TRD Widebody - 509.6BHP!
Moderators: IMOC Moderators, IMOC Committee Members
Re: TRD Widebody - 509.6BHP!
engine looks tidy jim,would benefit from 4wd tho 
 .i tell you what,i will do a straight swap,yours for mine and take a chance
Re: TRD Widebody - 509.6BHP!
As long as I get custom driveshafts, propshaft and transfer box thrown in
Re: TRD Widebody - 509.6BHP!
New mocal oil cooler and associated bits going in.
More updates soon
-
TBDevelopments
Re: TRD Widebody - 509.6BHP!
fair play mate, love the colour of the car.
Making me wish i went that way instead of red on my widebody
Tim
xxxx
Making me wish i went that way instead of red on my widebody
Tim
xxxx
-
The Morris
- Posts: 1870
- Joined: Wed Dec 15, 2004 3:27 pm
- Location: Uckfield
Re: TRD Widebody - 509.6BHP!
impressive 
Re: TRD Widebody - 509.6BHP!
xxxx wrote:Making me wish i went that way instead of red on my widebody
Tim
xxxx
C'mon Tim, you know Red's the fastest colour mate.
Sable Grey 2004 MkIII Roadster
Once an MR2 owner, ALWAYS an MR2 owner!
Once an MR2 owner, ALWAYS an MR2 owner!
-
TBDevelopments
Re: TRD Widebody - 509.6BHP!
pmsl,
yeah i know what you mean. Well it'll be a long time before mine finished
Tim
xxxx
yeah i know what you mean.
Tim
xxxx
-
splashnatz
- Posts: 2068
- Joined: Thu Feb 24, 2005 12:23 pm
- Location: LEEDS
Re: TRD Widebody - 509.6BHP!
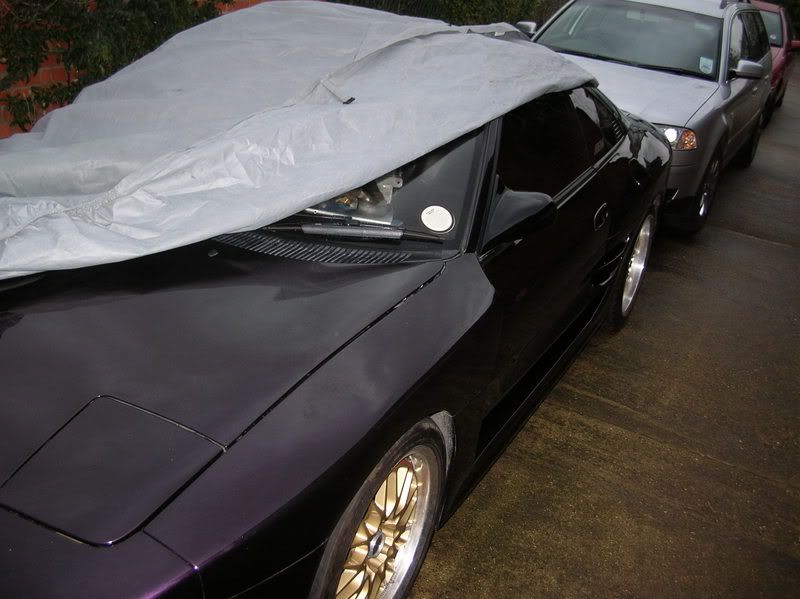
i think this is the nicest widebody i've seen. does it still have the little GT mirrors on there ?
Re: TRD Widebody - 509.6BHP!
Cheers Splashnutz, you mean these ones?
No unfotunately they were just too small for me. Went for Bomex in black. Not sure whether to paint purple or not?
James
No unfotunately they were just too small for me.
James
Last edited by Jimbob on Sun Jan 28, 2007 12:35 pm, edited 1 time in total.
Re: TRD Widebody - 509.6BHP!
Jim, if you still have those small mirrors and fixings, I'd be interested in buying them.
Regards,
EarL.
Regards,
EarL.
Sable Grey 2004 MkIII Roadster
Once an MR2 owner, ALWAYS an MR2 owner!
Once an MR2 owner, ALWAYS an MR2 owner!
Re: TRD Widebody - 509.6BHP!
Hi Earl,
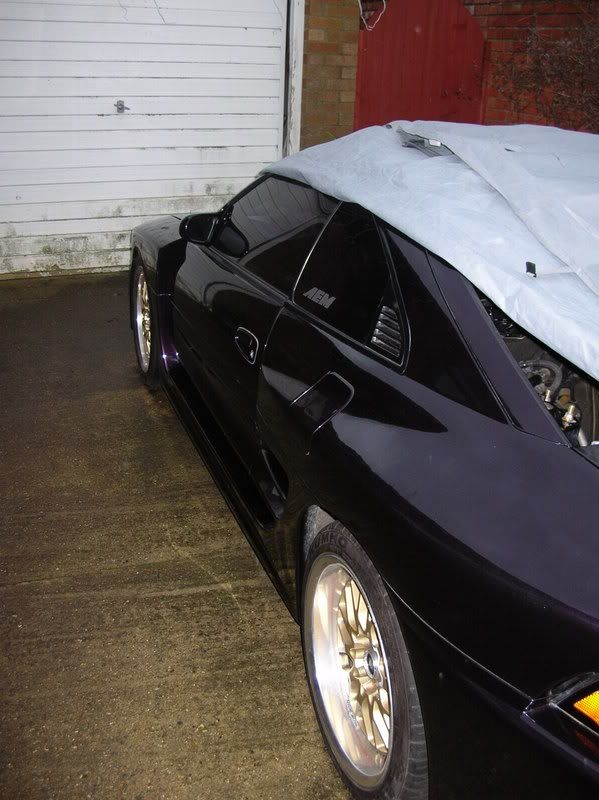
Still deciding if I like the bomex ones? I haven't had a chance to get the cover off and have a proper look at it from a distance. Got the GT ones, you can have first refusal mate.
James
Still deciding if I like the bomex ones? I haven't had a chance to get the cover off and have a proper look at it from a distance.
James
Re: TRD Widebody - 509.6BHP!
Ok, another update.
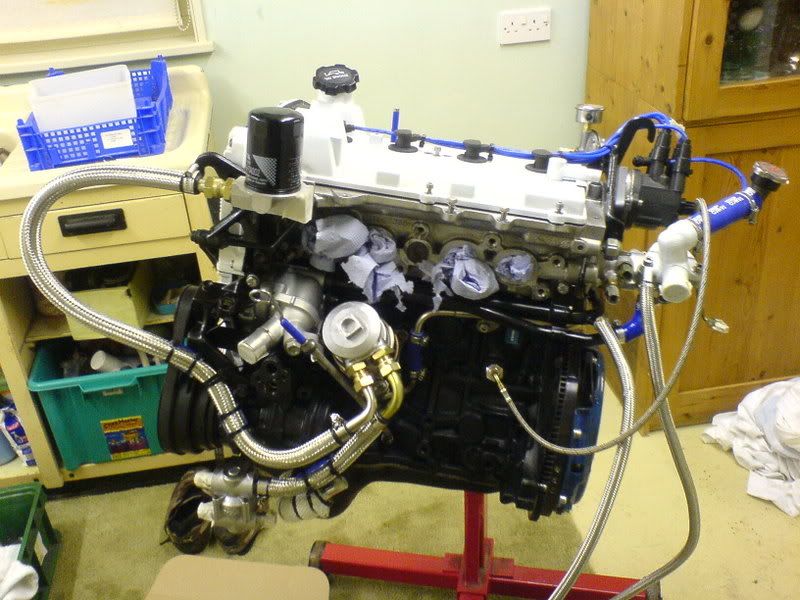
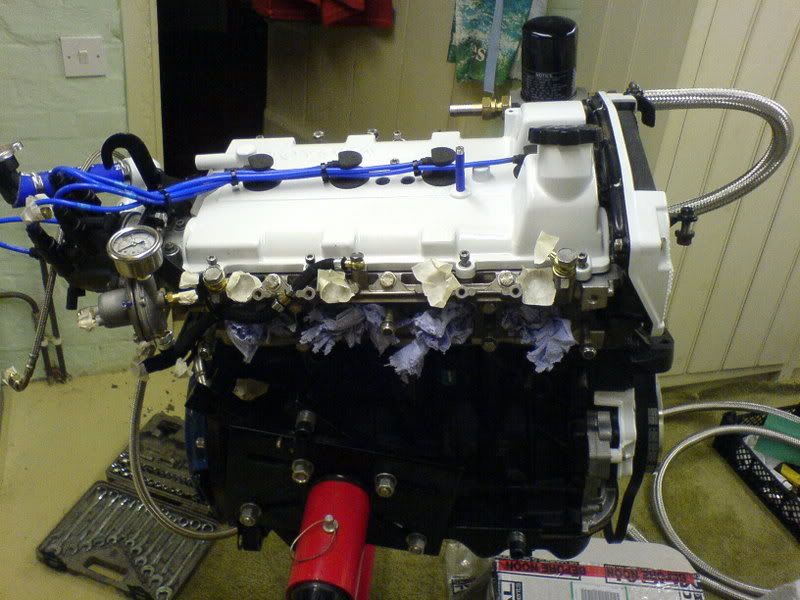
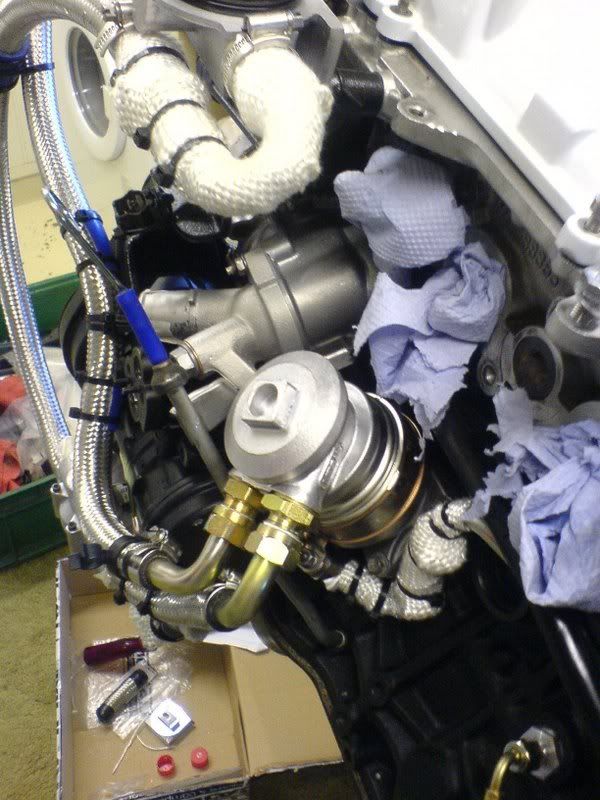
I have now fitted the oil lines from the block adapter to filter, to thermostat and back to the block adapter. Also added some heatwrap around the hose connecting the oil cooler water line and some near the remote filter to protect from manifold radiant heat.
This pic also shows off the air-con pump in black, the Fensport pulley and pulley covers.
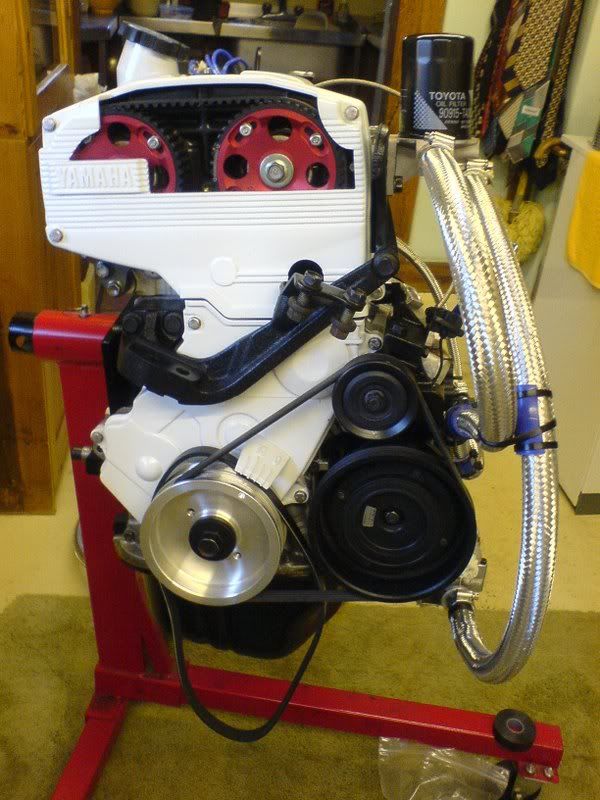
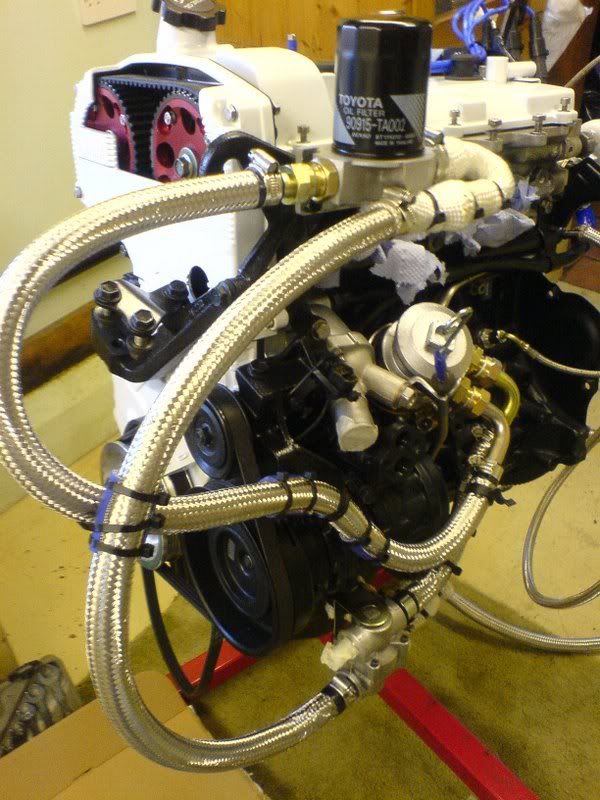
This one shows a bit better the mocal block adapter and wrapped hose
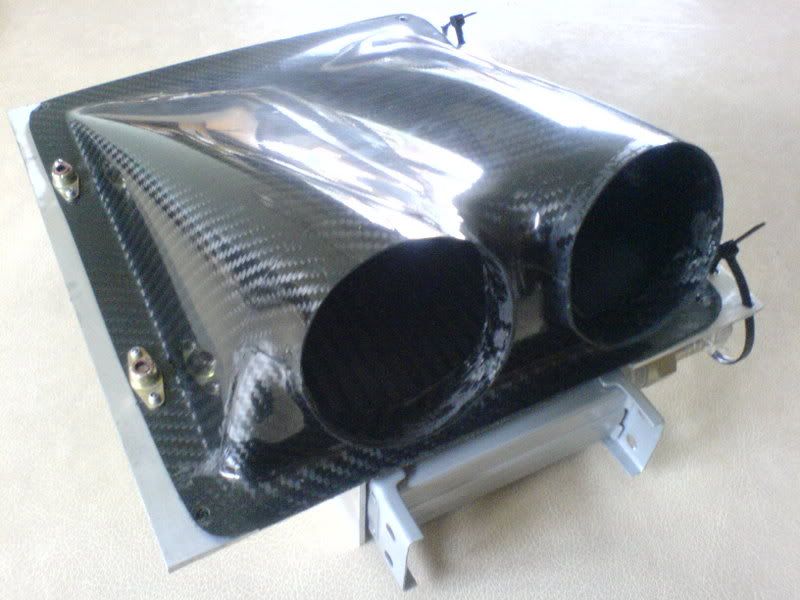
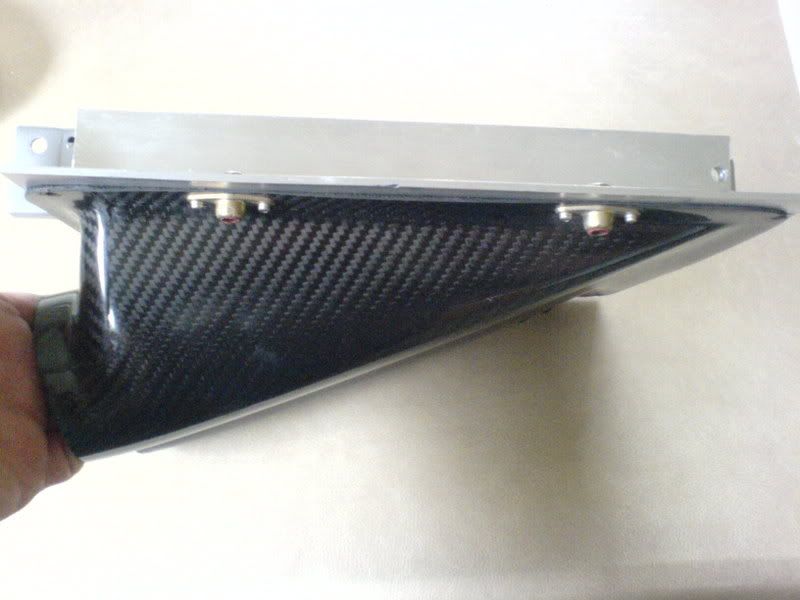
I've also been making a new duct for my oil cooler(mocal 16row). I made it using a carbon duct (2x3" inlets) with some aluminium side plates. The cooler is both bonded and bolted to the plates and the plates are bolted to the duct. My intention is to hang the cooler under either the sump or gearbox, space permitting. The cable ties at each end will be used to secure the hoses to the plates so that vibration doesn't break the oil cooler fittings.
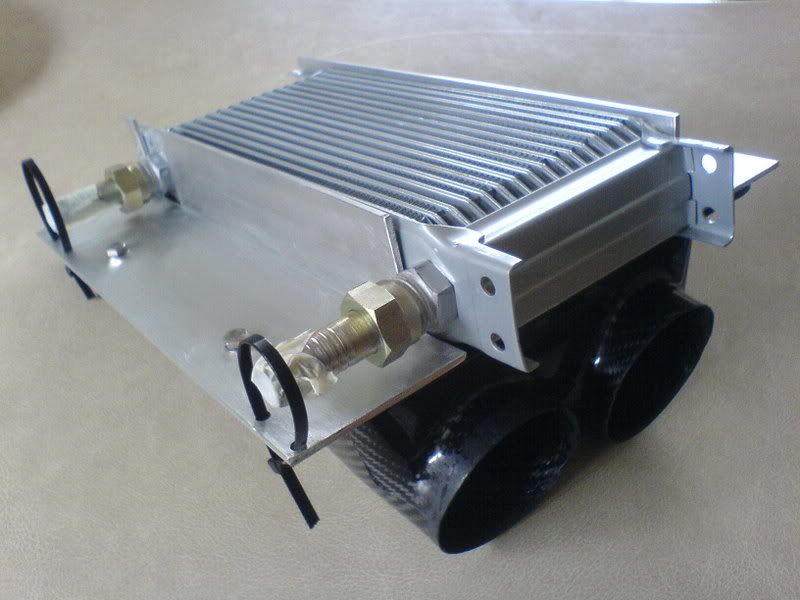
I have also come up with a nifty trick of cutting a piece of blue samco hose down one side and securing it using two cable ties. This acts as a nice soft anti friction pad for hoses etc. 14mm samco fits 5/8" ID hose perfectly 
More coming soon, next update will be bootmount pics
James
I have now fitted the oil lines from the block adapter to filter, to thermostat and back to the block adapter.
This pic also shows off the air-con pump in black, the Fensport pulley and pulley covers.
This one shows a bit better the mocal block adapter and wrapped hose
I've also been making a new duct for my oil cooler
I have also come up with a nifty trick of cutting a piece of blue samco hose down one side and securing it using two cable ties.
More coming soon, next update will be bootmount pics
James
Re: TRD Widebody - 509.6BHP!
Where as before there were a few Mr2s over 400hp it seems that goal posts are constantly being moved also loving them rims jim
Re: TRD Widebody - 509.6BHP!
Boot Mount update
Spent the day today doing my oil cooler and boot mount. Cut a hole in my boot the same size as the intercooler core. Then sealed all exposed metal using satin black smooth Hammerite. When the paint was tacky I slid over the finishing strips shown to give it a nice neat edge and them something to stick to.
The first stage of the boot mount structure was then fitted. I used a few rivets at strategic locations to hold the section to the boot floor whilst the sealant set. I used a whole tube of this stikcy stuff and yes it does exactly what it says on the tin! The whole lot is now being left to dry ready for stage 2.
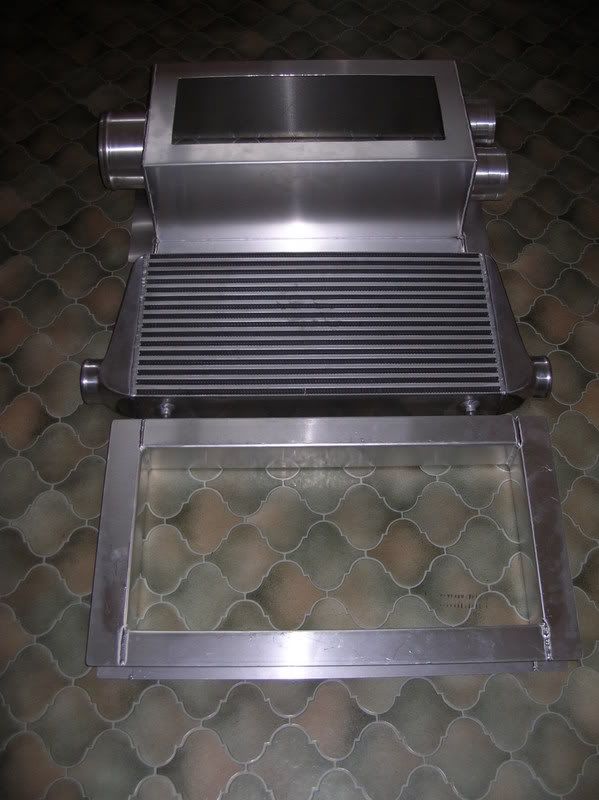
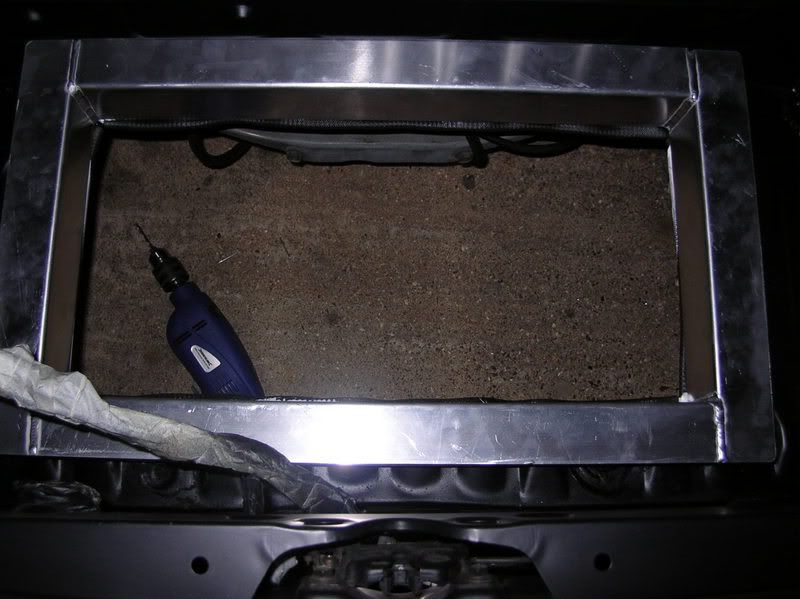
Component parts of the boot mount, the bottom layer is bonded to the boot floor the IC sits on top and is sandwiched by the top half.
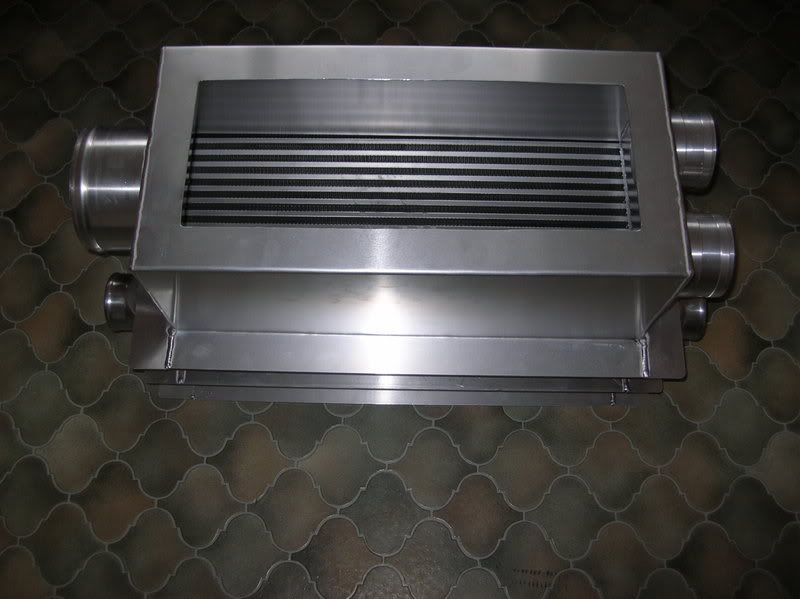
Component parts arranged in order. A perspex cover will be fitted on top to allow viewing of the intercooler but seal air in.
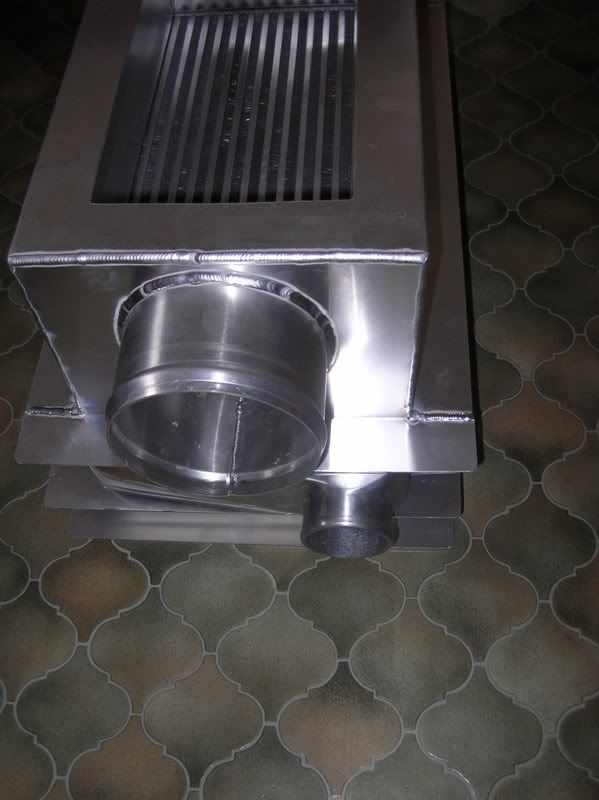
Large air inlet at one end.
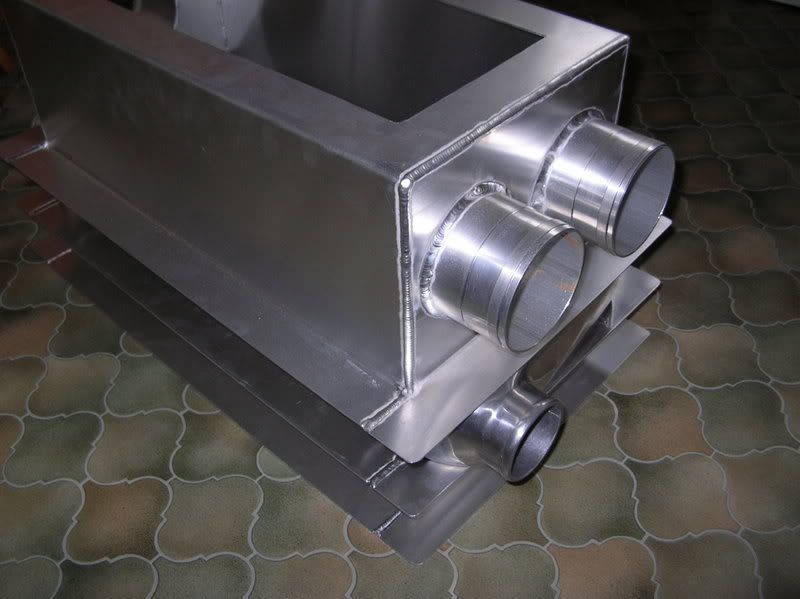
Two smaller inlets.
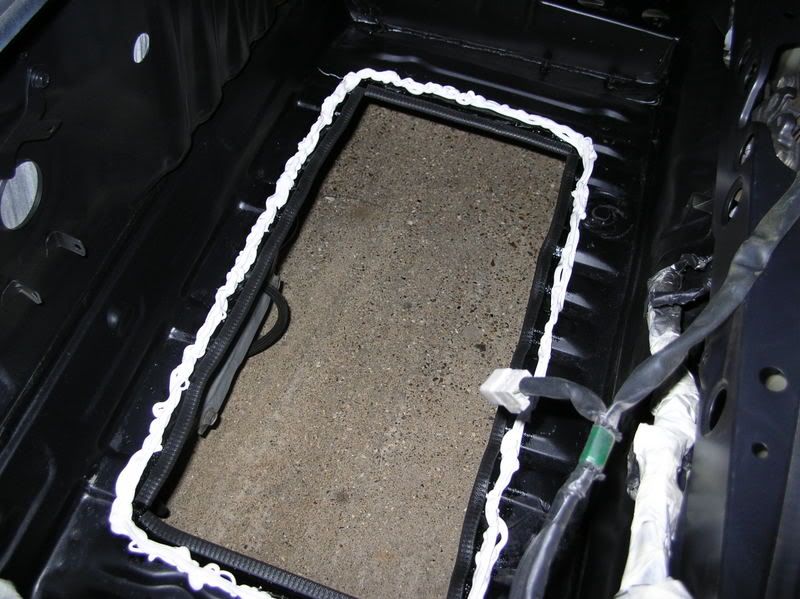
One tube of sealant later and the edging strip is fitted, next step is to carefully lay the first stage on top. Boot has been sprayed Satin Black.
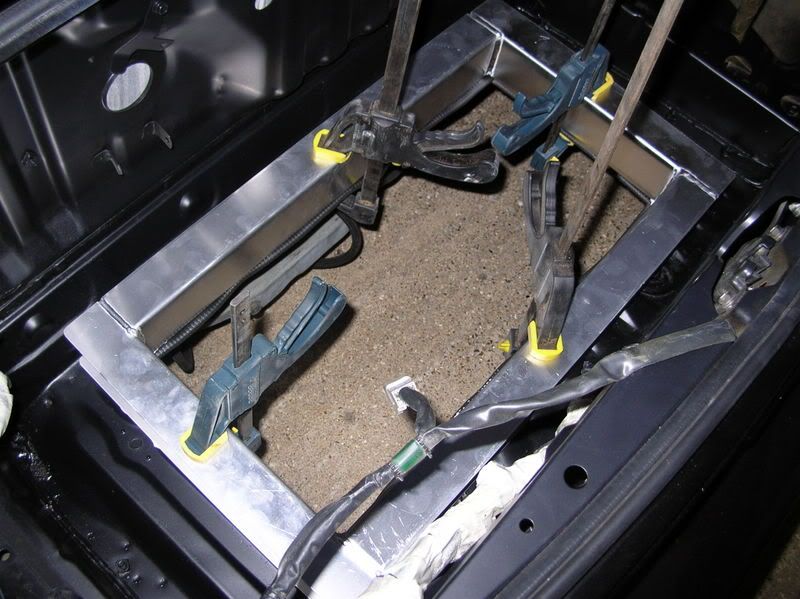
Clamp in place and then add rivets to secure in place for drying.
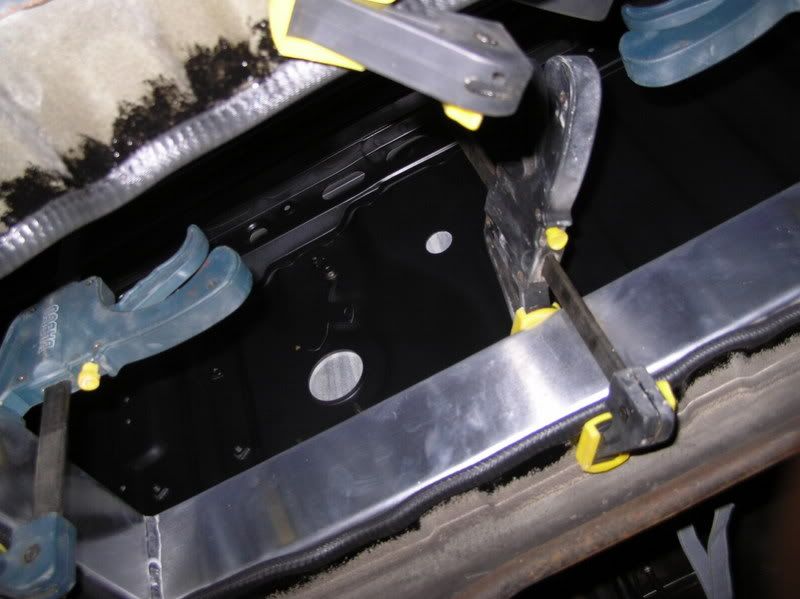
View from underneath, just need to finish the rest of the underneath of the boot in the same paint.
View fitted in boot after rivets fitted. This is extremely rigid.

Yep
Keep your eyes peeled for further updates this week.
James
Spent the day today doing my oil cooler and boot mount.
The first stage of the boot mount structure was then fitted.
Component parts of the boot mount, the bottom layer is bonded to the boot floor the IC sits on top and is sandwiched by the top half.
Component parts arranged in order.
Large air inlet at one end.
Two smaller inlets.
One tube of sealant later and the edging strip is fitted, next step is to carefully lay the first stage on top.
Clamp in place and then add rivets to secure in place for drying.
View from underneath, just need to finish the rest of the underneath of the boot in the same paint.
View fitted in boot after rivets fitted.
Yep
Keep your eyes peeled for further updates this week.
James
-
TBDevelopments
Re: TRD Widebody - 509.6BHP!
looks good buddy. the best boot mount install i've seen so far  good effort
Tim
xxxx
Tim
xxxx
-
mikewright
- Posts: 249
- Joined: Tue Dec 14, 2004 1:24 pm
- Location: chelmsford
Re: TRD Widebody - 509.6BHP!
Nice work Jim!
Re: TRD Widebody - 509.6BHP!
WASH YOUR HANDS YOU GRUBBY bu88er
Re: TRD Widebody - 509.6BHP!
jonst205 wrote:WASH YOUR HANDS YOU GRUBBY bu88er
PMSL
Cheers on the first refusal Jim.
EarL.
Sable Grey 2004 MkIII Roadster
Once an MR2 owner, ALWAYS an MR2 owner!
Once an MR2 owner, ALWAYS an MR2 owner!
Re: TRD Widebody - 509.6BHP!
Thanks guys, i'm trying my best to keep it tidy, i'm not all that good with my hands, things tend to go wrong. I know what I want to do, but it never seems to turn out quite right!
My hands are cleaner than yours normally are when ur on your cars! Cheeky Bu88er!
The short nights mean its dark when I get home so not much time for doing stuff, will hopefully have time to install the remainder of the boot mount parts on Sunday though. Got a few pumps to go in there too.
James
My hands are cleaner than yours normally are when ur on your cars! Cheeky Bu88er!
The short nights mean its dark when I get home so not much time for doing stuff, will hopefully have time to install the remainder of the boot mount parts on Sunday though.
James
-
The Morris
- Posts: 1870
- Joined: Wed Dec 15, 2004 3:27 pm
- Location: Uckfield
Re: TRD Widebody - 509.6BHP!
Quality job, very impressed with all the detailling