FAO Widearch people, what have you done to your originals?

Discussion and technical advice for 84-89 AW10 & AW11 MR2. 3A-LU, 4A-GE, 4A-GZE.

Moderators: IMOC Moderators, IMOC Committee Members

AdamP
Posts: 141
Joined: Fri Feb 04, 2011 11:03 am
Location: Newbury / Bath

Re: FAO Widearch people, what have you done to your originals?

Post by AdamP »

PW@Woodsport wrote:There's nothing mechanically wrong with using spacers from an engineering point of view, Mr2 Ferrari replicas use an 8" rear spacer and a 6" front spacer without any safety issues, sort of puts the 20-30mm spacers normal folk use into perspective. I'll grab a pic of them tomorrow if you like so you can chuckle at the width of them.

I have used up to a 30mm spacer on Mk1's for many years to fill arches out with no problems at all.


I really hope that no one uses 6 or 8 inch spacers :O :O :O that is VERY wrong from an engineering point of view!
PW@Woodsport
Posts: 7642
Joined: Tue Dec 14, 2004 6:40 pm
Location: durham
Contact:

Re: FAO Widearch people, what have you done to your originals?

Post by PW@Woodsport »

All of the Ferrari replicas have 8" spacers, I kid you not, but they never seem to suffer any wheel bearing failures, testament to the Toyota bearing I suppose.
Image
Neil_turbo
Posts: 2878
Joined: Tue Aug 23, 2005 4:27 pm
Location: Congleton
Contact:

Re: FAO Widearch people, what have you done to your originals?

Post by Neil_turbo »

i have finally got round to this, it has admittadly been put off as it is one of those where once you have started there really is no going back!

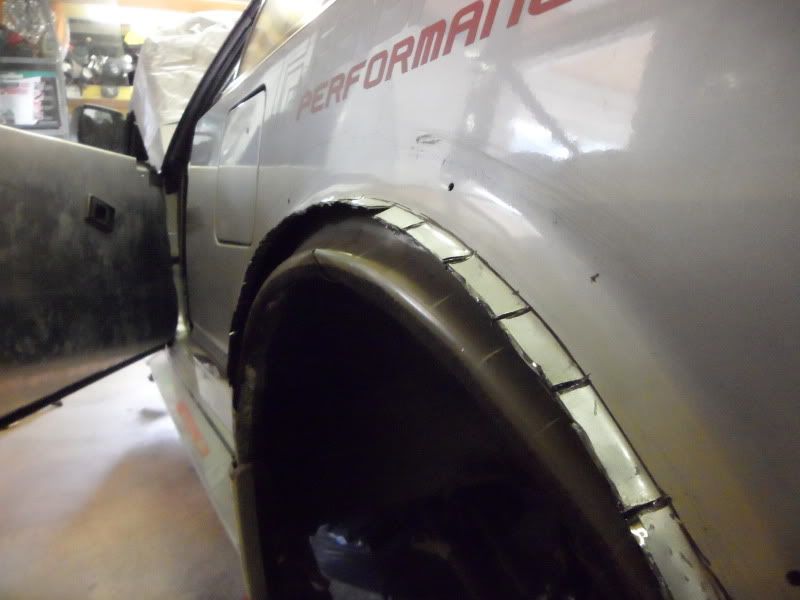
To recap the issue was as the wheels are wider they were sitting right under the original arch, leaving no travel at all! This is where the arch needed to be...

Image

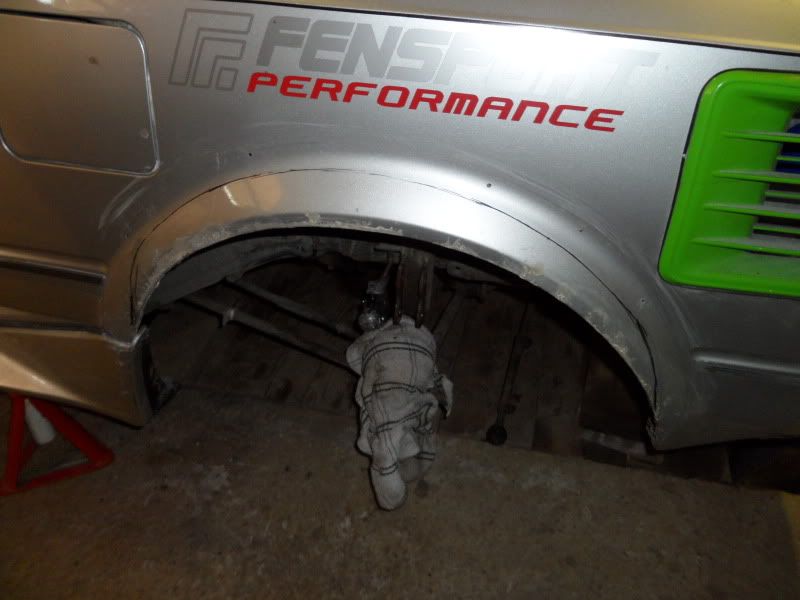
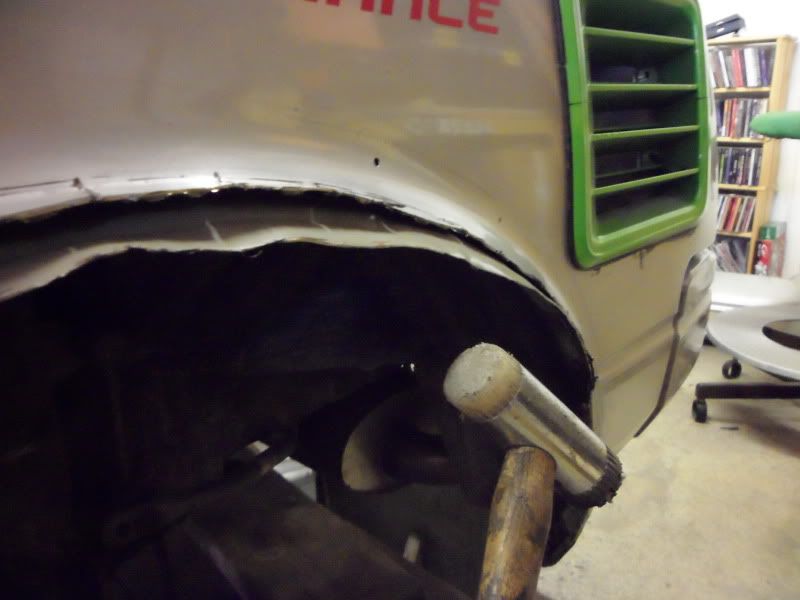
I didnt know whether the arches were orginal or not, and how they would be attached to the inner arch, so i made a small cut so i could see what i was working with...
(turns out they were the originals, so to be fair in good condition for the age!)

Image

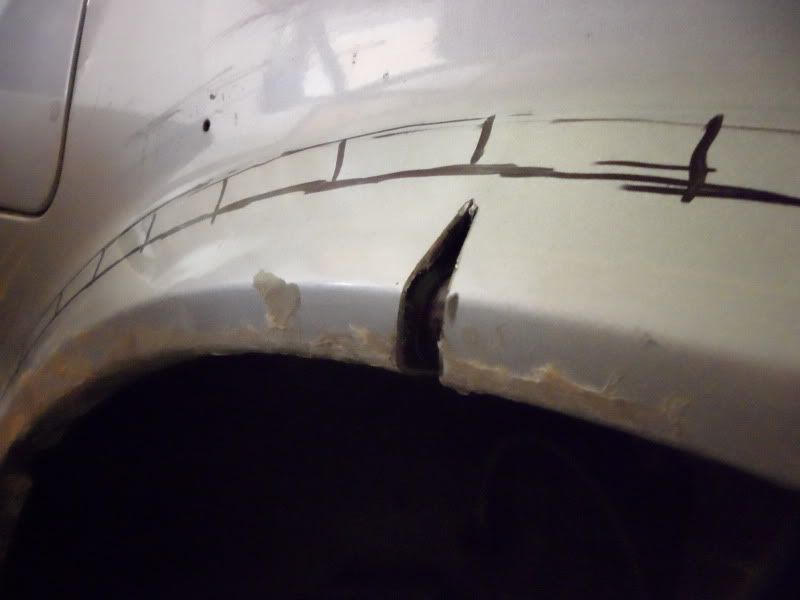
After this i started cutting, trying to avoid the inner arch as this could then be bought up to meet the raised original, and peeled it away

Image

Image

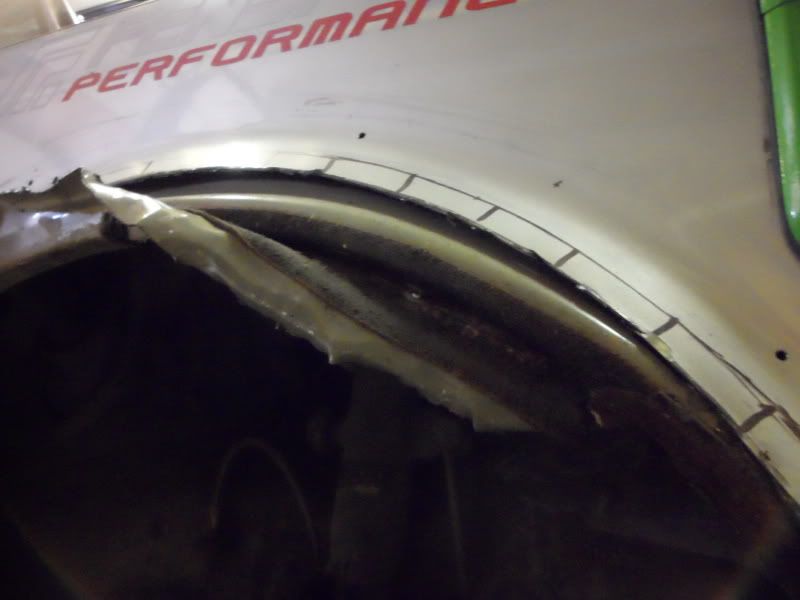
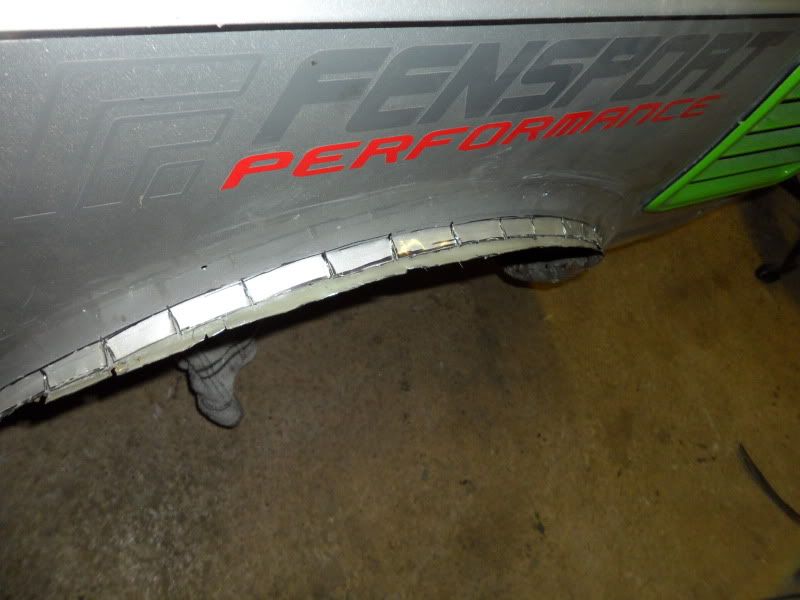
Again making sure not to cut the inner, i cut the slits into the original and bent the tabs out. 
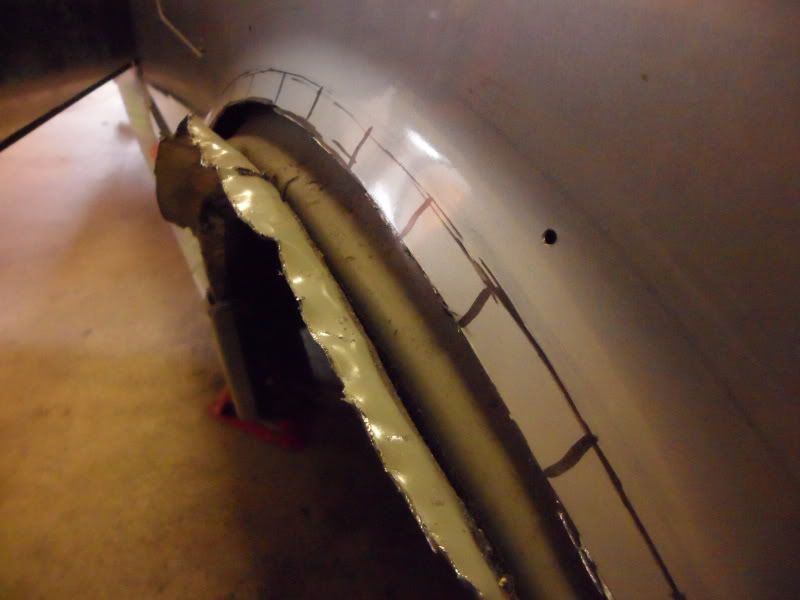
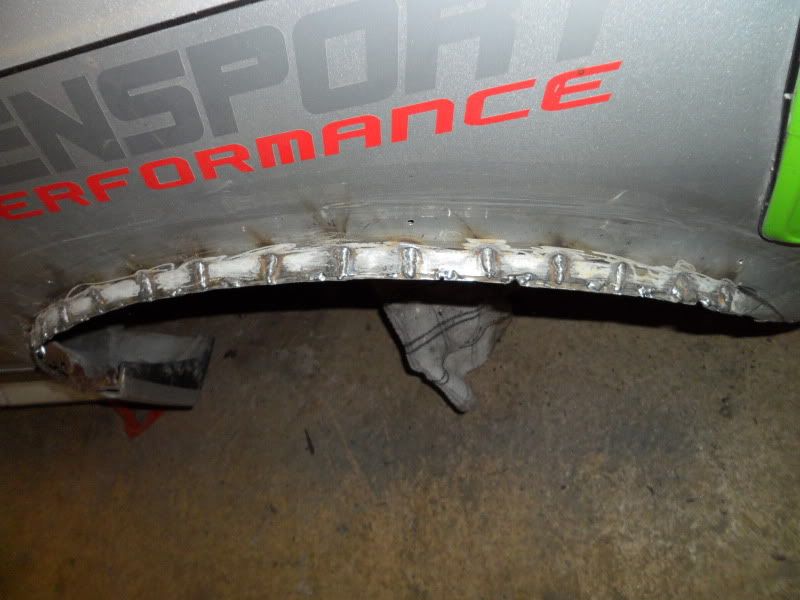
Once it was free from the inner arch the outer was sooo wobbly, so essenial the two were rejoined.

Image

I then "encouraged" the inner arch up, this took quite a bit of effort! (Second time round i removed the paint for welding first)

Image

Image

The cuts were then seem welded up, penetrating throughto the inner arch underneath.

Image

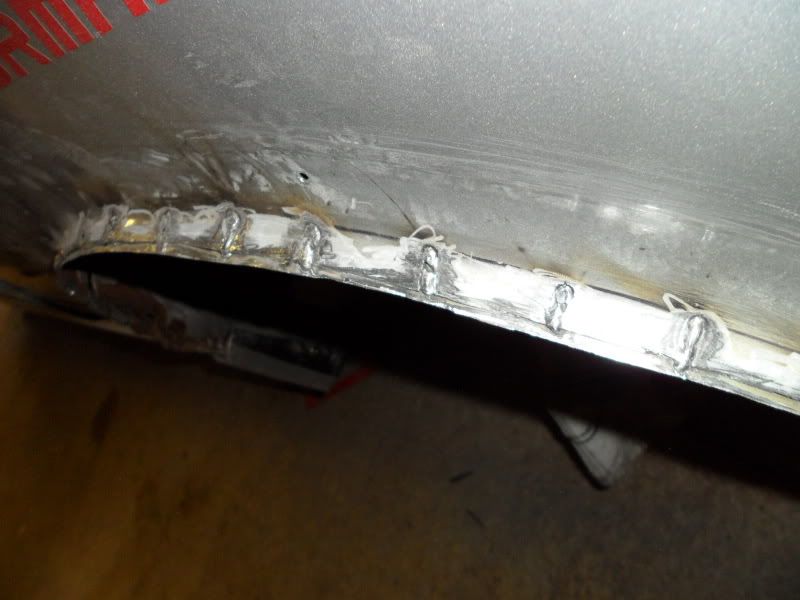
This was then tidies up and a few more spot welds added to the edges to ensure everything was joined..

Image

In all i have gained just over 2" of wheel travel which should suffice! The new flared arches look much better without the original sat behind them, will put a few more pictures up once the hubs are back on and wheels attached
Post Reply

Return to “MR2 MK1 1984-1989 NA & SC”