NA to Turbo Conversion, Write Up & Points to Consider.
Description:
Categories: MR2 Mk2 Articles -> Engine
Link to this article: Select all
[url=https://www.imoc.co.uk/app.php/kb/viewarticle?a=16]Knowledge Base - NA to Turbo Conversion, Write Up & Points to Consider.[/url]
I wrote this a while back, It maybe of use to someone on here, I'm always happy to help anyone with a similar conversion, just pm/call me:
This Conversion was carried out in the Autumn of
I am not a mechanic, and had not attempted anything like this before.
More Power! I’m lucky enough that my MR2 is not my daily driver, I could live with the extra fuel/insurance costs etc, on a limited mileage policy.
I could have sold and rebought but I’ve done so much to my car, it had such a low mileage, and was in such a good condition.
Then I spotted the advert….

The written off, Rev 3 Turbo hardtop, was roughly the same age as my Rev 3 G-Ltd and had extensive panel damage all round.
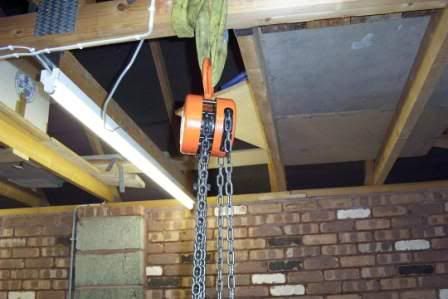
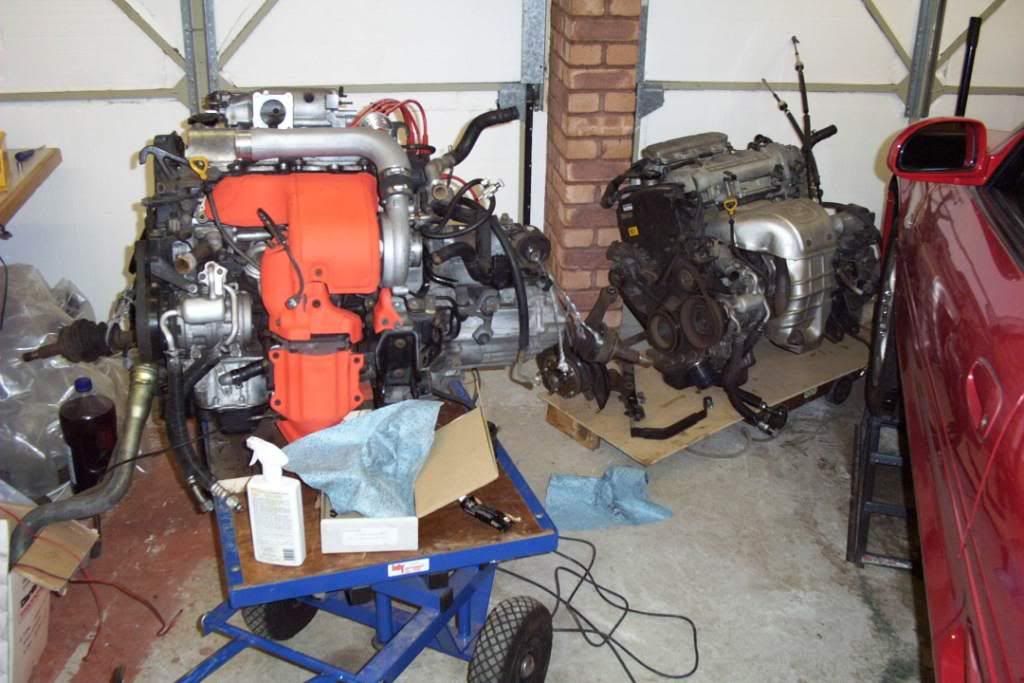
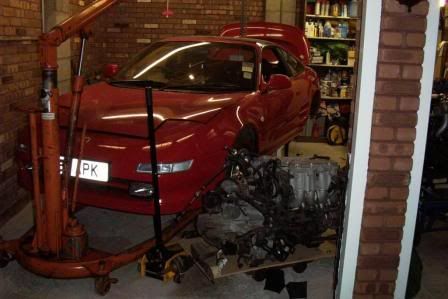
The Conversion was done in my garage at home, I used normal home garage tools, socket sets etc, I already had a torque wrench and the only tool I needed to buy was a chain hoist from Machine Mart to use to lift the engines/body shell.
I made an engine dolly with a strong rectangular piece of wood with heavy duty castors bolted to the bottom of it.
The Plan was to swap over the whole
What made the whole job so much easier was that it was completely
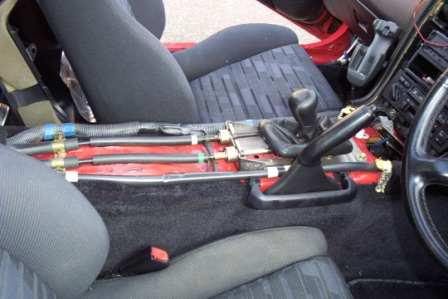
This was because the loom from the relay block in the passenger footwell back on the NA was exactly the same as that from the turbo, bar 1 pin, the turbo pressure gauge, and the same pin postion on the NA cars loom was unused, thus the turbo loom simply plugged into the car at this position.
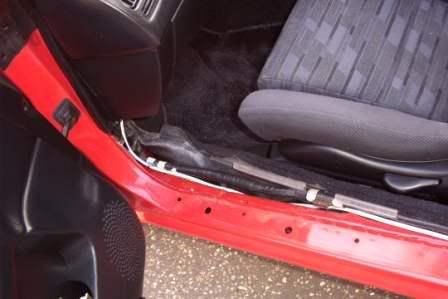
This was applicable on my car, may/will not be the same on all cars/all revisions.
Even so, if you can obtain the loom from a donor car from this point, it makes a easy comparison point to make any wiring changes.
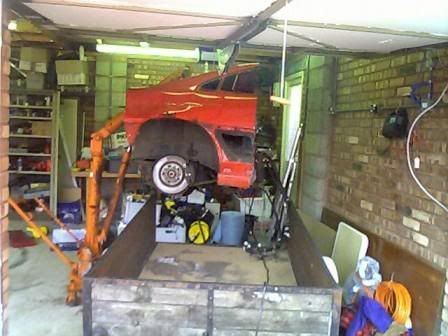
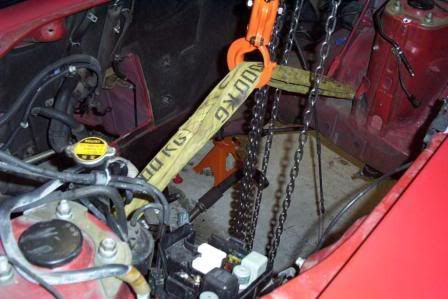
Car was positioned diagonally in the double garage with the main double beam, where I was going to support the chain hoist from, over the engine bay.
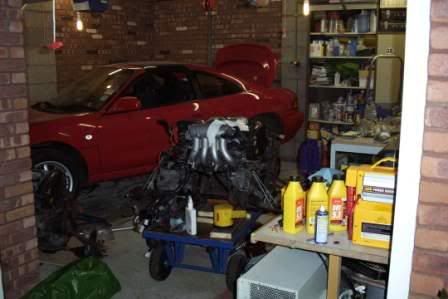
Battery, engine lid, engine side panels, exhaust, ecu, air filter piping, all removed, I bought some resealable bags with labels for all the nuts/bolts/parts that came off, labelling for refitting as they came off.
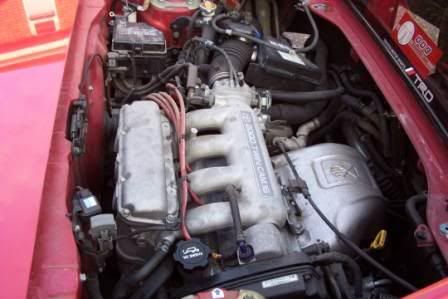
I drained the coolant then I just went around the engine, unplugging all the connectors, pipes, fuel lines, unbolting earth wires, fuse box, starter cable, anything that attached the
The car was then jacked up onto 2 ramps at the front, with axle stands on the sills supporting the rear of the car, any further more connections to the
The lump was now sitting in the chassis with the only connections to it being the left and right engine mounts.
Two engine mounting bolts were now used with a sling, to raise the rear of the car to clear the top of the old engine, old engine lump was then wheeled away!
Now the engine was out, it was so easy to drop the fuel tank to replace the fuel pump.
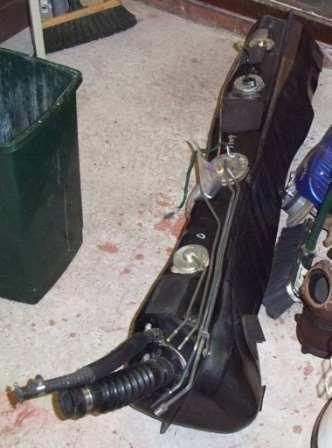
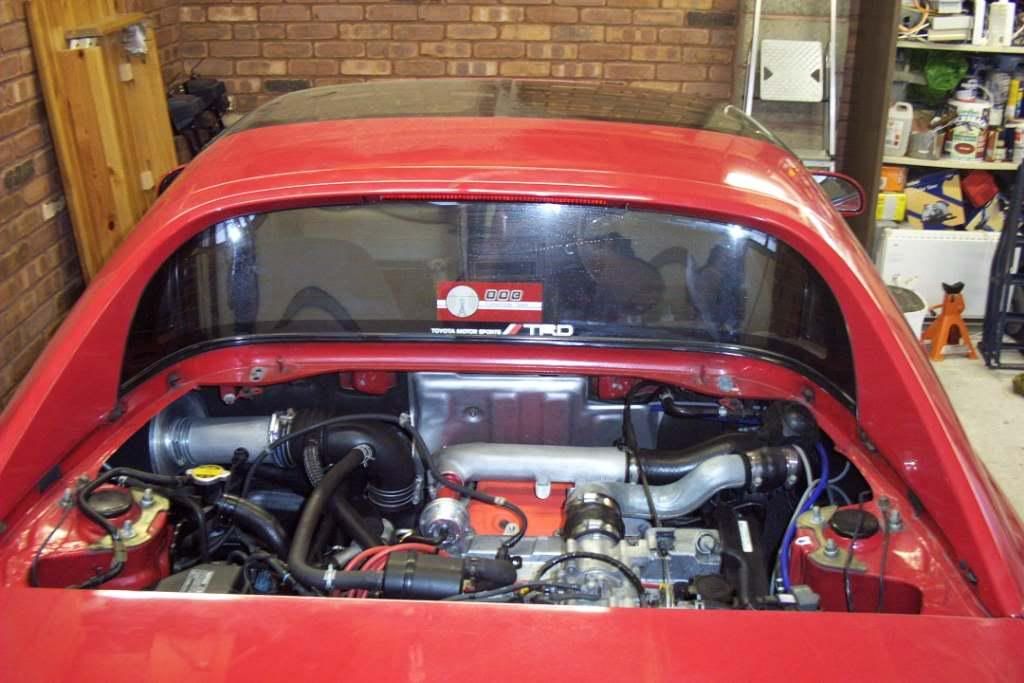
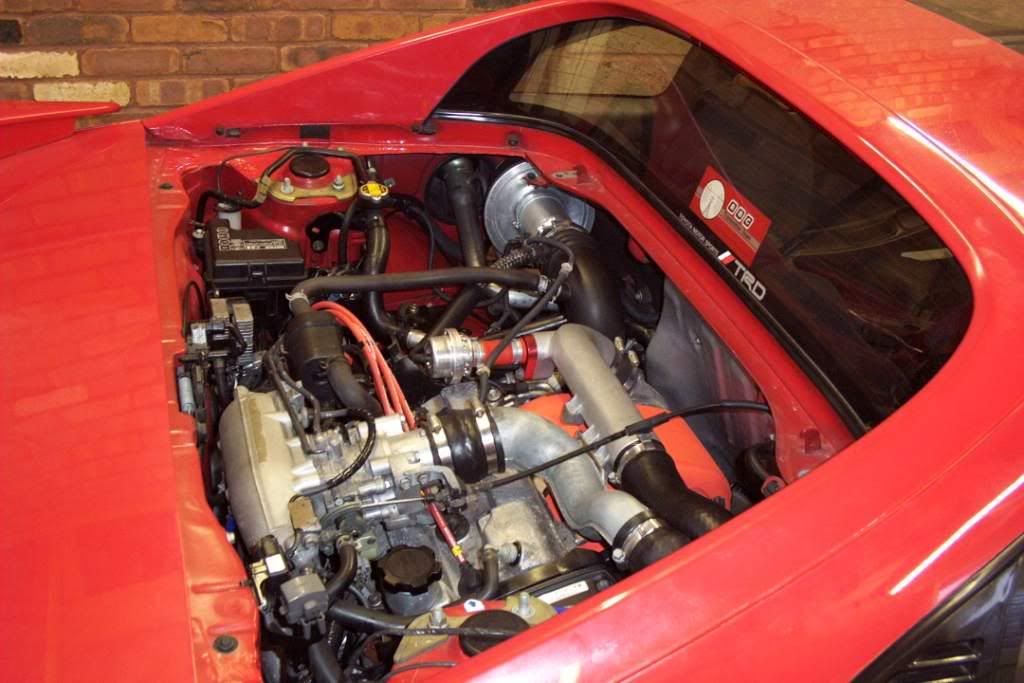
Then the old loom from the passenger footwell back wasthen completely removed, this came through from the car interior, into the engine bay and then out into the boot, the same item from the turbo was then installed once the engine bay had been cleaned, and the intercooler installed.
Now was a good time to fit any new pipes
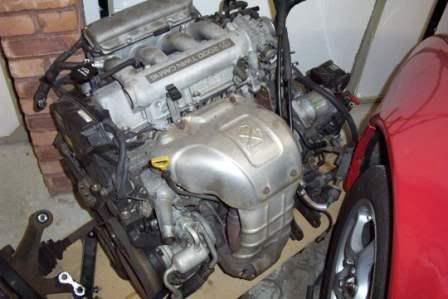
The donor engine lump was lowered onto the floor from its old rear cut chassis once all connections from itself to the engine bays walls had been disconnected, intercooler and loom removed, what was left of the old chassis lifted off by hand and disposed of.
The new engine lump was cleaned up, and given a full cambelt service, Inc all new ignition components.
The rear subframe and remaining engine mount were fitted, then it was just a case of refitting and reconnecting everything, re bolting up the suspension with the turbo hubs, fitting the exhaust, wheels, refilling with coolant, etc.
After all this, it was time to put some petrol in it and turn the key, well it was a bit of suspense, but when I turned it, it burst into life first time and away it purred.
The first run revealed it was boosting exactly stock at 14.5 psi,
Parts needed for a Turbo Conversion:
Engine and all ancillaries, turbo+induction piping, intercooler+fan, ecu
Gearbox and driveshafts+Hubs,
Turbo exhaust.
Turbo Fuel pump.
If possible but not essential, the car loom from passenger footwell back and Toyota service manuals for 3SGE, 3SGTE, and SW20 Body.
So don’t think a 3SGTE upgrade in out of the question, all you NA owners, It really is not that tough, or expensive!
If I was doing it a second time, I reckon a weekend would be plenty time as long as all the bits were to hand.
And the new engine, well I can't stop grinning when I plant that pedal