I'll get me coat lol
Project - Cosmos Eagle (New owner)
Moderators: IMOC Moderators, IMOC Committee Members
-
wilkie senior
- IMOC Moderator
- Posts: 2087
- Joined: Tue Feb 01, 2011 8:53 pm
- Location: Barnoldswick
Re: Project - Cosmos Eagle (New owner)
Dohhhh yep BM missed that one

I'll get me coat lol
I'll get me coat lol
-
Big_Martin
- Posts: 530
- Joined: Mon Apr 25, 2011 4:39 pm
- Location: Cheshire
Re: Project - Cosmos Eagle (New owner)
The only reason I knew it was there is because I often hit it when I mash the screen on my phone when trying to post a reply 
Re: Project - Cosmos Eagle (New owner)
Been a while since I've updated my project thread. Mainly because I've not done a great deal, just been running the poor thing everyday. Have to admit tho, not put a foot wrong, just keeps running 
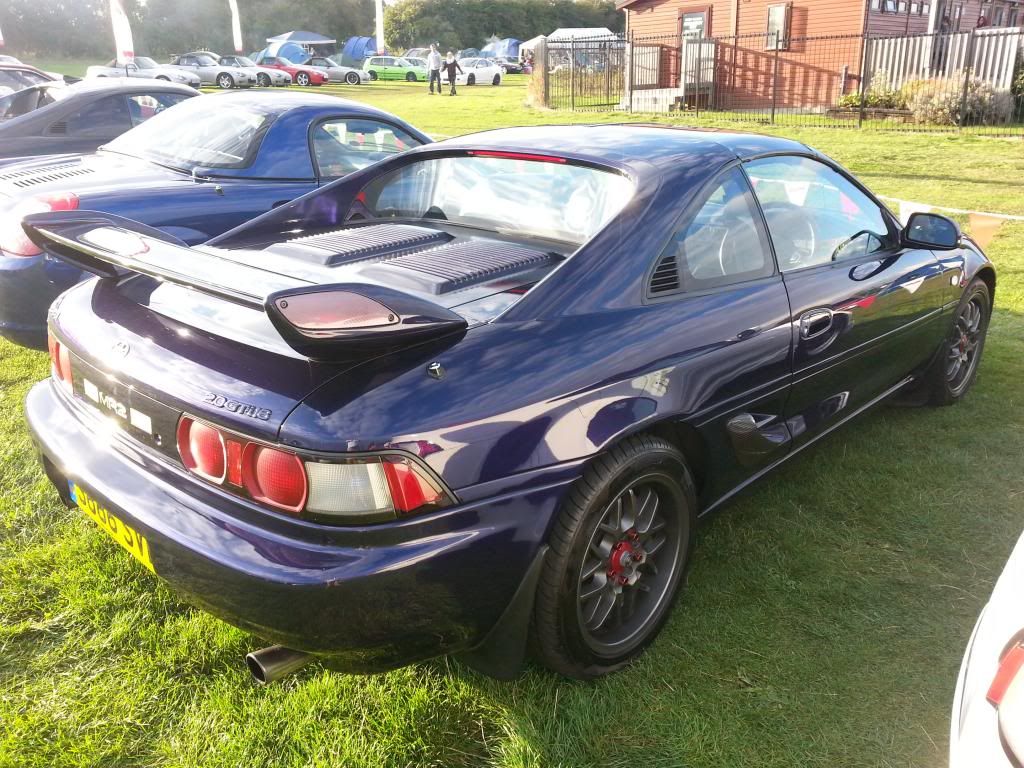
I have however since my last update resprayed the Sparco alloys as having a polished rim on a daily drive is just impossible to keep
Decided to go for full anthricite wheels with red centre rings and wheel nuts.
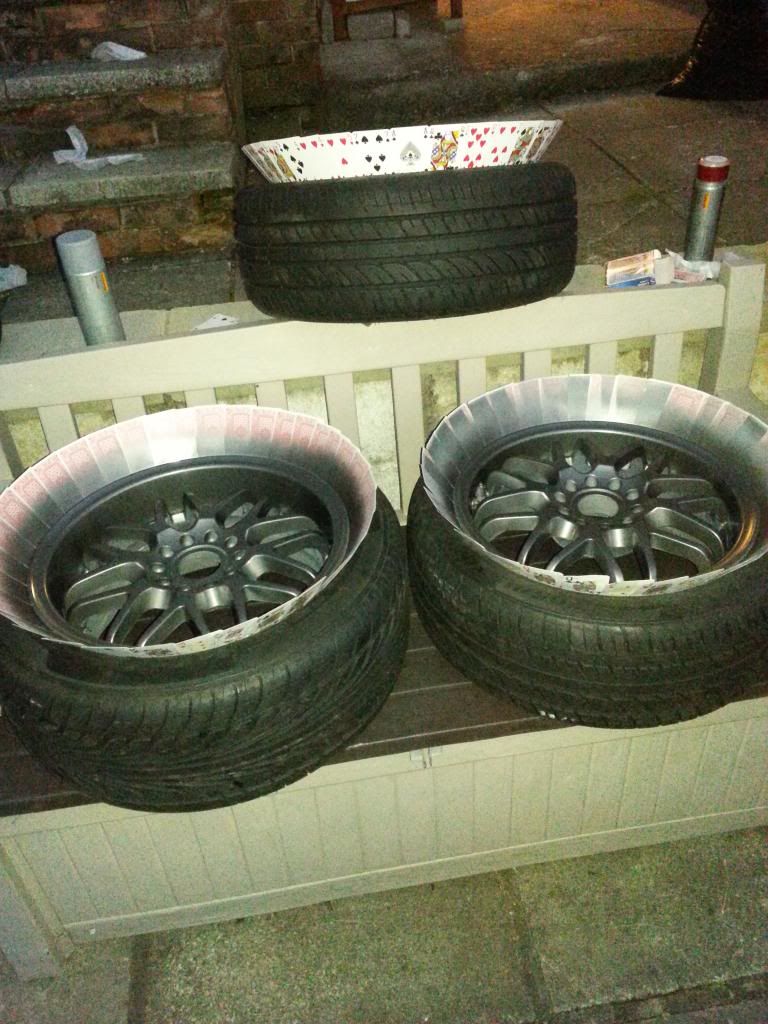
Use of the well approved playing card method
and after a good clean and the first time I've ever waxed a car, looked worthy enough I think to be on IMOC stand for JAE 2013(winner of best stand by the way  )
)
The weekend has inspired me to finish of the jobs I wanted to do over the last year, so I should get pleanty more updates in soon
I have however since my last update resprayed the Sparco alloys as having a polished rim on a daily drive is just impossible to keep
Decided to go for full anthricite wheels with red centre rings and wheel nuts.
Use of the well approved playing card method
and after a good clean and the first time I've ever waxed a car, looked worthy enough I think to be on IMOC stand for JAE 2013
The weekend has inspired me to finish of the jobs I wanted to do over the last year, so I should get pleanty more updates in soon

-
wilkie senior
- IMOC Moderator
- Posts: 2087
- Joined: Tue Feb 01, 2011 8:53 pm
- Location: Barnoldswick
Re: Project - Cosmos Eagle (New owner)
we did well with the wheels actually the week before, rather than the night before!!!! as previously

Hail Cosmos Eagle Rev 5, 1998
RIP White Eagle Rev 1, 1991
-
synXero
- Posts: 3781
- Joined: Fri May 28, 2010 12:04 pm
- Location: London, Edinburgh, or the Highlands!
Re: Project - Cosmos Eagle (New owner)
Oooh! Surprising, but she looks good with the red accents. Goes well with the lights.
Re: Project - Cosmos Eagle (New owner)
Forgot two little mods I have done actually:
My gear gaiter was starting to split and look tatty so replaced it and added one for the handbrake with red stitching
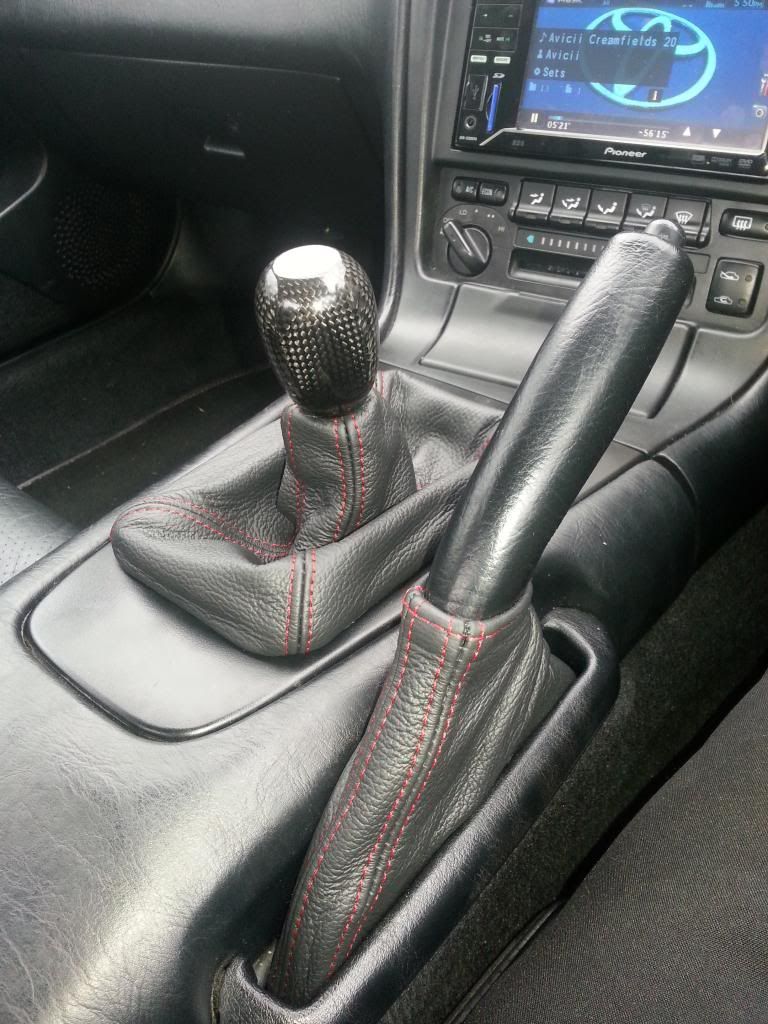
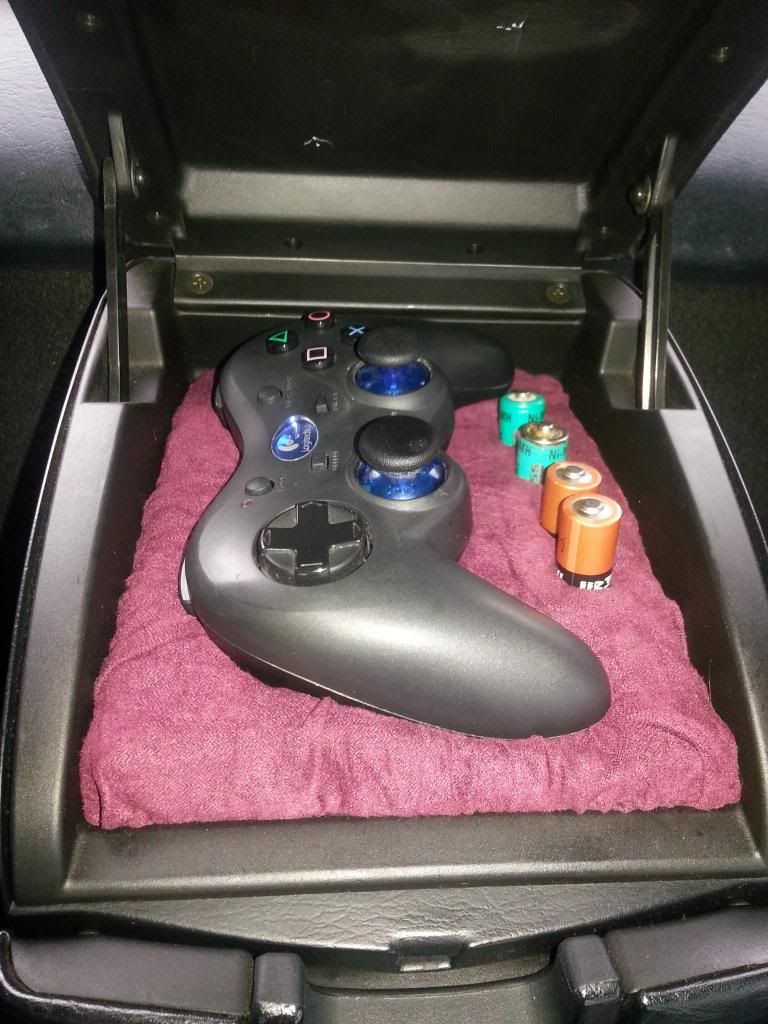
and I made a little seat for a wireless PS2 controller and slots for spare batteries
My gear gaiter was starting to split and look tatty so replaced it and added one for the handbrake with red stitching
and I made a little seat for a wireless PS2 controller and slots for spare batteries
Re: Project - Cosmos Eagle (New owner)
Finally got myself round to fitting my replacement leather trims for the cubby box lids
Good thing is with a couple of screws the thing comes out and can be done in the warmth and light of the indoors, making it a perfect throught the week task
Once you have it in bits(don't be affraid there are only 2 types of screws and it's obvious where theyt belong when you come to put it back together)
The leather rips of in one so can be saved
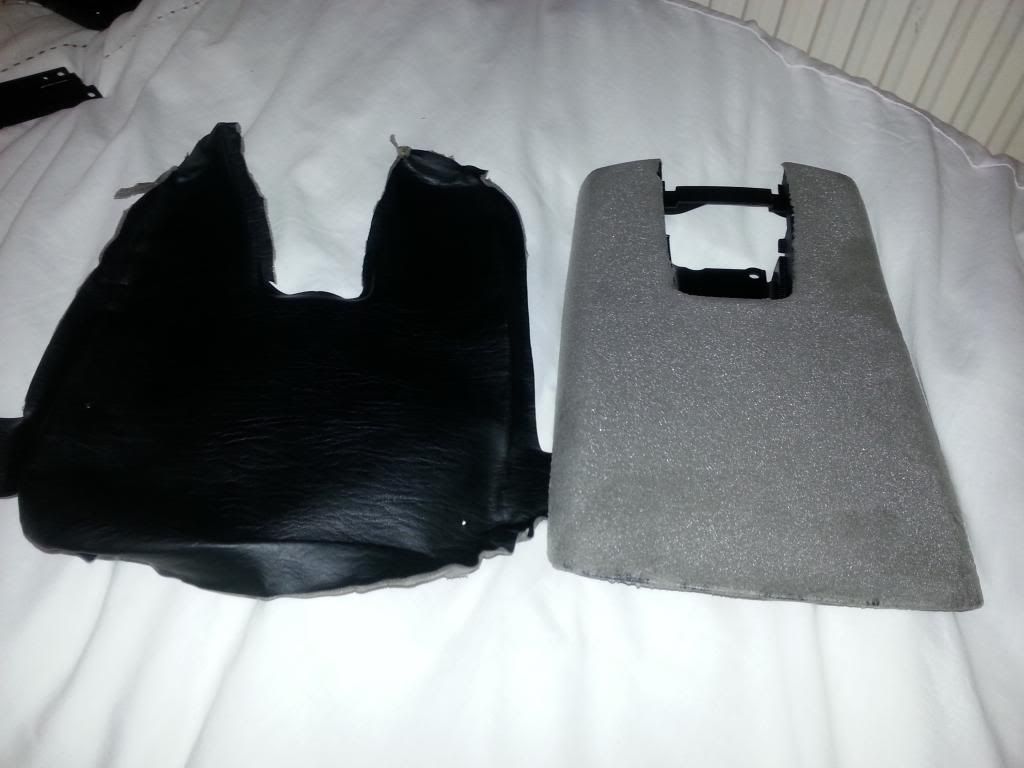
A layer of foam is left behind. I chose to leave it there, partly due to not wanting to deal with the mess I would of created but also in the hope it would make the leather a tighter fit.
After a trail fit with no glue I gave it death with contact adhesive and hoped for the best.
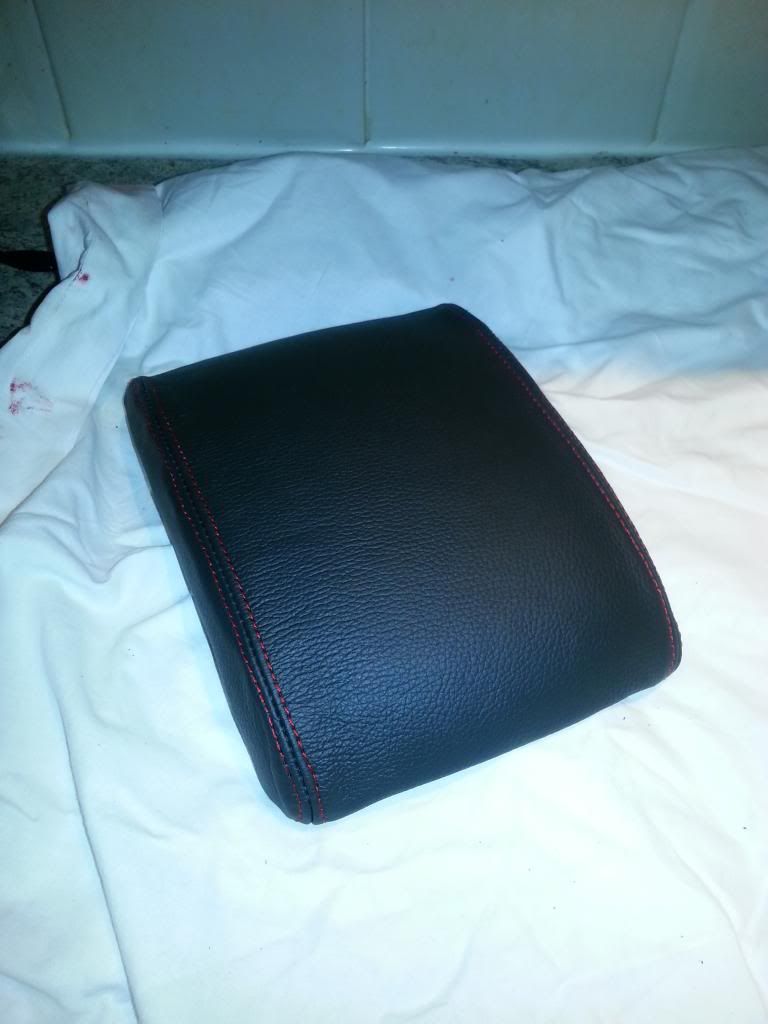
Luckily all went well with the top lid....So proceded to the next
10 minutes later, jobs a topper. 
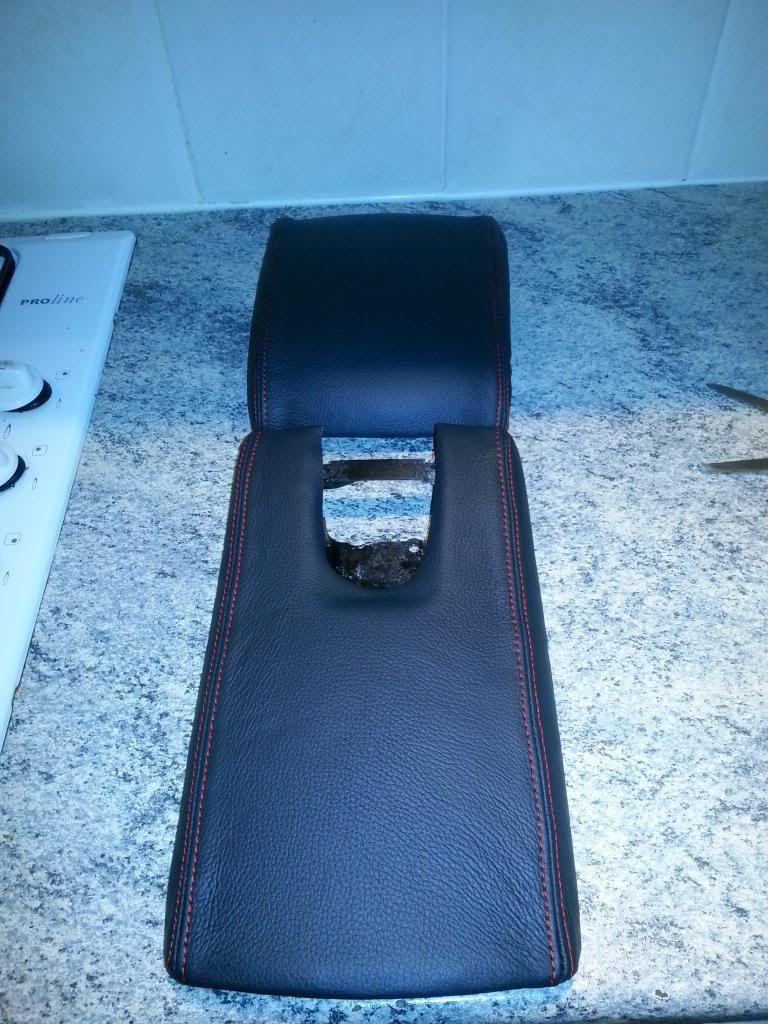
So after a quick re-assemble(hoping I'd not lost any screws)
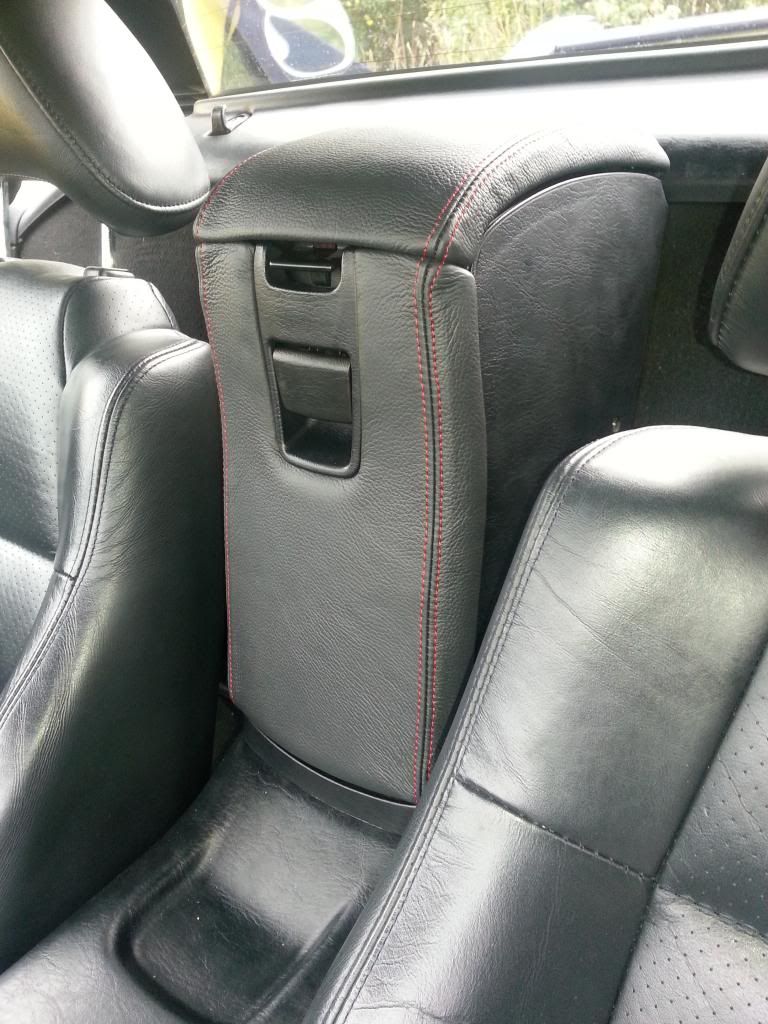
I like it alot, Just freshenss the interior up abit I think
Good thing is with a couple of screws the thing comes out and can be done in the warmth and light of the indoors, making it a perfect throught the week task
Once you have it in bits
The leather rips of in one so can be saved
A layer of foam is left behind.
After a trail fit with no glue I gave it death with contact adhesive and hoped for the best.
Luckily all went well with the top lid.
10 minutes later, jobs a topper.
So after a quick re-assemble
I like it alot, Just freshenss the interior up abit I think
-
Chumbaside
- Posts: 635
- Joined: Thu Dec 16, 2004 10:52 pm
- Location: Sutton Coldfield
Re: Project - Cosmos Eagle (New owner)
I like the leather cubby box lids. Look great with the gaiters.
Where did you purchase these?
Where did you purchase these?
Re: Project - Cosmos Eagle (New owner)
just on ebay. They do white and blue stitching aswell I think
this place:
http://stores.ebay.co.uk/TOP-GAITERS-BO ... 34.c0.m322
this place:
http://stores.ebay.co.uk/TOP-GAITERS-BO ... 34.c0.m322
-
wilkie senior
- IMOC Moderator
- Posts: 2087
- Joined: Tue Feb 01, 2011 8:53 pm
- Location: Barnoldswick
Re: Project - Cosmos Eagle (New owner)
my covers came off with the foam !! mind you mine had been on there for 21 years compared to your 15!! lol
might rip mine off and redo

might rip mine off and redo

Hail Cosmos Eagle Rev 5, 1998
RIP White Eagle Rev 1, 1991
Re: Project - Cosmos Eagle (New owner)
Well after a very wet winter of just purely running my car as a daily drive. Took the poor girl in for a leaky clutch slave cylinder, blowing exhaust and an MOT.
"ring-ring...ring-ring"
ME:"Hi Steve how my car getting on?"
GARAGE:"Oh hi Wilki, afraid I've got some bad news.........
ME:"Go on then.........
GARAGE: It's gunna need a fair bit of welding
ME:.......  ....... "Oh"
So me and Wiki Senior went over to take the seats and carpet out for the welding:
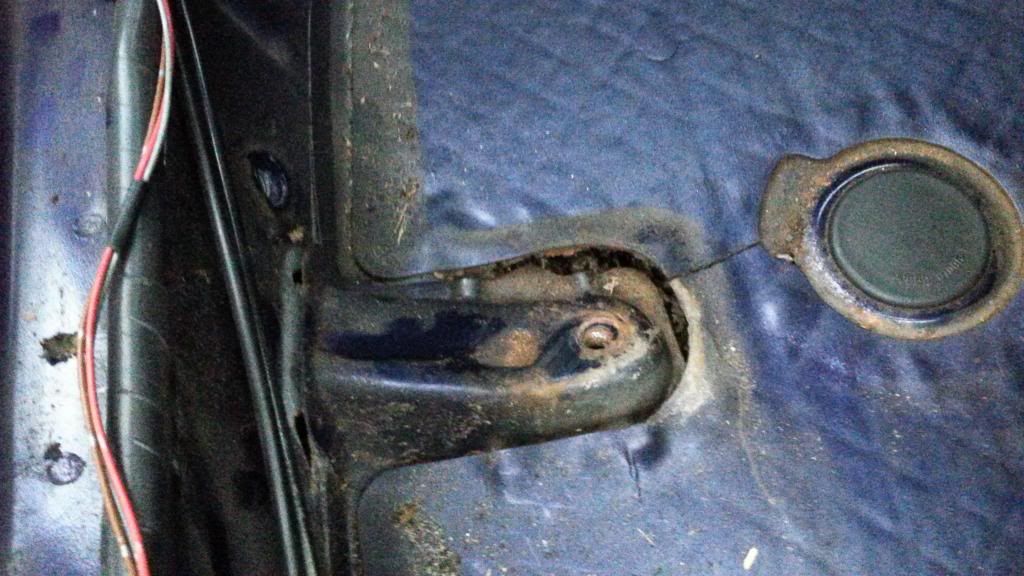
Drivers side rear anchor point
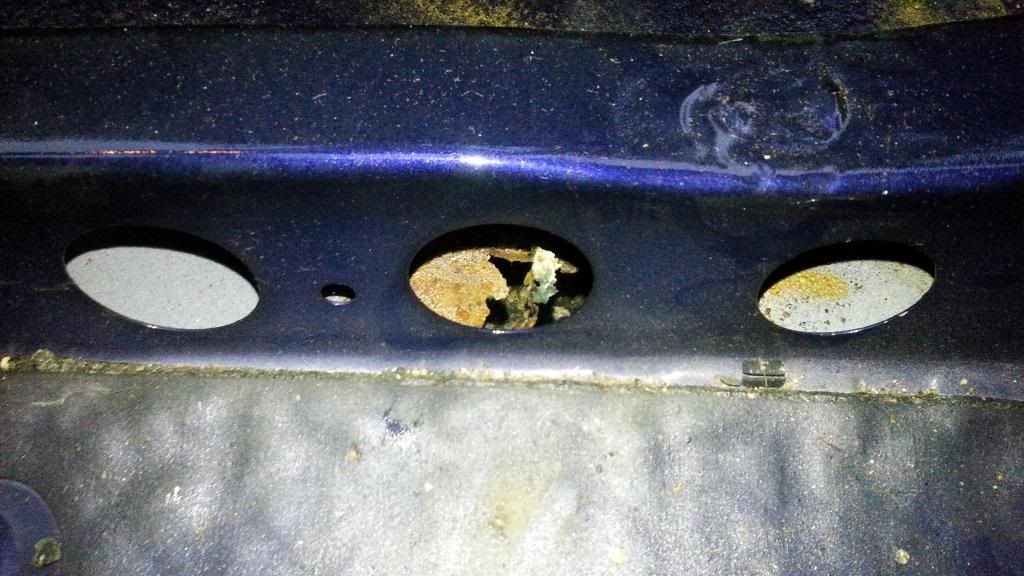
Under the box section along the front of the seats
Plus other rotton anchor points and holes
ME:"Hi Steve how my car getting on?"
GARAGE:"Oh hi Wilki, afraid I've got some bad news.
ME:"Go on then.
GARAGE: It's gunna need a fair bit of welding
ME:
So me and Wiki Senior went over to take the seats and carpet out for the welding:
Drivers side rear anchor point
Under the box section along the front of the seats
Plus other rotton anchor points and holes
Last edited by wilki on Tue Jun 03, 2014 12:22 pm, edited 1 time in total.
-
wilkie senior
- IMOC Moderator
- Posts: 2087
- Joined: Tue Feb 01, 2011 8:53 pm
- Location: Barnoldswick
Re: Project - Cosmos Eagle (New owner)
Hail Cosmos Eagle Rev 5, 1998
RIP White Eagle Rev 1, 1991
Re: Project - Cosmos Eagle (New owner)
Got ther back from the garage all fixed.
£130 to patch the floor up against giving up on it for something else = pennies
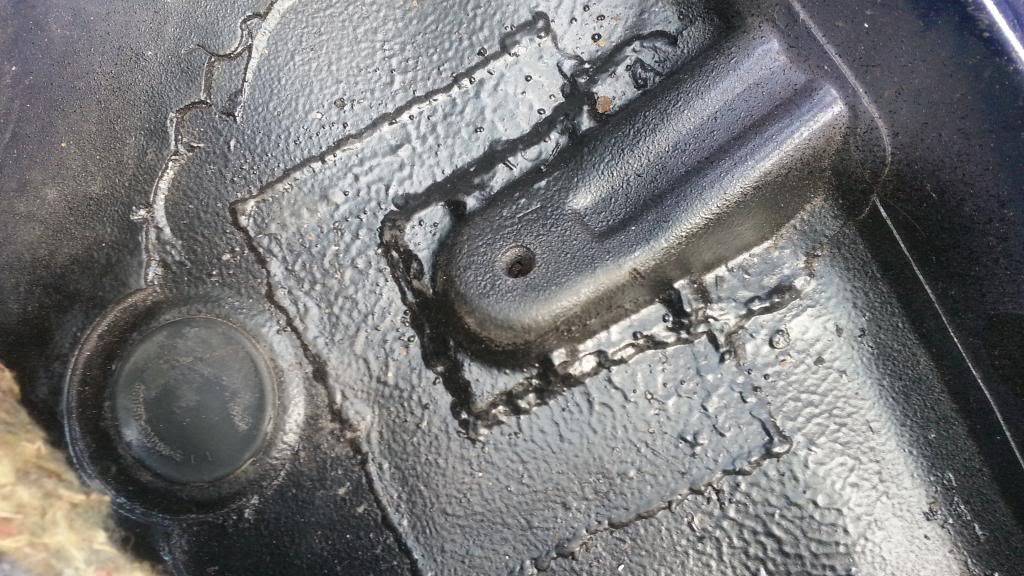
think it's a neat job aswell
think it's a neat job aswell
-
wilkie senior
- IMOC Moderator
- Posts: 2087
- Joined: Tue Feb 01, 2011 8:53 pm
- Location: Barnoldswick
Re: Project - Cosmos Eagle (New owner)
Hi Matey
We could have ground off the welds but, it was a neat job, and will be good for another 15 years
hilarious looking round for that last seat bolt, ha ha
we get this other little jobs done over the weekend, think well need brollys fella ha ha
We could have ground off the welds but, it was a neat job, and will be good for another 15 years
hilarious looking round for that last seat bolt, ha ha
we get this other little jobs done over the weekend, think well need brollys fella ha ha
Hail Cosmos Eagle Rev 5, 1998
RIP White Eagle Rev 1, 1991
-
wilkie senior
- IMOC Moderator
- Posts: 2087
- Joined: Tue Feb 01, 2011 8:53 pm
- Location: Barnoldswick
Re: Project - Cosmos Eagle (New owner)
we have the wheels to refurb
carbon fibre instrument backing, chrome rings, red leds, mk3 steering wheel
also these beauties, that one acquired for the eagle that is cosmos !!!

they need a lick of paint for what ever colour scheme you want, theres the carbon fibre headlight covers in one of the sheds?
carbon fibre instrument backing
also these beauties, that one acquired for the eagle that is cosmos

they need a lick of paint for what ever colour scheme you want, theres the carbon fibre headlight covers in one of the sheds?
Hail Cosmos Eagle Rev 5, 1998
RIP White Eagle Rev 1, 1991
Re: Project - Cosmos Eagle (New owner)
As JAE is approaching it's time to do all the things I intended to do over the summer in 2 weeks 

The first quick easy job was to put on the mk3/celica wheel. My trusty home made wheel remover came in useful as 15 years ish of being sat comfortably ensured it was a b***h to get off
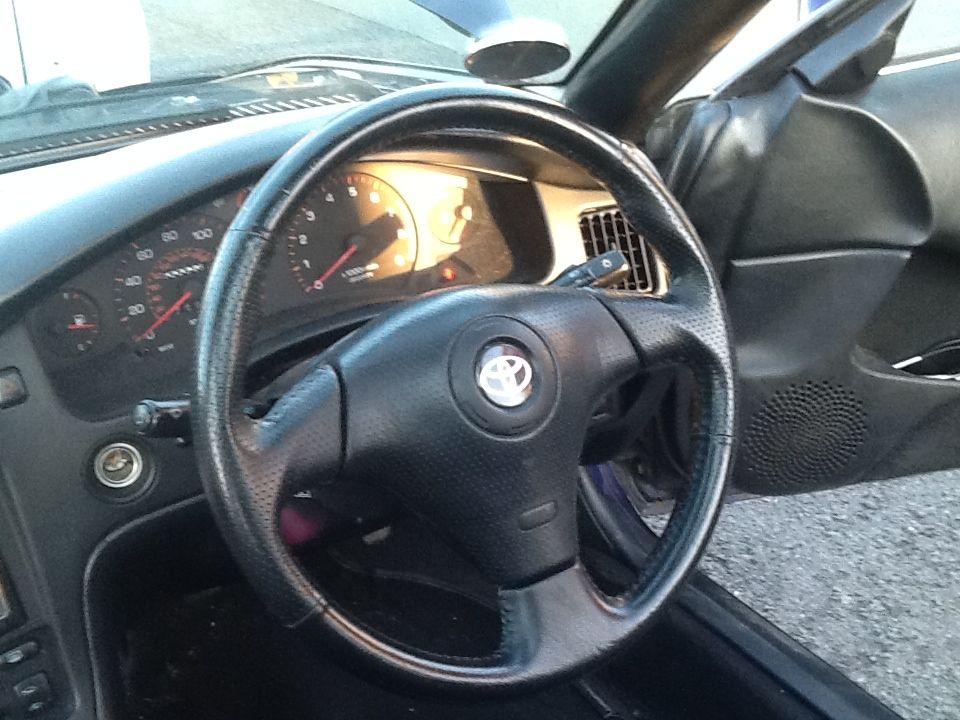
The first quick easy job was to put on the mk3/celica wheel.
Re: Project - Cosmos Eagle (New owner)
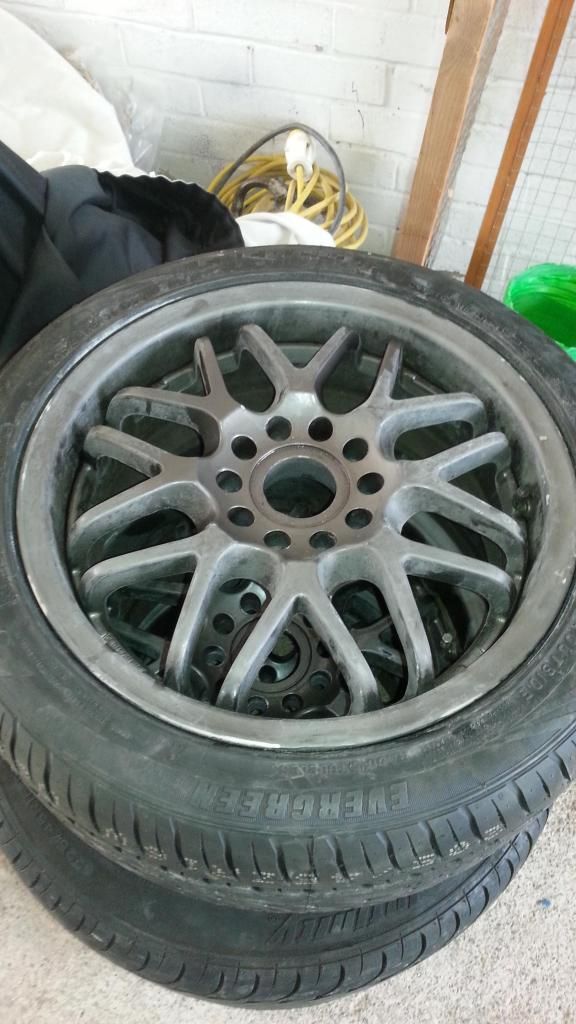
also my annual wheel & or colour change is due 
Unfortunately the thread nut assembly for holding the center doughnut had rusted themselves solid 
Never had one of these 10 minute jobs take less than an hour yet ](./images/smilies/eusa_wall.gif "Brick wall")
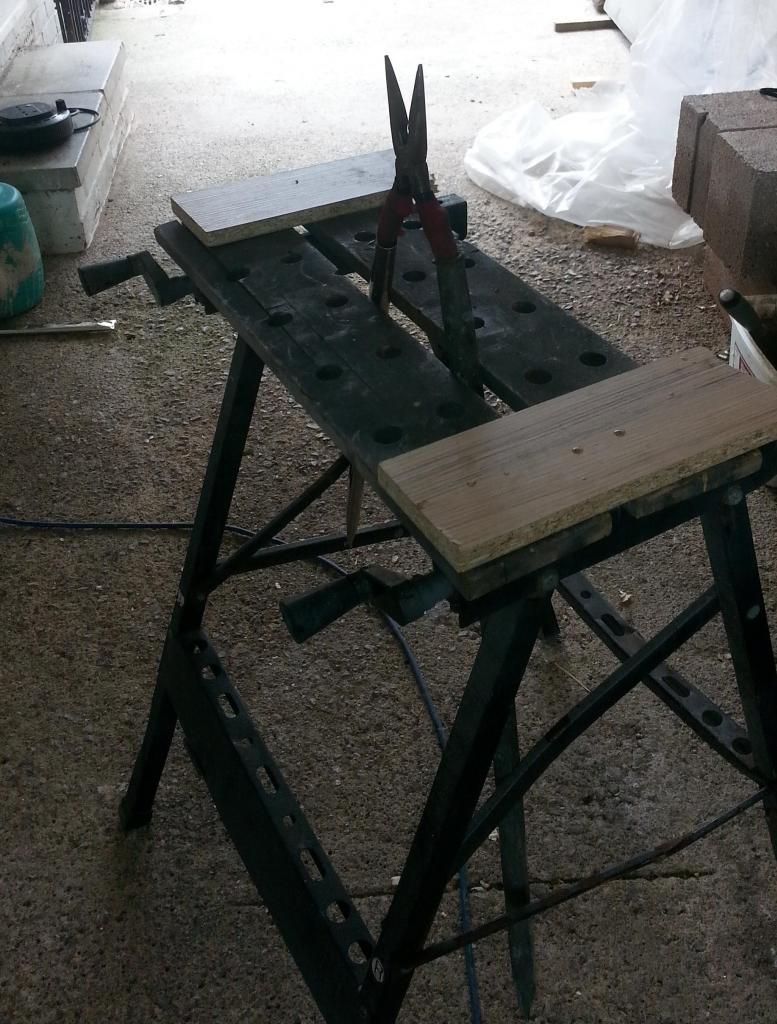
Anyways after much swearing, using all the brute force we could muster, another patented setup to rival the headlight oven(see page 1:D) had to be born......
I present the fully adjustable wheel center removery station(FAWCRS) for short
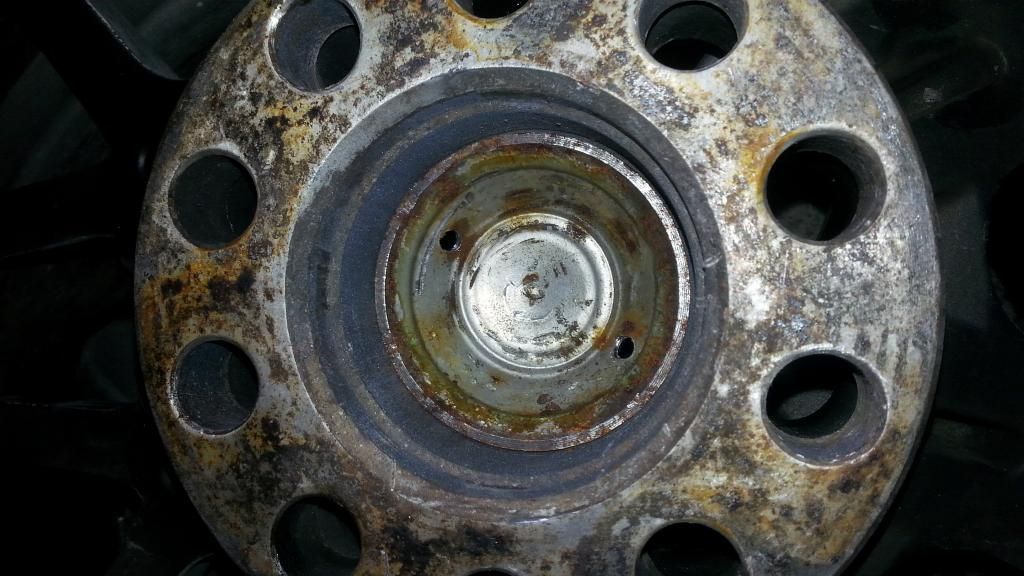
STEP 1:
Drill 2 parallel holes on the same PCD(not to a couple of mm) on the flange on the under side of the center thread
STEP 2:
Place wheel on the FAWCRS ensuring to align the pincer nose fingers in drilled holes
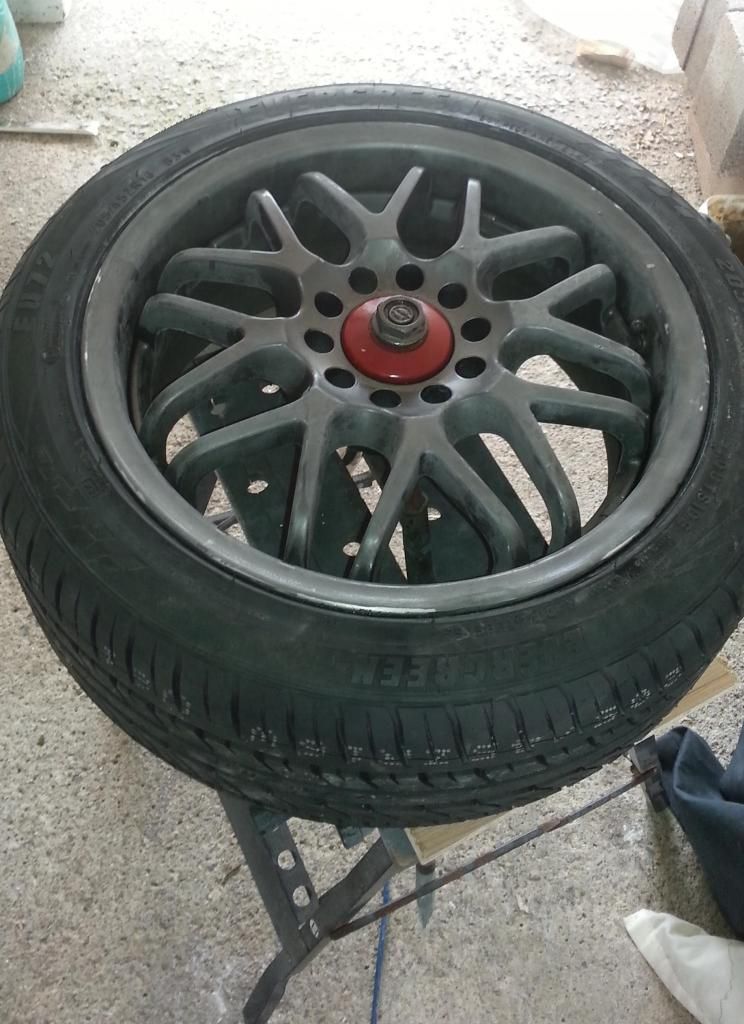
STEP 3:
Use large spanner/adjustable spanner and turn nut anti-clockwise to release nut from it's threaded prison
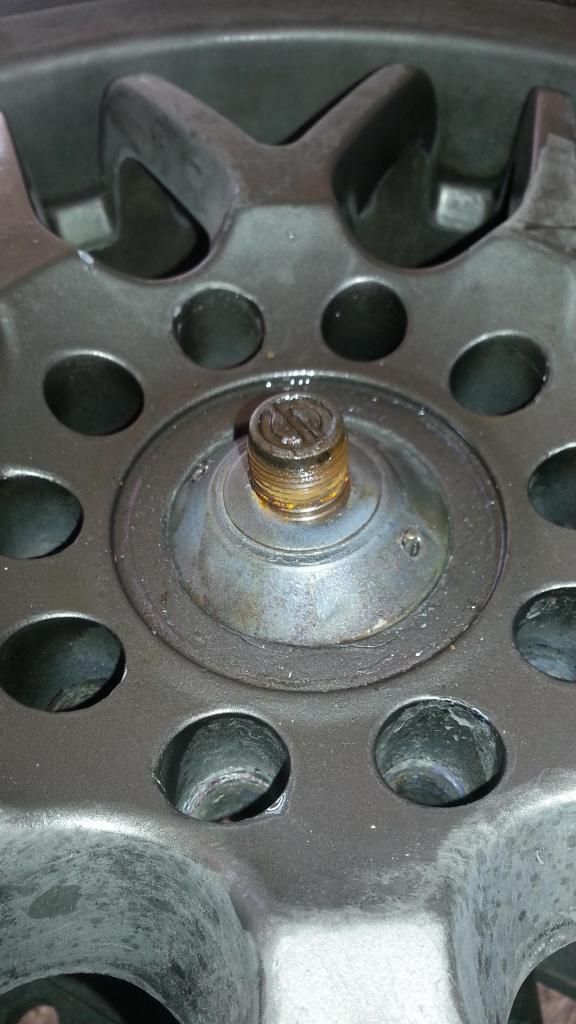
................and in the words of the gumtree bloke, success!
With the removal of the centers, Wilkie Seniors shed kindly volunteered to become my spray booth and I've managed to get the front sprayed and am very happy with the colour
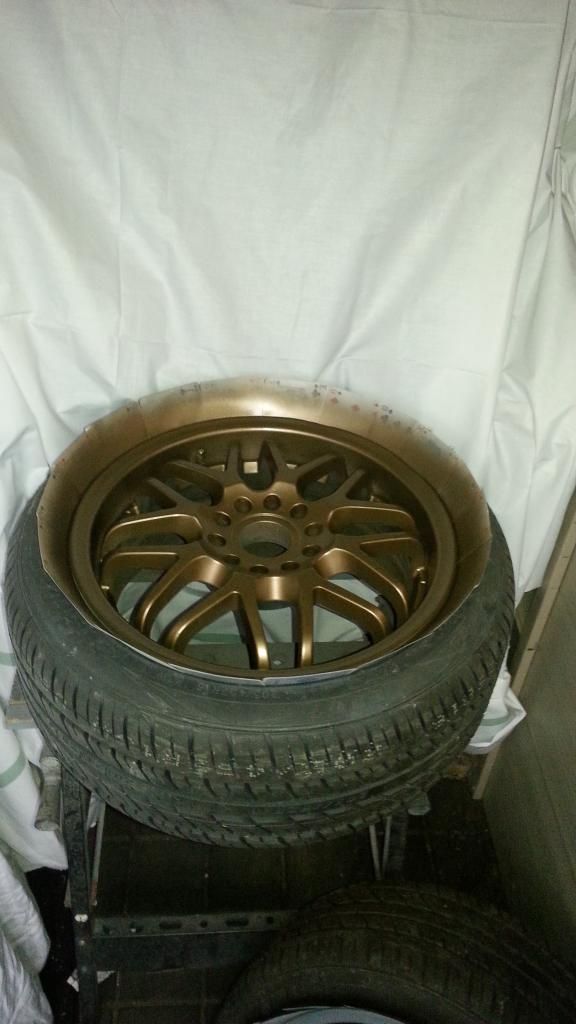
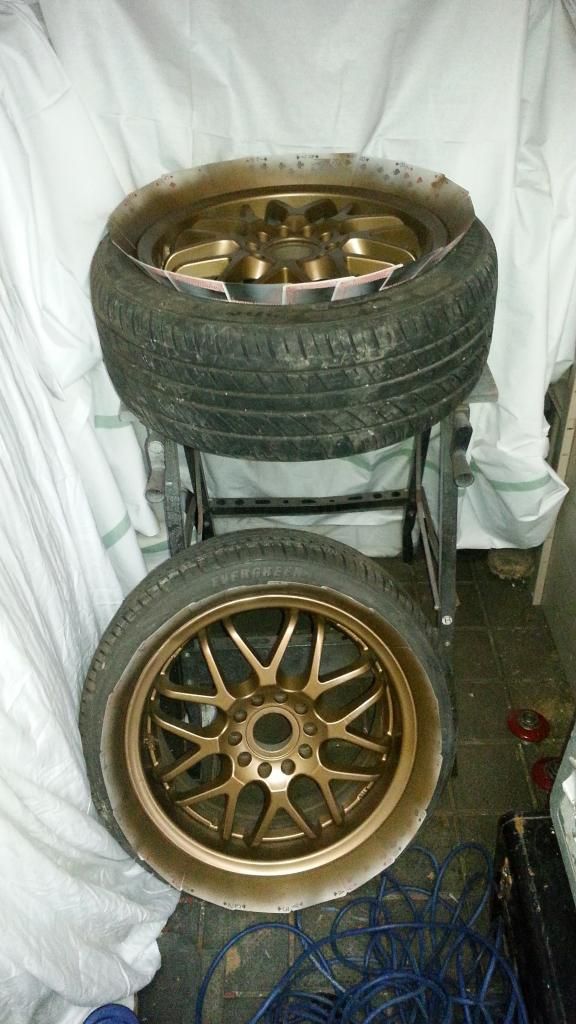
Just can't decide what colour to do the centre doughnut and thread/nut
Unfortunately the thread nut assembly for holding the center doughnut had rusted themselves solid
Never had one of these 10 minute jobs take less than an hour yet
Anyways after much swearing, using all the brute force we could muster, another patented setup to rival the headlight oven
I present the fully adjustable wheel center removery station
STEP 1:
Drill 2 parallel holes on the same PCD
STEP 2:
Place wheel on the FAWCRS ensuring to align the pincer nose fingers in drilled holes
STEP 3:
Use large spanner/adjustable spanner and turn nut anti-clockwise to release nut from it's threaded prison
With the removal of the centers, Wilkie Seniors shed kindly volunteered to become my spray booth and I've managed to get the front sprayed and am very happy with the colour
Just can't decide what colour to do the centre doughnut and thread/nut
Re: Project - Cosmos Eagle (New owner)
Nice colour choice.
-
wilkie senior
- IMOC Moderator
- Posts: 2087
- Joined: Tue Feb 01, 2011 8:53 pm
- Location: Barnoldswick
Re: Project - Cosmos Eagle (New owner)
It was getting a bit annoying trying to get the dammed thing off!!
Like i said we will not be defeated, amazing what you can do with a bit of thought.
So we've developed the babyliss, oven
S duct fixing application system
and not the get the chuffing centre caps off including pincer nose pliers copper 3/4" pipe& a oval wardrobe hanging rail, not forgeting the workmate
Ha ha
good colour choice though looks good once its on the wheel, just the centre cap ring to decided on!
Like i said we will not be defeated, amazing what you can do with a bit of thought.
So we've developed the babyliss
S duct fixing application system
and not the get the chuffing centre caps off including pincer nose pliers copper 3/4" pipe
Ha ha
good colour choice though looks good once its on the wheel, just the centre cap ring to decided on!
Hail Cosmos Eagle Rev 5, 1998
RIP White Eagle Rev 1, 1991