Mk1b restoration... its alive..and painted!!
Moderators: IMOC Moderators, IMOC Committee Members
-
SuperRedMR2
- Posts: 5494
- Joined: Mon May 16, 2005 8:40 pm
- Location: Wickford, Essex
Re: Mk1b restoration... its alive..and painted!!
How much did your pistons cost from the States may I ask? And where did you get them from?
-
boondougal
- Posts: 520
- Joined: Sun Jul 10, 2005 9:48 am
- Location: Shavington (near Crewe)
Re: Mk1b restoration... its alive..and painted!!
i bought them from ebay. ..
..
http://cgi.ebay.co.uk/ws/eBayISAPI.dll? ... K:MEWNX:IT
think it worked out about 90 quid or something like that.
The communication was good, i got over sized pistons and rings but standard fitment shells and thrust washers.
I think in reality everything in my original Block would have cleaned up really nice and still been way within tolerance but i just liked the idea of nice new shiney internals... i can see this engine going into more than one shell in its life time (kit car maybe)...would be nice to give it a fresh start
http://cgi.ebay.co.uk/ws/eBayISAPI.dll? ... K:MEWNX:IT
think it worked out about 90 quid or something like that.
The communication was good, i got over sized pistons and rings but standard fitment shells and thrust washers.
I think in reality everything in my original Block would have cleaned up really nice and still been way within tolerance but i just liked the idea of nice new shiney internals.
-
SuperRedMR2
- Posts: 5494
- Joined: Mon May 16, 2005 8:40 pm
- Location: Wickford, Essex
Re: Mk1b restoration... its alive..and painted!!
Thats bloody cheap init?!
-
boondougal
- Posts: 520
- Joined: Sun Jul 10, 2005 9:48 am
- Location: Shavington (near Crewe)
Re: Mk1b restoration... its alive..and painted!!
i thought so.. main reason why i decided to change it all.. i also got a new oil pump and head bolts from states side.
-
boondougal
- Posts: 520
- Joined: Sun Jul 10, 2005 9:48 am
- Location: Shavington (near Crewe)
Re: Mk1b restoration... its alive..and painted!!
Only small updates from the weekend, i have managed to get a bit more welding done and i have started the first pass filler ont he arch..
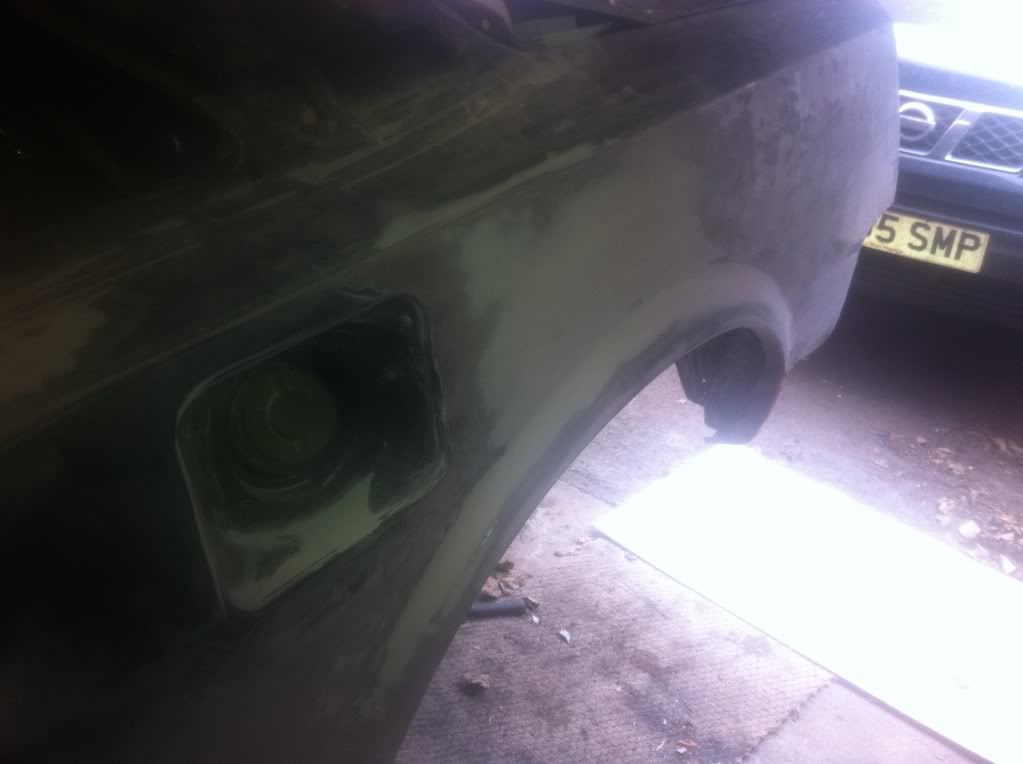
We have actually just accepted an offer on our house so can't see to much more work being done on her(maybe a little reassembly so i can actually move her to the new place) for quite a while now.. its all box's and packing and discusions about what we should keep and what we should take this opportunity to throw away...
We have actually just accepted an offer on our house so can't see to much more work being done on her
-
boondougal
- Posts: 520
- Joined: Sun Jul 10, 2005 9:48 am
- Location: Shavington (near Crewe)
Re: Mk1b restoration... its alive..and painted!!
Well the offer on the house is... awaiting the rest of he chain now as one of the buyers further down pulled out (they were at the start and had been in it for over 3 months, i completed the chain... only for them to pull out, its a funny game this house buying
Well not much done on the car to be honest but i had a few hours yesterday(took the day off)
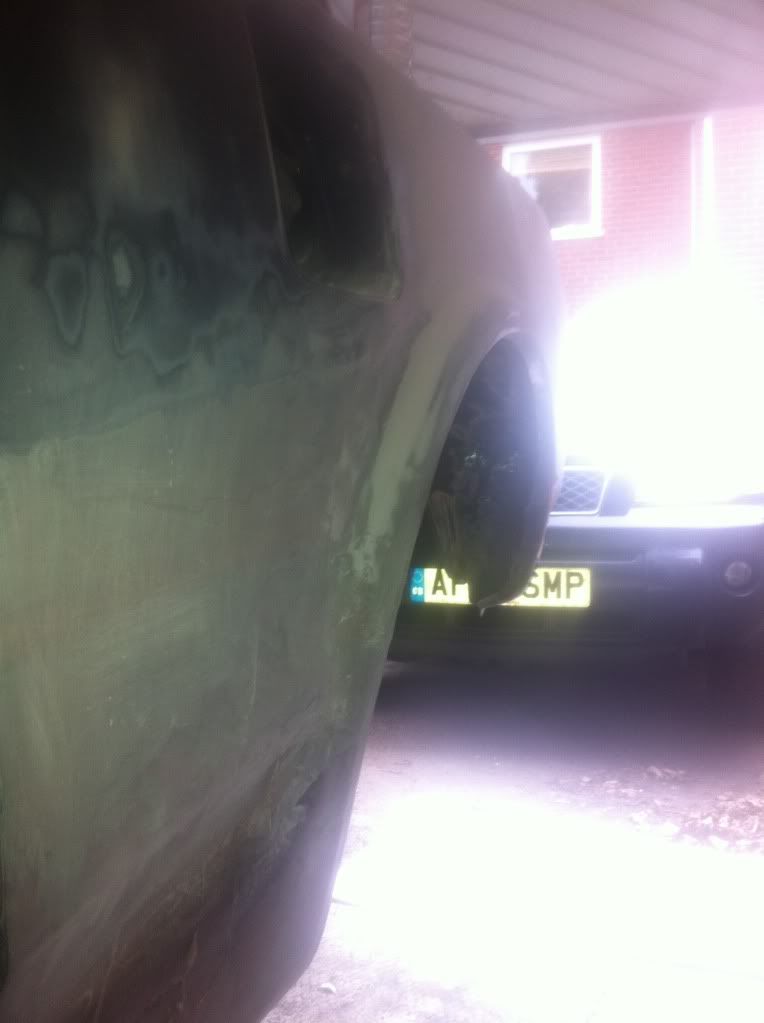
I finished all the inner arch repairs and after much filling and sanding i thought i would get a coat of pimer on to see just how bad it is.... 


Well non of it was anywhere near where it needs to be...
Arch has a loverly wobble..
the smoothed out lines were.. a little on the lumpy side
And the rest of the panel was well... crap tbh. There has been a previous repair and i took a fair bit of filler off, now i know why as most of the panel will need a thin skim...
Oh well, all the joy of the learning curve i supose, mno harm done just means more hours of annoying the neighbours with my orbital sander!!!
I also cleaned up a few more of the engine parts, i had bought some"Gunk" before but hadn't rated it, However i got a another tin and thought i would give it another go.. and boy this stuff was so much better, i can still smell it on my skin today... really got stuff clean.
I cleaned the end caps and they cam eup pretty good, while cleaning i noticed that the relief for the bearing was clogged up solid so gace it a good clean out... would that be effecting lubrication?
Well not much done on the car to be honest but i had a few hours yesterday
I finished all the inner arch repairs and after much filling and sanding i thought i would get a coat of pimer on to see just how bad it is.
Well non of it was anywhere near where it needs to be.
Arch has a loverly wobble.
the smoothed out lines were.
And the rest of the panel was well.
Oh well, all the joy of the learning curve i supose, mno harm done just means more hours of annoying the neighbours with my orbital sander!!!
I also cleaned up a few more of the engine parts, i had bought some
I cleaned the end caps and they cam eup pretty good, while cleaning i noticed that the relief for the bearing was clogged up solid so gace it a good clean out.
-
boondougal
- Posts: 520
- Joined: Sun Jul 10, 2005 9:48 am
- Location: Shavington (near Crewe)
Re: Mk1b restoration... its alive..and painted!!
Well I have 2 days off and I have decided to crack on with the mr2. Of course the job list is as long as my arm but I have decided a coil over conversion mod... So today tha ts what I have started.
The rear suspension was already off with working on the rear arch and inner, so I started there.
Spring clamp things on, not sure they are really needed on the rear but better safe than sorry....
Well after 20+ years this is probably why people suspension is not quite as good as it once was, this damper had 0 rebound, I could push it all the way with my little finger
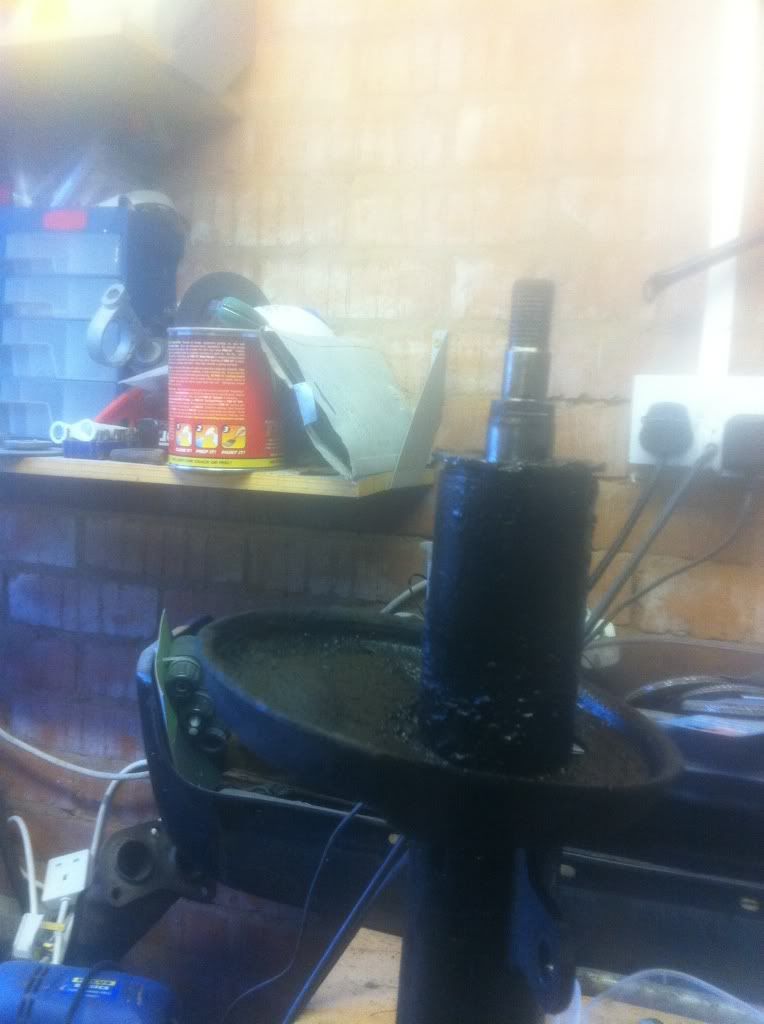
The gland nut was not coming off so after a little trip to a mates body shop and some oxy acet later the nut was free

Back home and the spring seat was attacked with the grinder
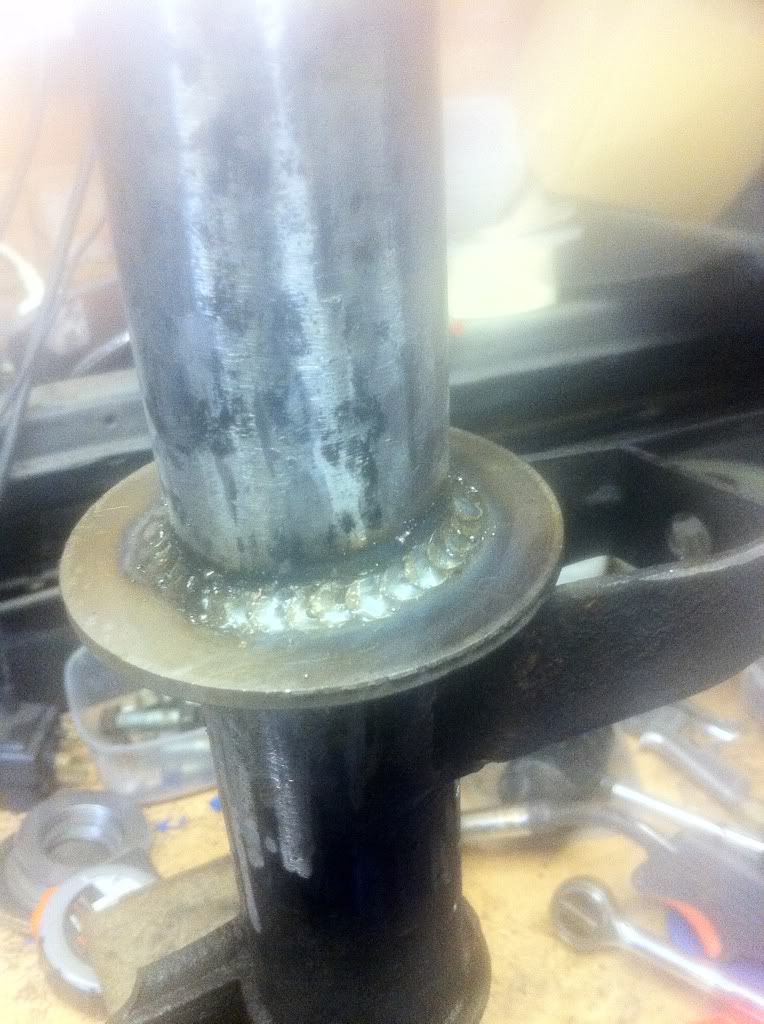
Well I had a huge 3 inch washer that I had the internal diameter put to the casing diameter, I have tacked it on for now just checking everything lines up but seems to look good
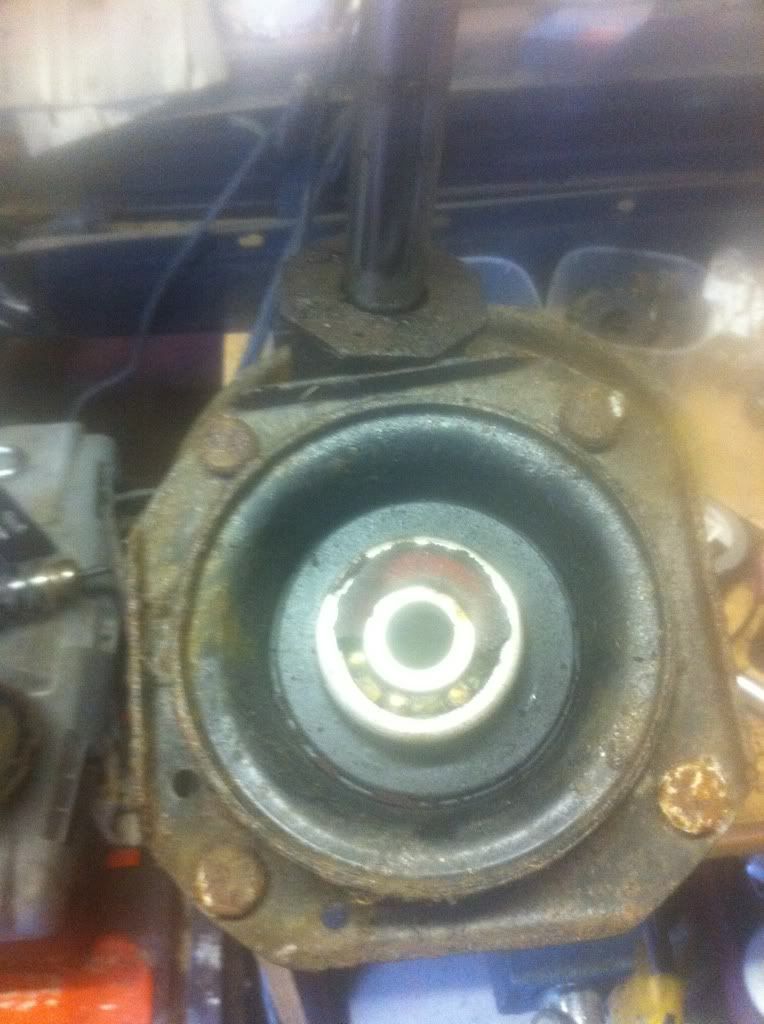
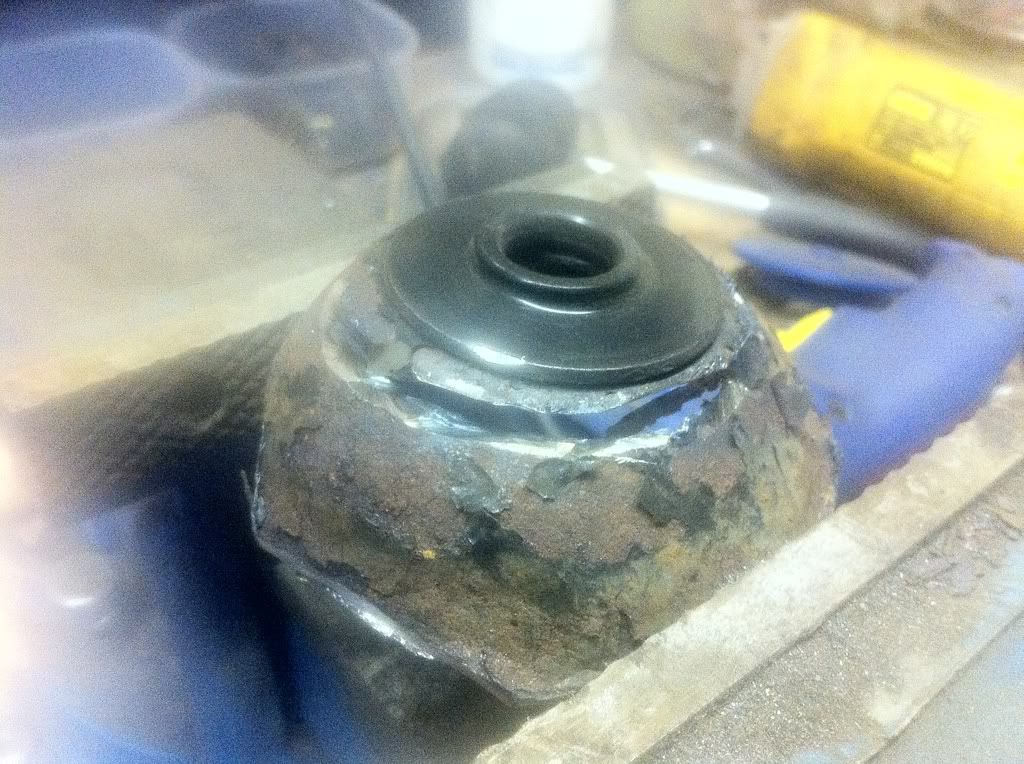
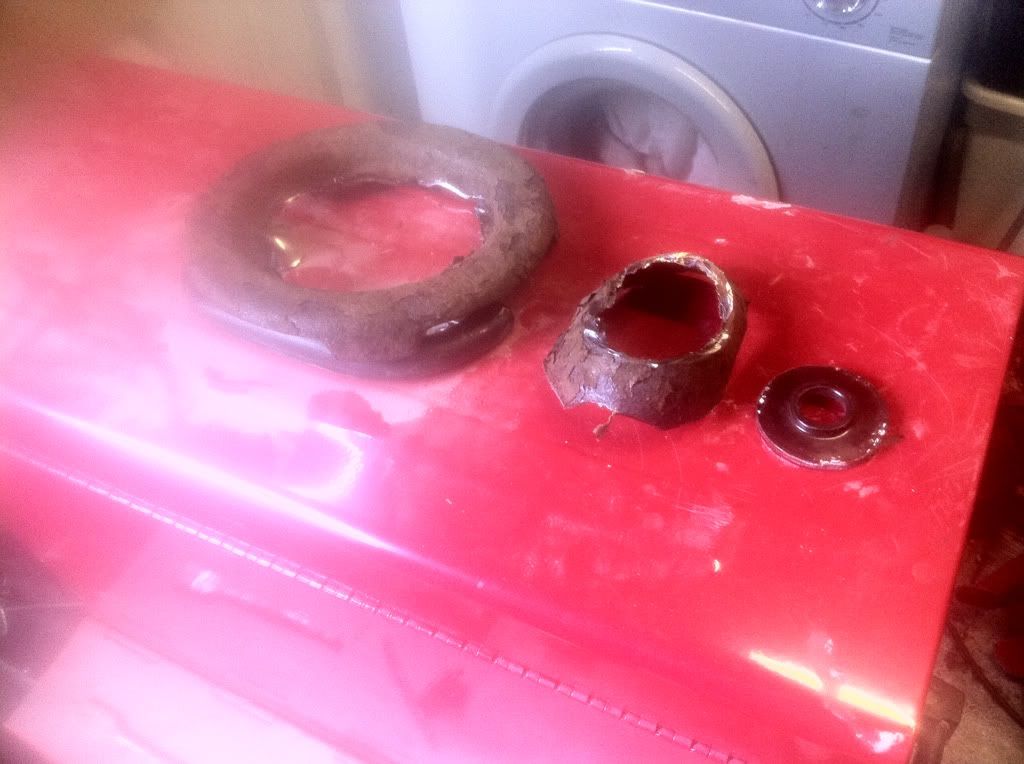
Front is pretty much the same apart from it has a bearing in the top mount which when I took off has the remnence of a dust cover/ foam washer which I will need to replace.... Any ideas?
The rear suspension was already off with working on the rear arch and inner, so I started there.
Spring clamp things on, not sure they are really needed on the rear but better safe than sorry.
Well after 20+ years this is probably why people suspension is not quite as good as it once was, this damper had 0 rebound, I could push it all the way with my little finger
The gland nut was not coming off so after a little trip to a mates body shop and some oxy acet later the nut was free
Back home and the spring seat was attacked with the grinder
Well I had a huge 3 inch washer that I had the internal diameter put to the casing diameter, I have tacked it on for now just checking everything lines up but seems to look good
Front is pretty much the same apart from it has a bearing in the top mount which when I took off has the remnence of a dust cover
-
boondougal
- Posts: 520
- Joined: Sun Jul 10, 2005 9:48 am
- Location: Shavington (near Crewe)
Re: Mk1b restoration... its alive..and painted!!
Quick up date, the dust cap is the same as mk2 and still available from MrT, not generally in stock but available same day, picking mine up at 2 today, hopefully get the passenger side finished today.
Part number is 90303-22049 in case your interested.
Part number is 90303-22049 in case your interested.
Re: Mk1b restoration... its alive..and painted!!
Interesting coilover convertion Boondougal
Is the threaded height adjuster a push fit over the original casing?
Peter
Is the threaded height adjuster a push fit over the original casing
Peter
-
boondougal
- Posts: 520
- Joined: Sun Jul 10, 2005 9:48 am
- Location: Shavington (near Crewe)
Re: Mk1b restoration... its alive..and painted!!
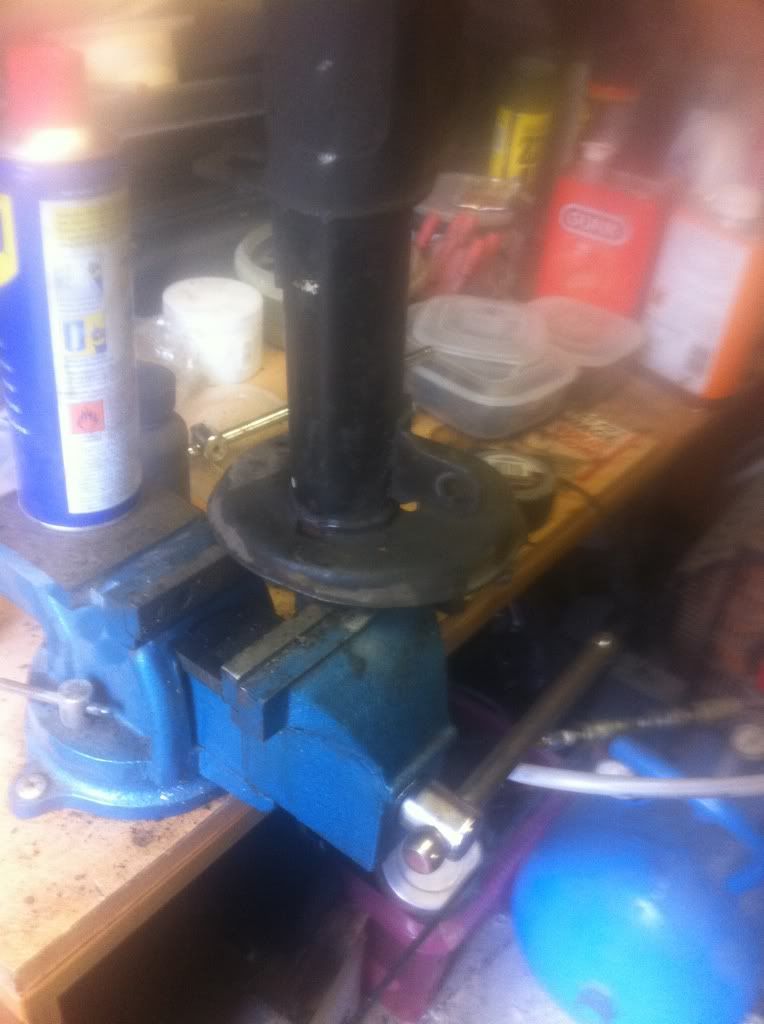
Pretty much! That's why I welded on a new platform for them, you can get steel which can be welded straight to your casing.
I do have to point out I am basically copying what some other people have already done on other sites.
I do have to point out I am basically copying what some other people have already done on other sites.
-
cartledge_uk
- Posts: 7608
- Joined: Sun Nov 13, 2005 6:28 pm
- Location: Newbury
Re: Mk1b restoration... its alive..and painted!!
boondougal wrote:Pretty much! That's why I welded on a new platform for them, you can get steel which can be welded straight to your casing.
I do have to point out I am basically copying what some other people have already done on other sites.
Yes Paul woods has done them somewhere on most of the threads, looking good
The odd front top mounts are TRD
Re: Mk1b restoration... its alive..and painted!!
where did you get the coilovers from and how much? 
-
boondougal
- Posts: 520
- Joined: Sun Jul 10, 2005 9:48 am
- Location: Shavington (near Crewe)
Re: Mk1b restoration... its alive..and painted!!
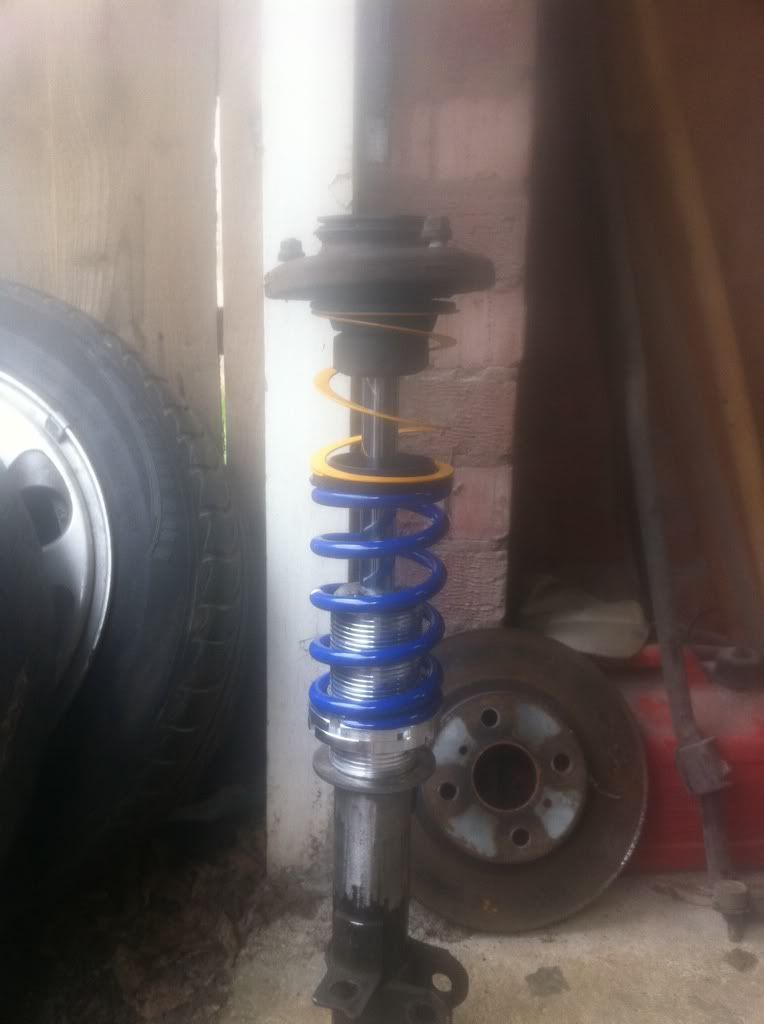
I just used a kit like this, mx5 has the engine up front so just need to make sure the rear springs go on the front of the mister2 and vice a versa.
http://cgi.ebay.co.uk/MAZDA-MX5-98-03-L ... 611wt_1199
http://cgi.ebay.co.uk/MAZDA-MX5-98-03-L ... 611wt_1199
-
boondougal
- Posts: 520
- Joined: Sun Jul 10, 2005 9:48 am
- Location: Shavington (near Crewe)
Re: Mk1b restoration... its alive..and painted!!
The helper springs and seat are from Faulkner springs, have to saysuper service... Ordered at 3 pm and they were with me just after mid day the next day...
-
boondougal
- Posts: 520
- Joined: Sun Jul 10, 2005 9:48 am
- Location: Shavington (near Crewe)
Re: Mk1b restoration... its alive..and painted!!
well i thought i would finish up dating the thread with a final few pics that add to the conversion on the front.
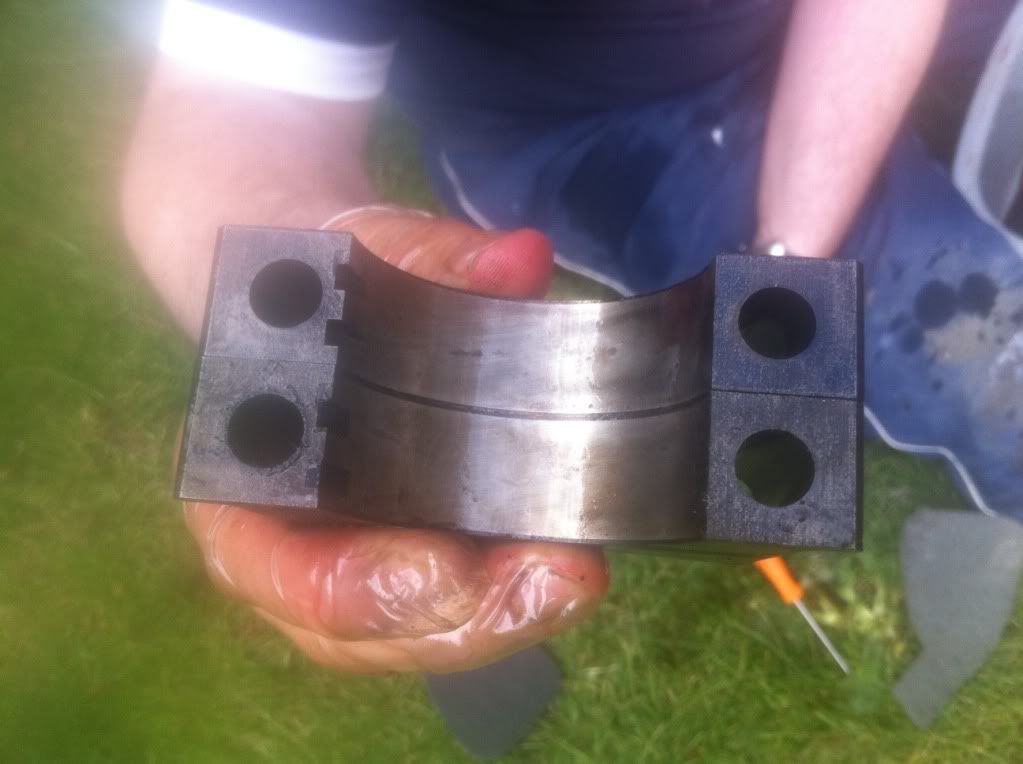
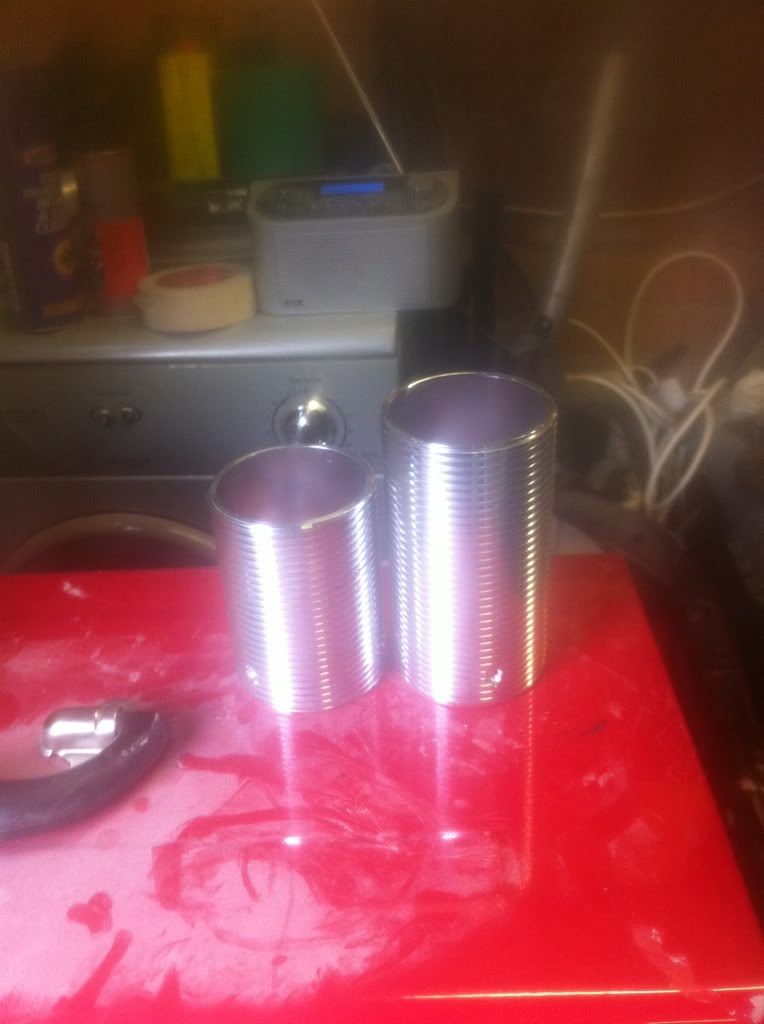
The ID on the front seat had to be opened out to 45mm, the rears are wider and had to be opened to 50mm.
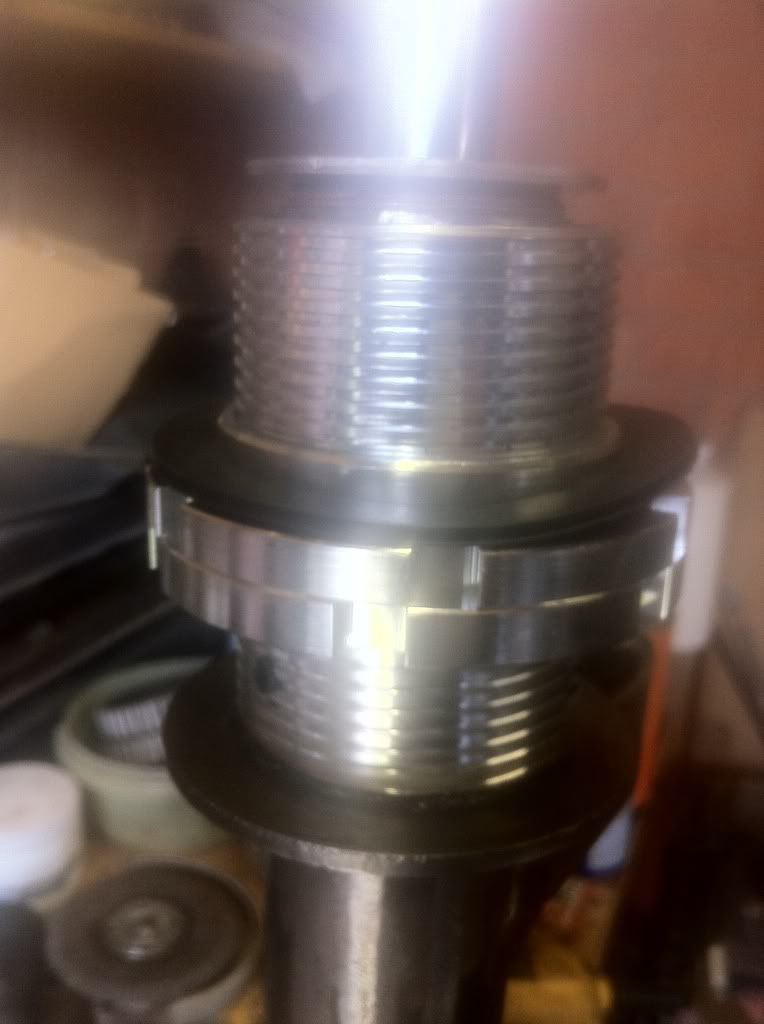
Here is the seat welded to the casing
the seat position on the fronts is also different to the rears. I didn't want the threaded sleeve to hide the gland nut (it actually woudn't fit over it and i didn't really want to grind it round) so i had the sleeve shortend to 80 mm on the front... the rear were perfect as they were
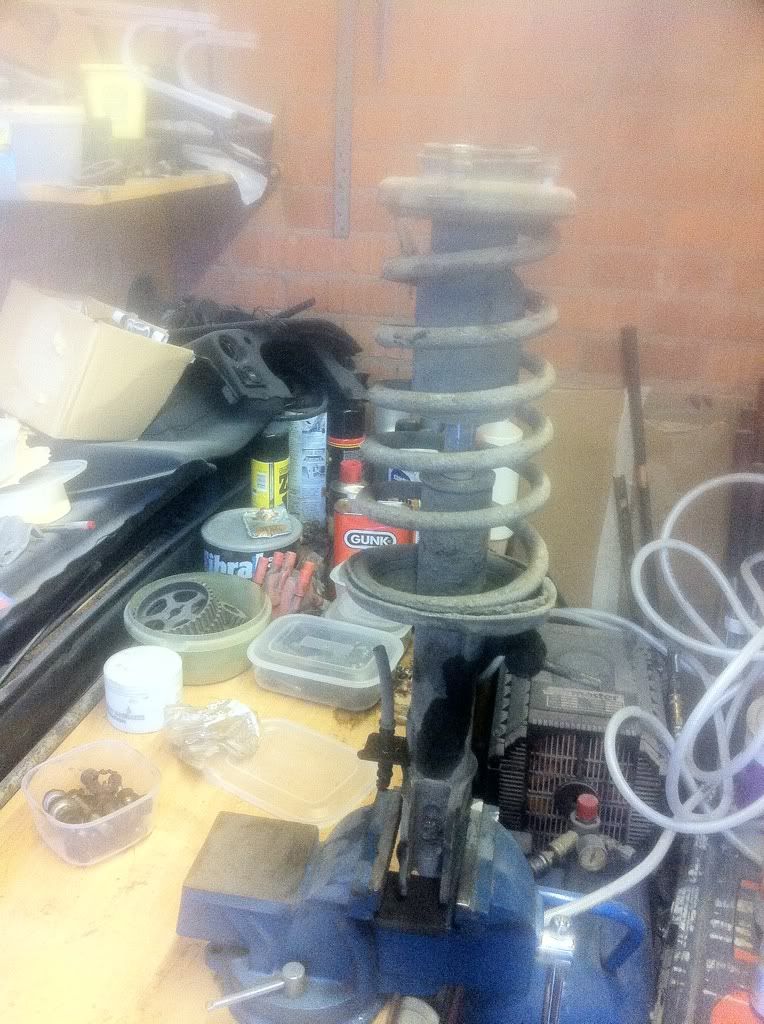
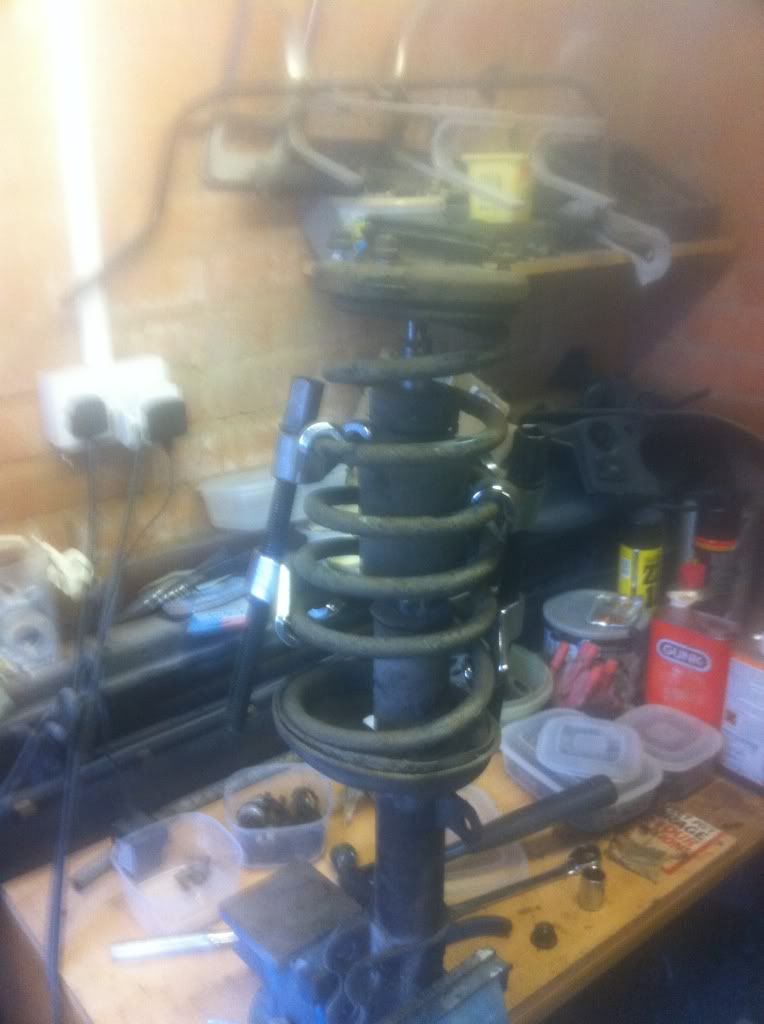
the fronts have the bearing in the top mount that located into the spring top seat, the spring seat included the flat sided locator for the damper shaft, in order to maintain this and the appropriate location and seat for the bearing i cut it out.
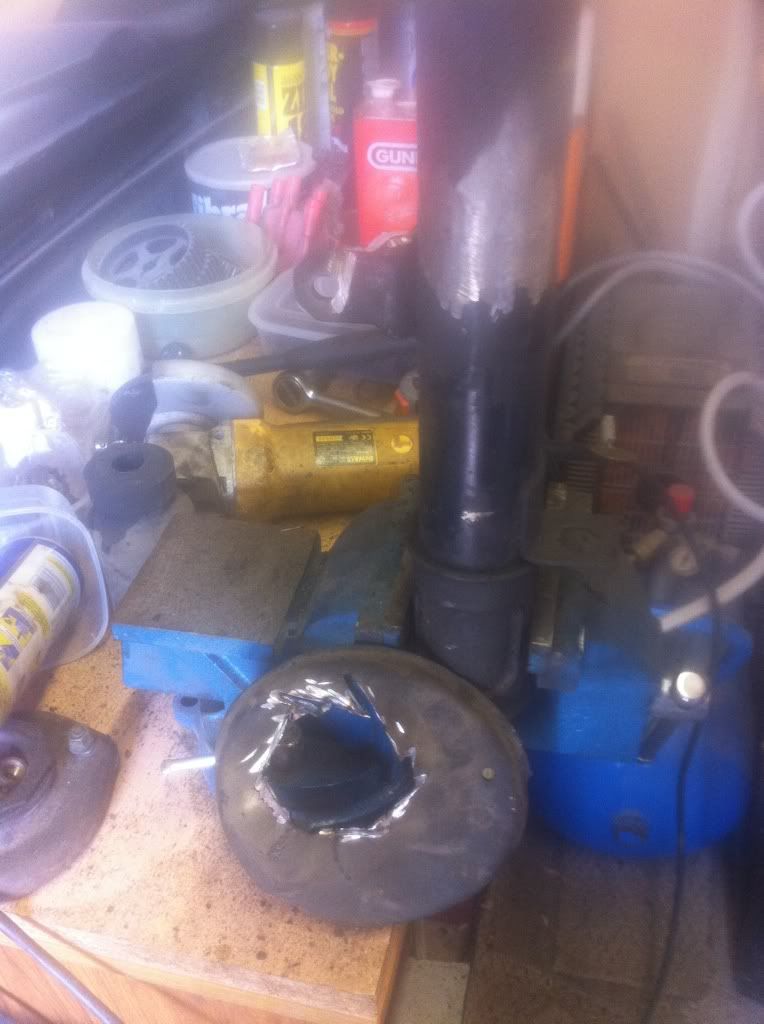
this is the Damper spring and spring seat that i got from DFaulkner springs, its 4 inches long and only has 4lb of pressure... its really an anti rattle spring.
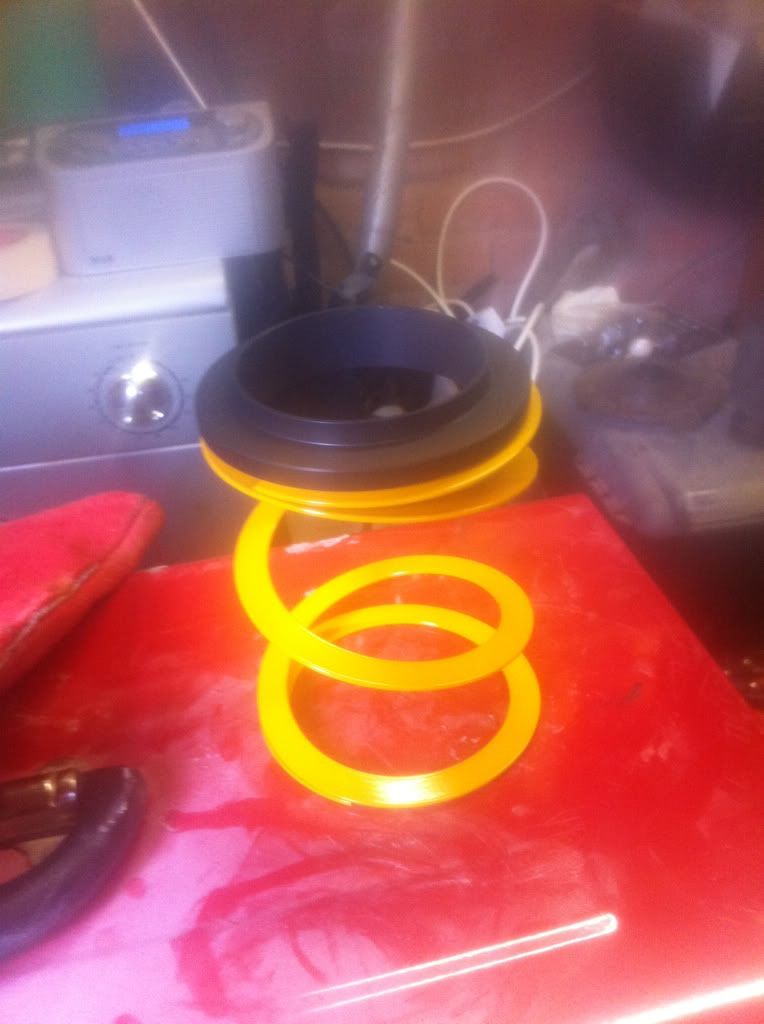
I havn't got a pic but i cut down the bump stop as well, just left the top bit of it around the damper shaft....
I will probably do a more coherent write up once i have finished sand blasting and powder coating everthing.

The ID on the front seat had to be opened out to 45mm, the rears are wider and had to be opened to 50mm.
Here is the seat welded to the casing
the seat position on the fronts is also different to the rears.
the fronts have the bearing in the top mount that located into the spring top seat, the spring seat included the flat sided locator for the damper shaft, in order to maintain this and the appropriate location and seat for the bearing i cut it out.
this is the Damper spring and spring seat that i got from DFaulkner springs, its 4 inches long and only has 4lb of pressure.
I havn't got a pic but i cut down the bump stop as well, just left the top bit of it around the damper shaft.
I will probably do a more coherent write up once i have finished sand blasting and powder coating everthing.
-
boondougal
- Posts: 520
- Joined: Sun Jul 10, 2005 9:48 am
- Location: Shavington (near Crewe)
Re: Mk1b restoration... its alive..and painted!!
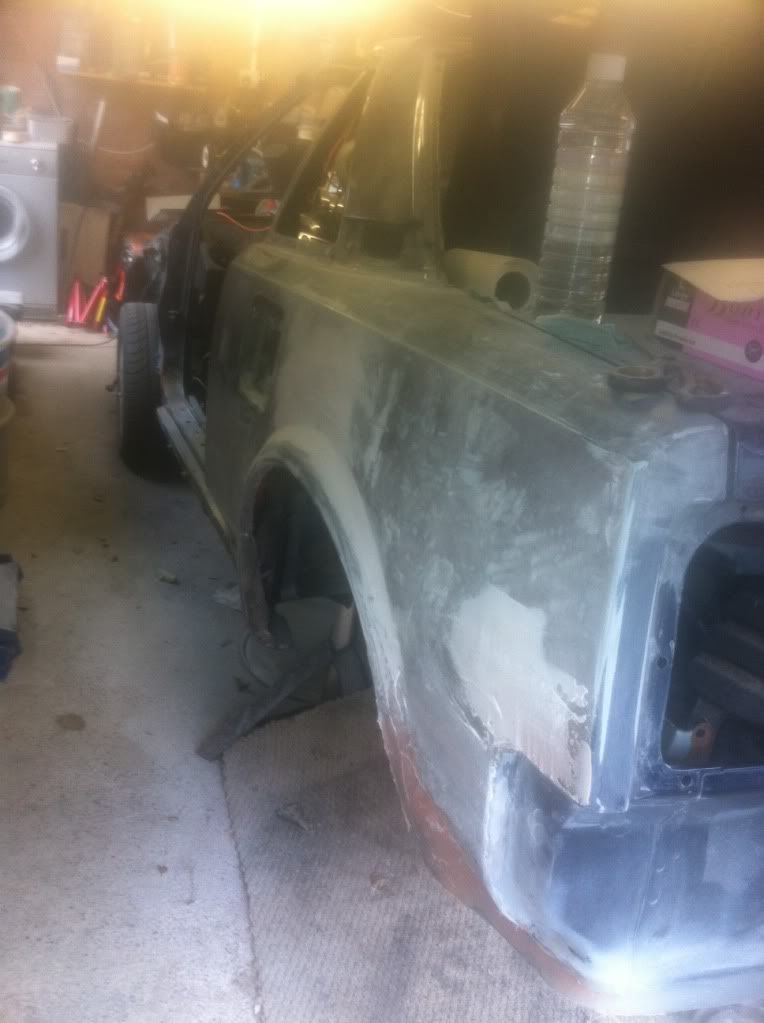
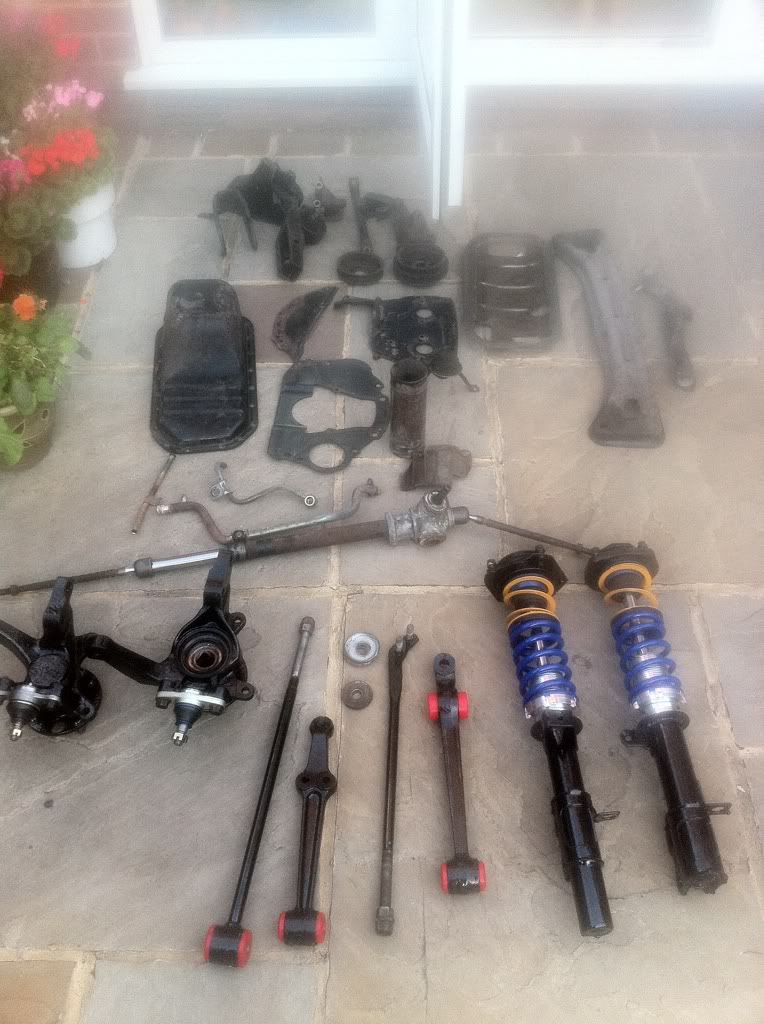
Well I have had a couple of days painting cleaning and removing stuff and this is what I have in front of me, I actually shot blasted the suspension arms but it took ages and although it was good for all the reseses I'm not 100% sure it was fully necessary, depends how perfect you want things I suppose. All the shiney black items have por15 on them, the other not so shiney items will be getting either black or silver por 15 over the next few days. I also stated the polybushing... Which is actually a pretty straight forward job I found.
It is actually starting to feel like progress!
It is actually starting to feel like progress!
Re: Mk1b restoration... its alive..and painted!!
I've seen an MX5 that had a quick change suspension system BoonDougal
He had 6 or seven sets of front springs, all rated differently
Dunno the exact design but evidently not coilover
Peter
He had 6 or seven sets of front springs, all rated differently
Dunno the exact design but evidently not coilover
Peter
-
boondougal
- Posts: 520
- Joined: Sun Jul 10, 2005 9:48 am
- Location: Shavington (near Crewe)
Re: Mk1b restoration... its alive..and painted!!
I do envisage at some point needing to change the coils, I think these will be too stiff, plus it might need 6 inch coils when these are only 4... Time will tell I suppose
-
boondougal
- Posts: 520
- Joined: Sun Jul 10, 2005 9:48 am
- Location: Shavington (near Crewe)
Re: Mk1b restoration... its alive..and painted!!
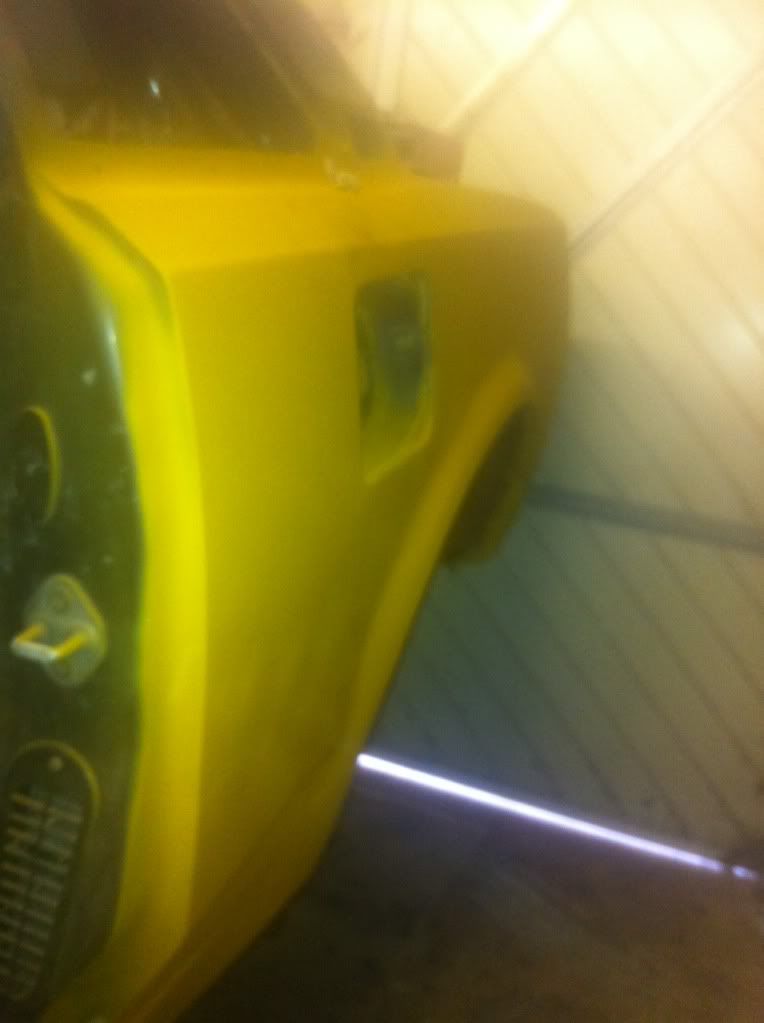
Well as a quick up date I have basically been cleaning and painting as many parts as I can, here is a bad pic of the engine parts painted in a bright blue.
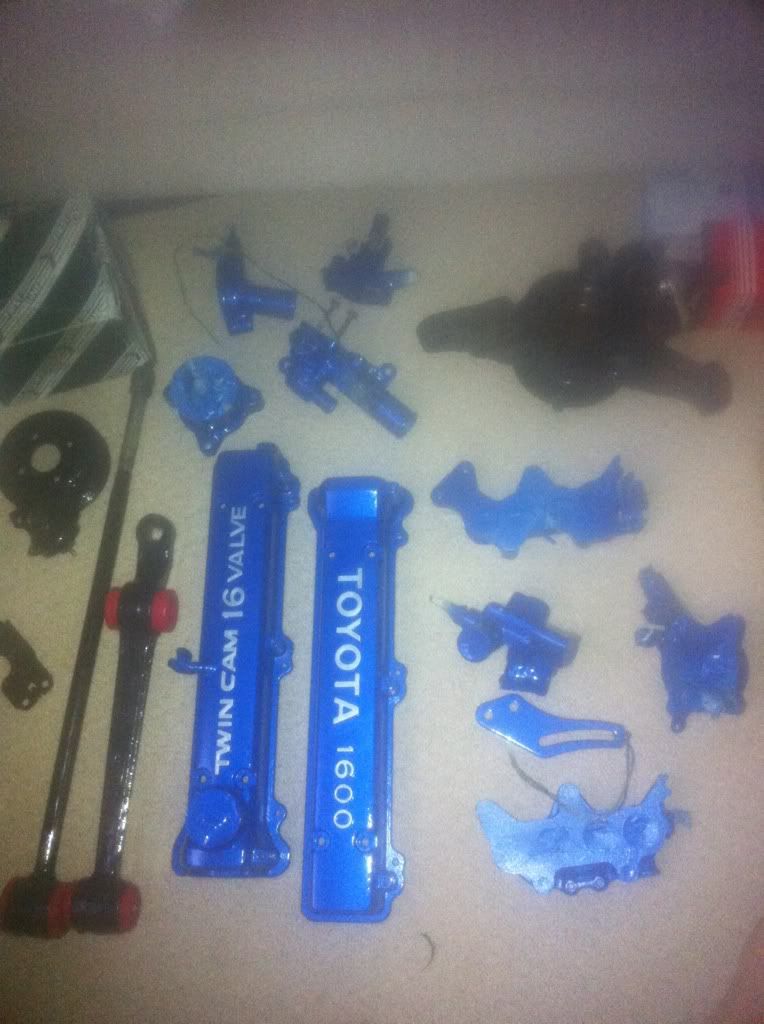
I have also today re fitted the steering rack, and built up the passenger front suspension back onto the car. Sorry but no pics at the moment.
Basically we are moving soon so I am starting to refit as much as a can to make sure it's a solid rolling chasis for the relocation!
I have also today re fitted the steering rack, and built up the passenger front suspension back onto the car.
Basically we are moving soon so I am starting to refit as much as a can to make sure it's a solid rolling chasis for the relocation!
Re: Mk1b restoration... its alive..and painted!!
I like the cam covers in that blue colour Boondougal 
Are the polybushes easy to fit?
Did you press them in?
Peter
Are the polybushes easy to fit
Did you press them in
Peter