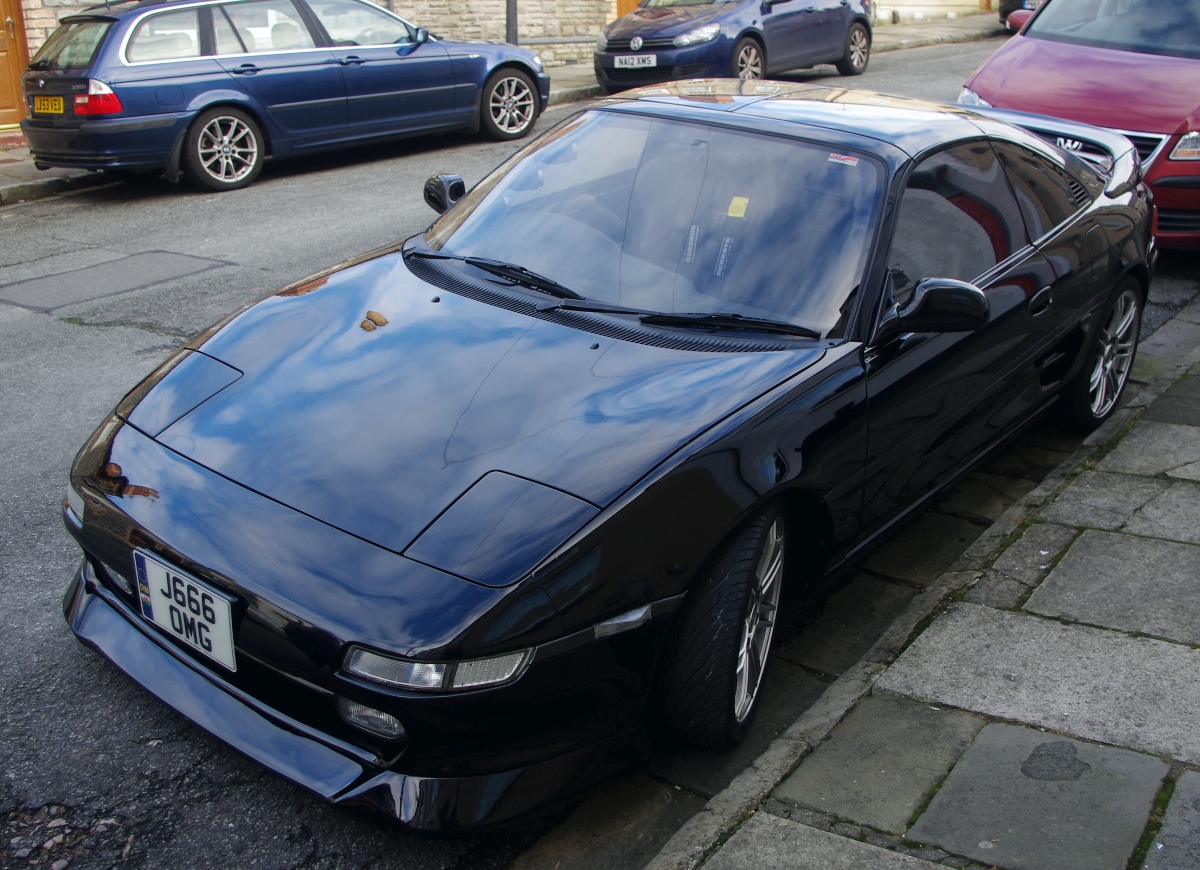
Whilst waiting for Winter to really kick in I've been trying to make the best the dry but chilly weather to get on top of my to do list, before it goes back to the body shop for snagging.

First the engine bay, boot and interior were given a good clean to remove the grime left behind by the body shop, and then it was time to tackle some of the small things that have been niggling me.
First up, a heater that just pumps out cold air.
As suspected this was air in the system, with the cooling system bled, the heater sprang back into life.
I'm really not sure how or why air got into the system, and the only possible reason for this that I could find was that the coolant overflow tank was very low.
Onto the flashing hand brake warning light.
As I'd previously modified the wiring at the hand brake lever to create a signal for the head unit, I decided to start at that end.
The connections all looked OK, but the stock wiring felt a bit
"limp", so suspecting a possible internal break I stripped it back several inches and remade the connectors.
Needless to say that made no difference what so ever.
I then noticed that the door open dash warning light had also stopped working, so turned my attention to checking the speedo cluster for loose connections.
Having removed the cluster I discovered the fit of the led lamps I'd installed a while ago had become very slack.
One of them actually fell out of it's holder when I took it out of the cluster!
Replacing the leds fixed that particular issue, and all the warning lights are now working as they should.
With the minor issues sorted, it was time to move on to the main event.
Swapping the door looms for folding mirror looms, and fitting new speakers and crossovers in the door.
I've been meaning to do this job for some time, but kept putting this off, suspecting it was going to be a right faff, especially when you have to work in the street.
Oh for a nice warm garage to work in

When I took the door cards off, I could see what a bodge a previous owner had made of fitting 6.5" Alpine dual concentric speakers.
Rather than fit a spacer the speaker had been pushed in at whatever angle was needed for clearance and held in with a couple of self tapping screws.
The result being that only one side of the speaker was actually contacting the surrounding metal work.
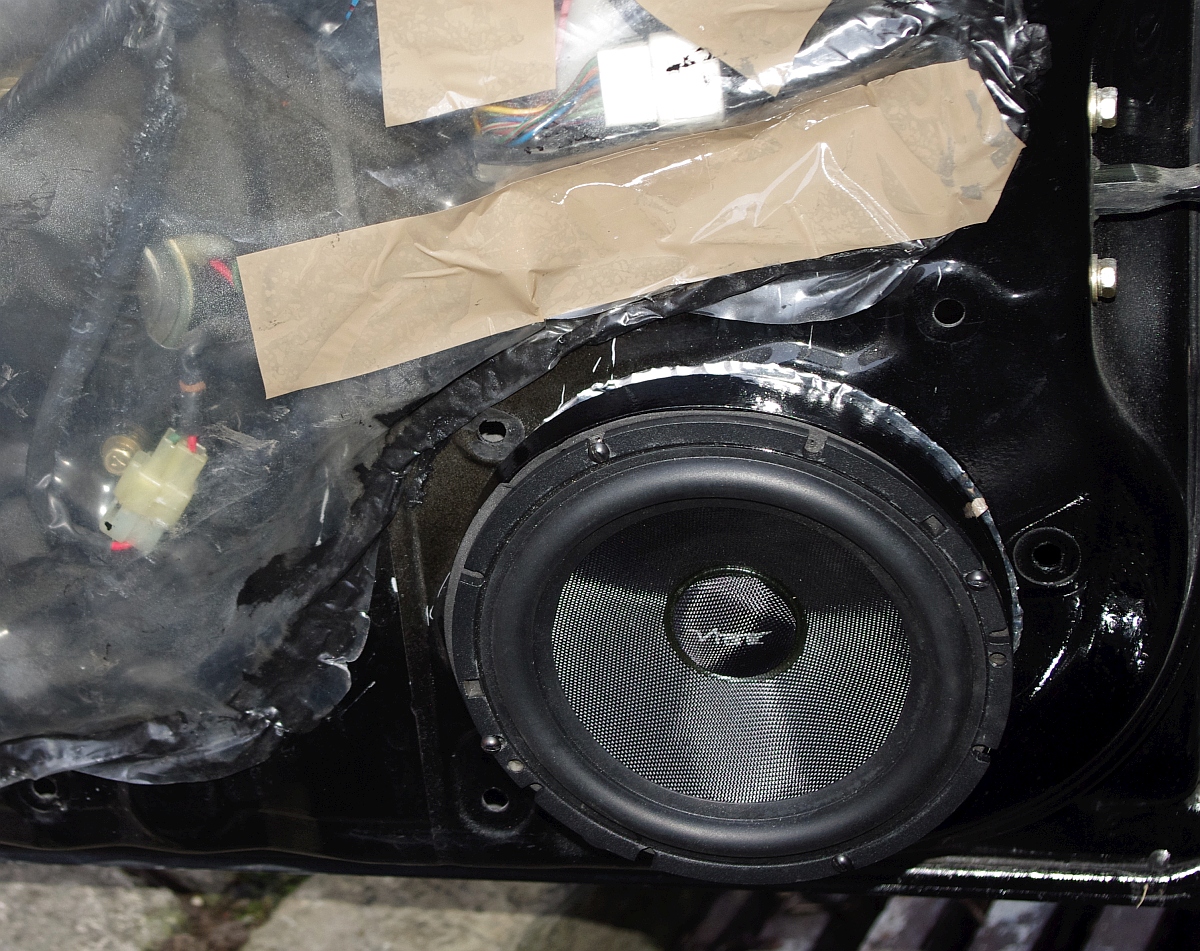
After taking the old speakers out, I started working out how best to fit the new Vibe Woofers.
These are also 6.5" diameter speakers, but have a larger magnet and require more fitting depth than the Alpines.
I wasn't keen on the idea of constructing custom mdf spacers from scratch.
So I carefully measured the required internal and external diameter and the depth of spacer required to fit the speaker in the door, whilst ensuring no major visible modifications to the door card would be needed, as I wanted to retain the stock look when everything was back in place.
Luckily I found a pair of mdf rings on eBay which looked as though they were ideal for the job.

These were finished in what appeared to be a thin coat of varnish, and had an outside diameter small enough to fit the door car, and big enough to allow me to screw the speaker down safely.
The dimensions were tight, but I felt there was a good chance that it would all work out OK.
The first job was to drill three countersunk holes to allow the spacers to be screwed to the door using the stock mounting holes.
With the spacers fixed to the doors, I then marked four suitable fixing points for the speakers, and drilled appropriate pilot holes.
The finished spacers were then treated to a healthy coat of black paint to offer a bit of protection.
Whilst that was drying, I fitted sound deadening material inside doors immediately behind the speaker position, to try to reduce any possible drumming issues.
I also used the sound deadening material to cut out
gaskets for the rings, to try to ensure a good seal between the door and the spacer.
A second layer was also added at the bottom, where the door profile falls away.

I then screwed the spacers in place, squashing the material until no gaps were visible.

That done, it was time to swap over the door looms.
But more about that later.
With the new looms in place, I started to wire up the speakers.
The old Alpines had concentrically mounted tweeters, and whilst the installation was poor, the speakers actually sounded OK.
However, I much prefer tweeters mounted in the stock position close to ear height.
I also wanted to fit Vibe Blackair component speakers as I thought they would be a
better match for the Vibe rear speakers and sub I fitted some time ago.


My aim was to make the system reliable and easy to maintain, whilst retaining the stock look.
I therefore soldered short leads on to the woofers with bullet connectors, and trimmed the leads fitted to the tweeters to an appropriate length, before again fitting bullet connectors.
The speaker feeds in the door wiring looms were was also terminated in bullet connectors.
Having wired the crossover with similar short leads and bullet connectors, I fixed them inside the door behind the woofers, using extra strong self adhesive velcro pads.
These were almost the same size as the crossovers and seem to have stuck solidly, and withstood door slamming, etc.
I used these rather than straight self adhesive pads to hopefully allow removal of the crossovers, if anything goes wrong.
When deciding where to mount the crossovers, it's obviously important to check that they don't foul the window when it's lowered.
I then fitted the supplied speaker gaskets to the spacers.

That done, I connected everything up, and screwed the woofers in place.
I fixed the tweeters to the stock brackets behind the mirrors using strong self adhesive pads, as the brackets can always be unscrewed if needs be.
After a quick check that everything was working OK, it was time to trim back the circle inside the door cards, that normally surrounds the smaller stock speaker.
Using a sharp knife I cut vertically through the circle at regular intervals, then bent the first section flat to make room to cut horizontally around the circle as tight as possible to the inner surface of the door card.
After removing any sharp edges
with wet and dry, the card looked reasonably presentable.

All that was left was to fit the door cards back on the car to cover everything up.
.
.

.
.
.
and then sit back, close the doors, and turn up the volume.
The bass now seems much tighter, with more kick when needed.
Whilst at the same time it doesn't muddy the sound on lighter material.
High level tweeters have also improved the perceived sound quality.
I'm well pleased.
Job done.
Now it's time to rewind to the swapping the door looms.
As I feared, this
turned out to be a real pain.
When I took a look at the existing door loom plugs on the driver's side I found a pair of wires from the alarm had been spliced into the loom.
Having made a note of the cable colours, I cut the wires to the alarm and fitted bullet connectors.
I then spliced two new cables with bullet connectors into the new loom.
Taking note of the existing loom's path through the door, and where it was attached, I unplugged everything and slowly pushed the loom back into the door.
Because of limited access, the hardest part was guiding the plugs past all the wiring by the fuse panel in the foot well, and through the adjacent hole.
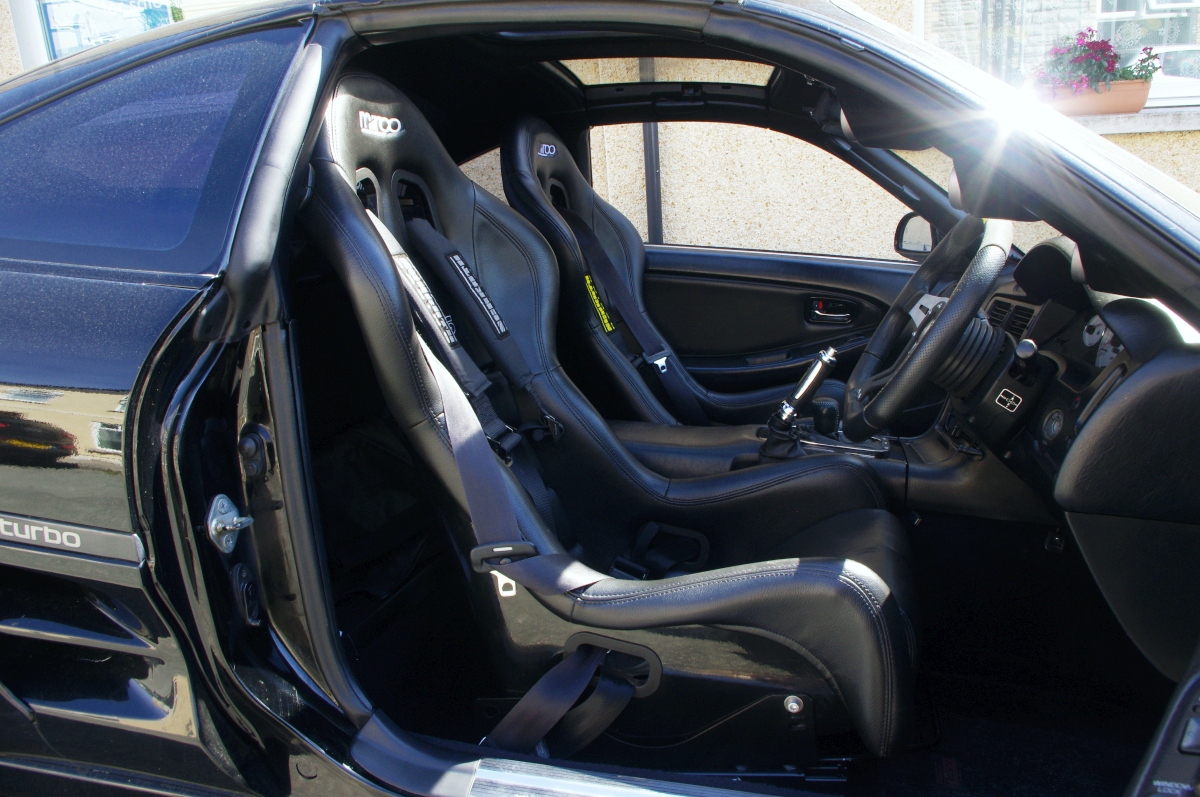
This would probably have been much easier if I had a stock seat, rather than a fixed bucket, or if I'd removed my seat before starting this job.
Some of the attachment points in the door were easy to release, others were a bit of a pig, and I was forced to resort to brute force.
Once the old loom was out, it was time to reverse, and pull the new loom through the door back into the foot well.
Getting the plugs through the hole in the foot well one at a time, again proved the trickiest part.
But I got there in the end
Having plugged everything back up, I re-attached the loom to the various fixing points in the door.
The final task on the driver's side was to install the folding mirror relay in the foot well.
It quickly became obvious that I would need to take the seat out to gain access to do this.
This probably wouldn't be necessary with a stock seat, but my bucket seat does badly restrict easy access to the foot well.
I just wish I'd removed the bucket seat at very the start, as it would have made the whole job so much easier.
Ain't hindsight a wonderful thing

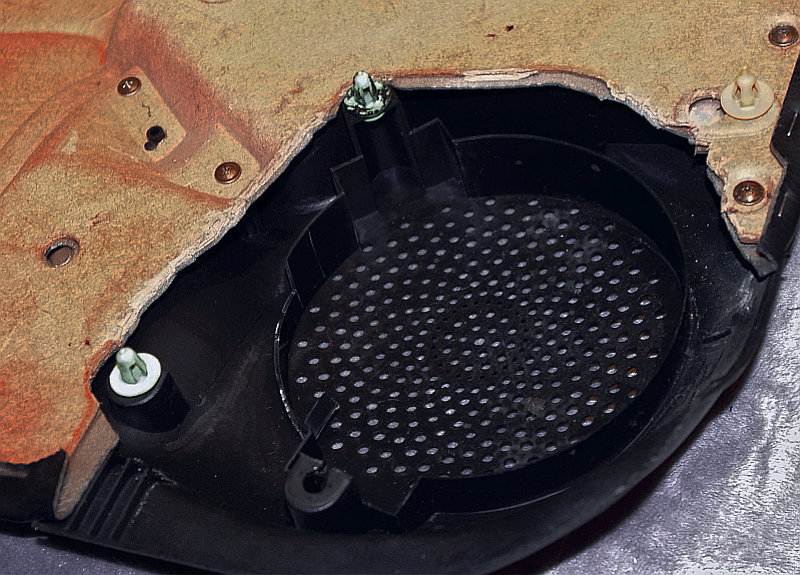
With the seat removed, I dropped the panel housing housing the fog light switch, and removed the horizontal plastic air duct.
The plug for the folding mirror relay and, the bolt to fix it to are located close to the duct for the right hand air outlet.
I'm afraid I forgot to take a photo of this when everything was removed, but you can just about see the black folding mirror relay on this photo which was taken when everything was back in place.

Fortunately the passenger seat is currently stock, which made swapping the door loom that side much easier.
But during the jiggling to get the new loom plugs back into the foot well, a large gray connector dropped into view.
The obvious question I now faced was, had I accidentally managed to disconnect something, or was this just an unused connector I'd disturbed.

Having had a good look around I couldn't see anything it ought to be plugged into, so for the time being pressed on.
With the new loom in place and everything reconnected, I started to check all the electrics were working correctly.
All was well until I shut the door and the speaker suddenly cut out.
When I opened the door it then started working again.
I checked all the audio connections inside the door, no problems there.
This seemed to suggest there was a problem with the speaker wiring in the loom I'd just fitted.
What a pain.
After much cussing and a few cuts on my hands, I eventually managed to pull a new pair of wires through the rubber tube between the door and the car, using a flat spring cable puller.
Having spliced these into the correct wires at the plug end, and connected the new wires to the crossover, all was well.
But there remained nagging doubts about the
"spare" gray connector, so I decided to take out the glove box to double check the matching socket wasn't dangling behind there, unloved.
You can also see the bullet connectors used to join the new red and blue speaker wires to the loom plug wiring in the following photo.

At first I thought I'd found something, but on closer inspection the two connectors didn't match.
So reassured I put everything back together and refitted the plastic sheets on the door.
These weren't in the best of shape and needed patching in several places.
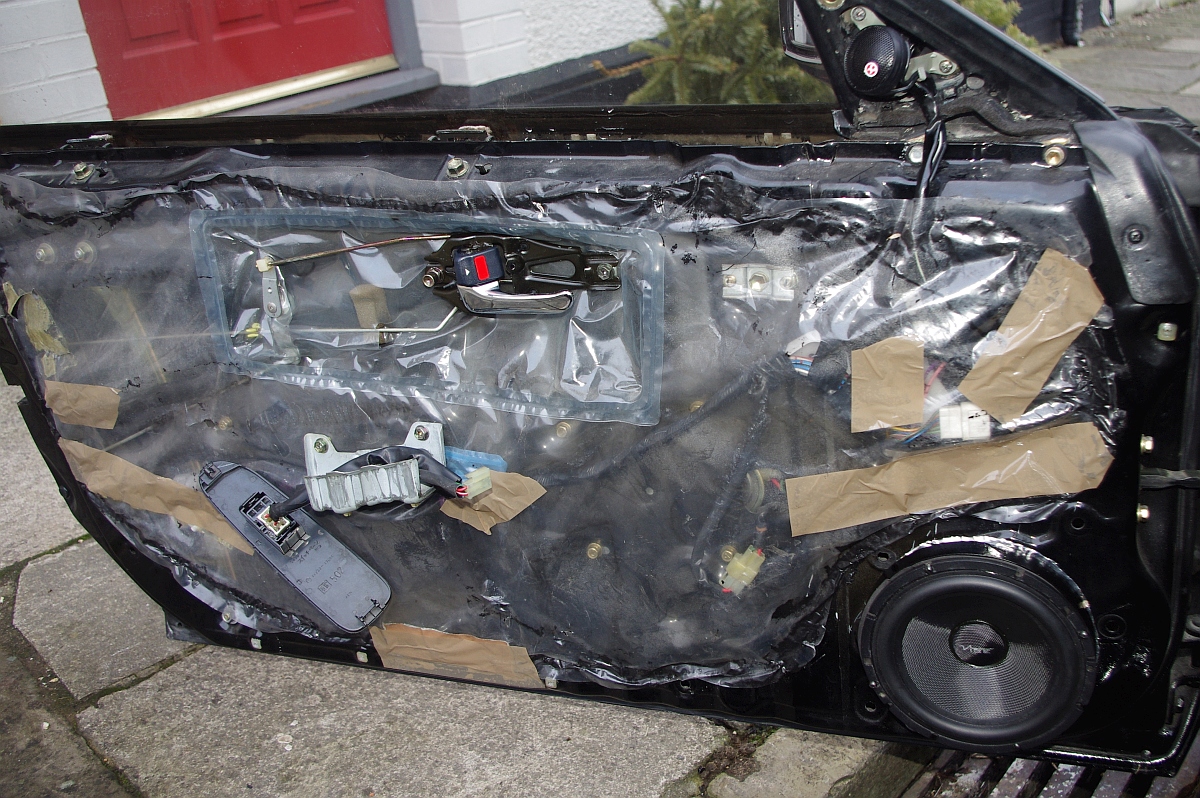
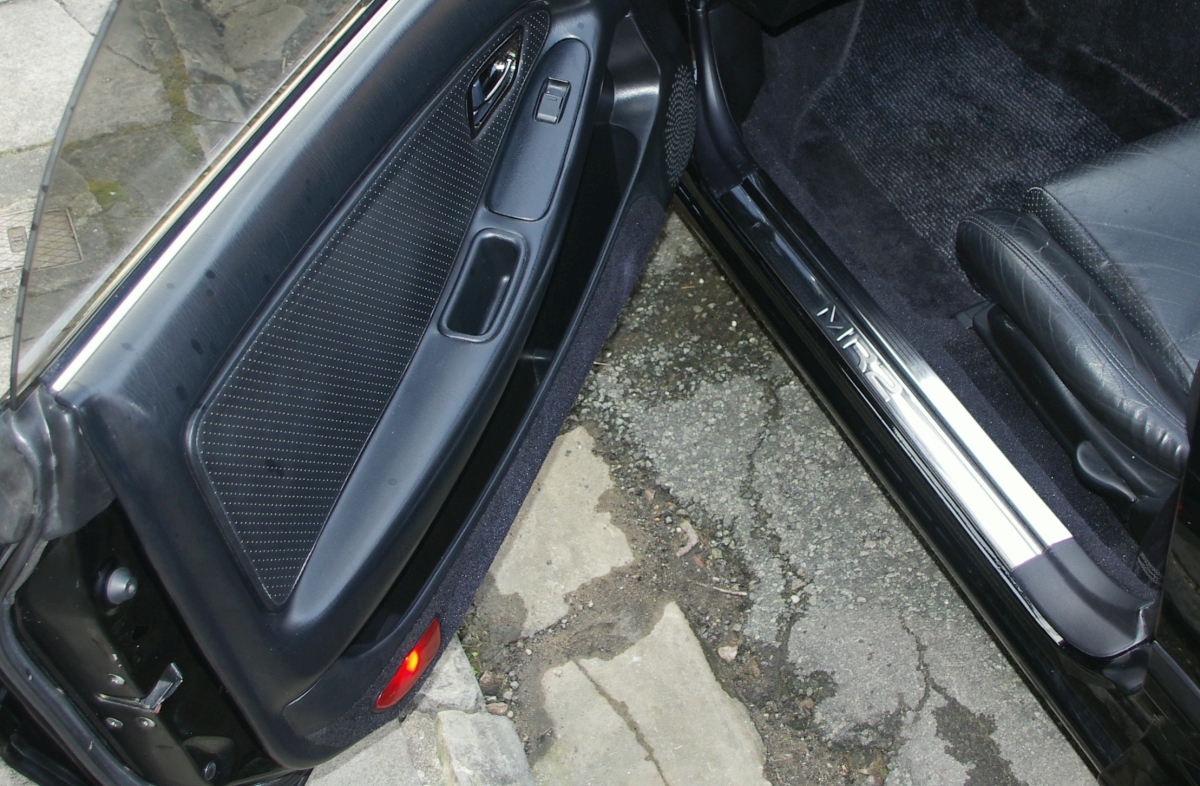
As you can see in this last shot, I've also replaced both inside door handles with chrome ones.
A bit of bling never did anyone any harm.
The car is currently due to return to the body shop on Monday to have the Autopista spoiler fitted, and the issues with the paint finish on the inside door sills and rear bumper sorted out.
Hopefully I'll have it back by the following weekend.
Paul