Mk1b restoration... its alive..and painted!!
Moderators: IMOC Moderators, IMOC Committee Members
Re: Mk1b restoration... its alive..and painted!!
nice work, lot of time spending this MK!  LIKE
LIKE 
-
boondougal
- Posts: 520
- Joined: Sun Jul 10, 2005 9:48 am
- Location: Shavington (near Crewe)
Re: Mk1b restoration... its alive..and painted!!
My garage is joined to my neighbours and chatting over the garden fence the other day he asked if i was planning on doing any more sanding... obviously i had already teed them up re the noise but actually that didn't bother them... it appears the dust has travelled through to their garage and deposited a nice coating on everything... oops!
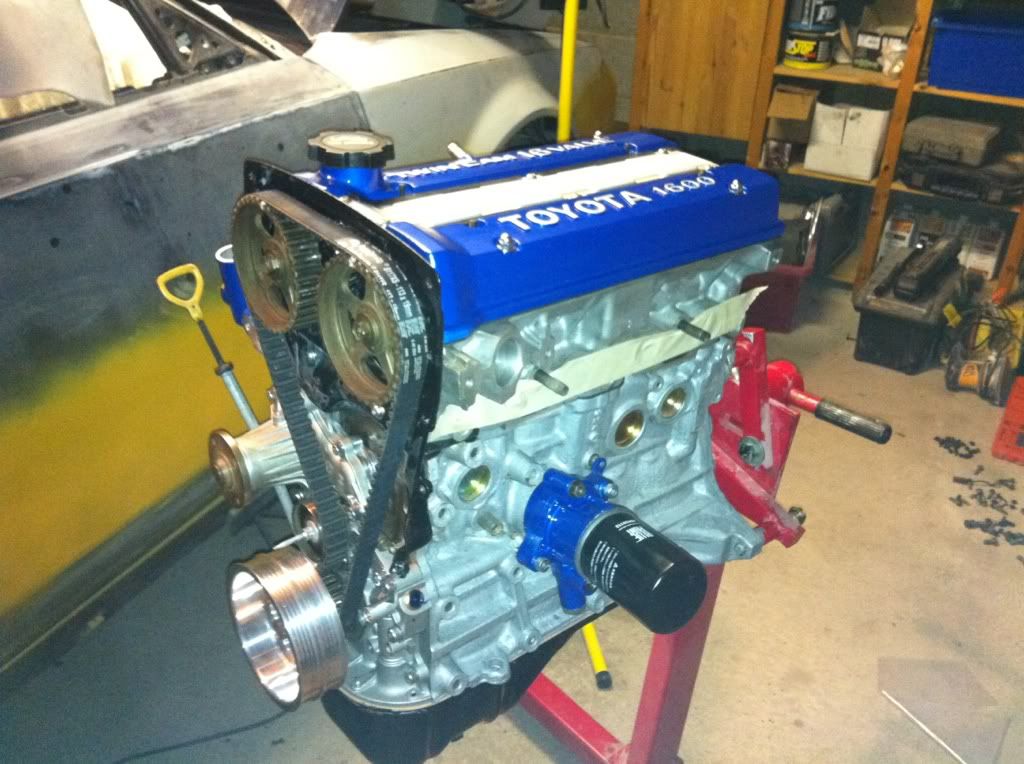
Well i was getting bored of body work anyway so i decided to start the engine rebuild.
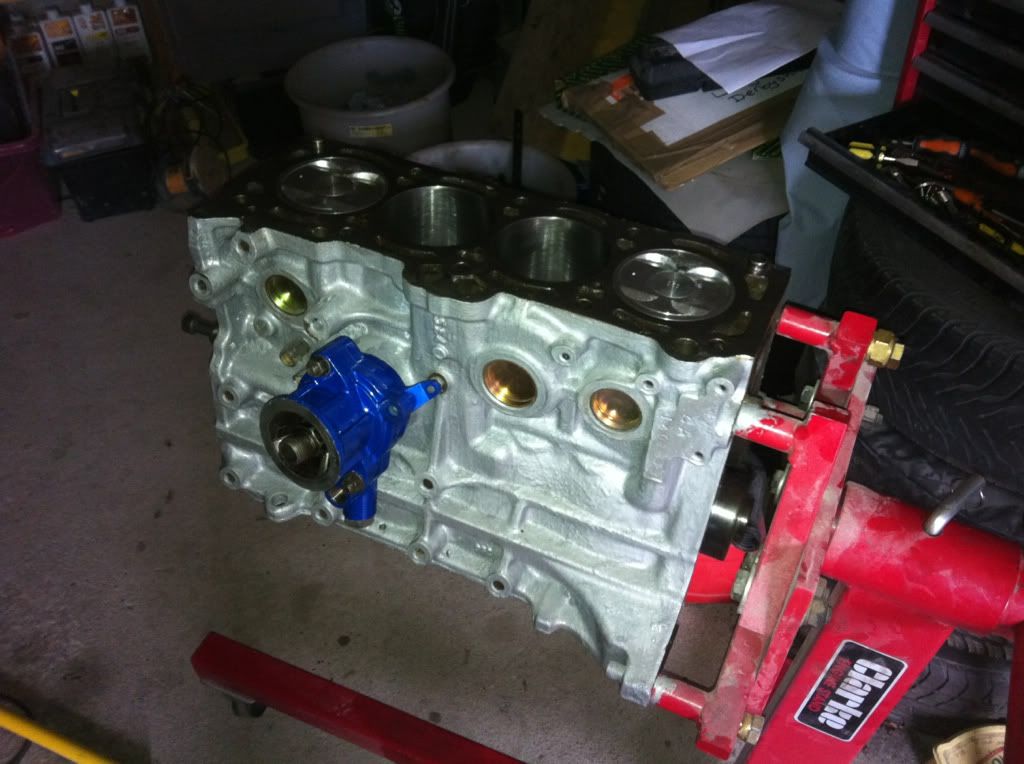
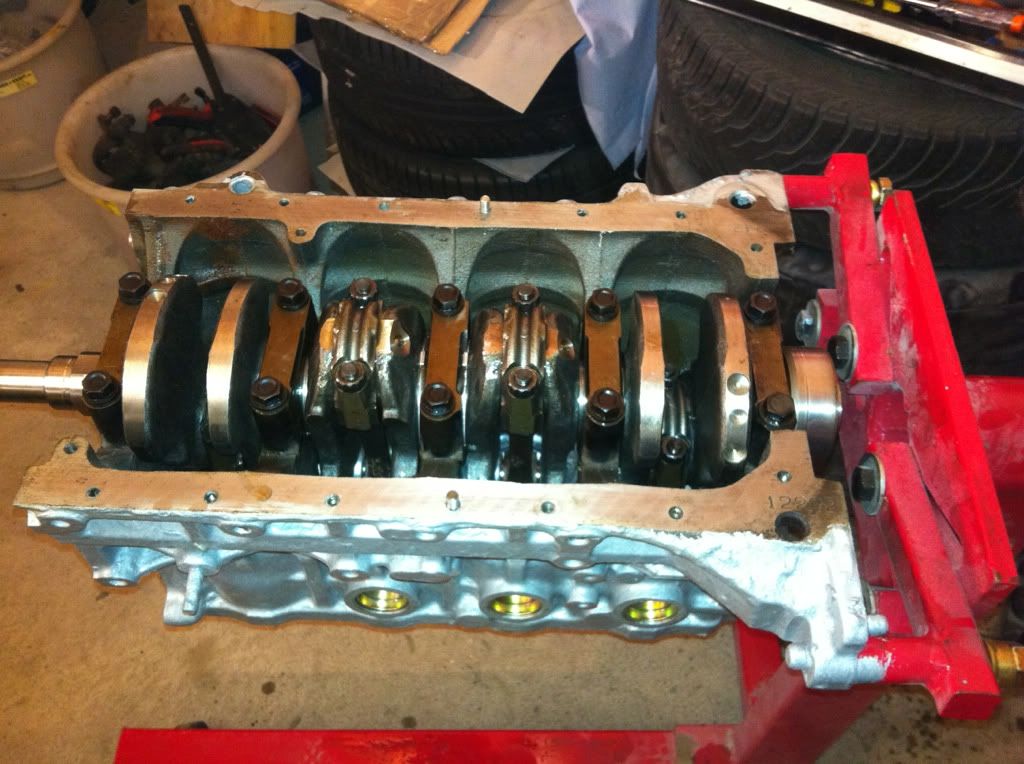
all the bottom end is in and torqued up, all tolerances checked with plastigauage. Main bearings were perfect, rod caps were close to the limit for standard tolerance but should be fine. 49nm torque feels like nothing when tightening the rod cap nuts... always tempted to give them another tweek.
Today i sourced a load of nuts bolts and washers, some steel plate/ angle and rod for fitting the front bumper and my rubber trim for the side skirts.
Tonight i have fitted the new water pump, new oil pump, clutch side oil seal as well as the oil filter thing in the sump. I get some pics tomorrow.
Well i was getting bored of body work anyway so i decided to start the engine rebuild.
all the bottom end is in and torqued up, all tolerances checked with plastigauage.
Today i sourced a load of nuts bolts and washers, some steel plate
Tonight i have fitted the new water pump, new oil pump, clutch side oil seal as well as the oil filter thing in the sump.
-
Lauren

- IMOC Committee
- Posts: 38632
- Joined: Mon Dec 13, 2004 5:37 pm
- Location: Greater Manchester
- Contact:
Re: Mk1b restoration... its alive..and painted!!
Looks like a nice job there. 
2020 GR Yaris - Circuit Pack 
-
boondougal
- Posts: 520
- Joined: Sun Jul 10, 2005 9:48 am
- Location: Shavington (near Crewe)
Re: Mk1b restoration... its alive..and painted!!
well i have been spending a little more time building the engine up..
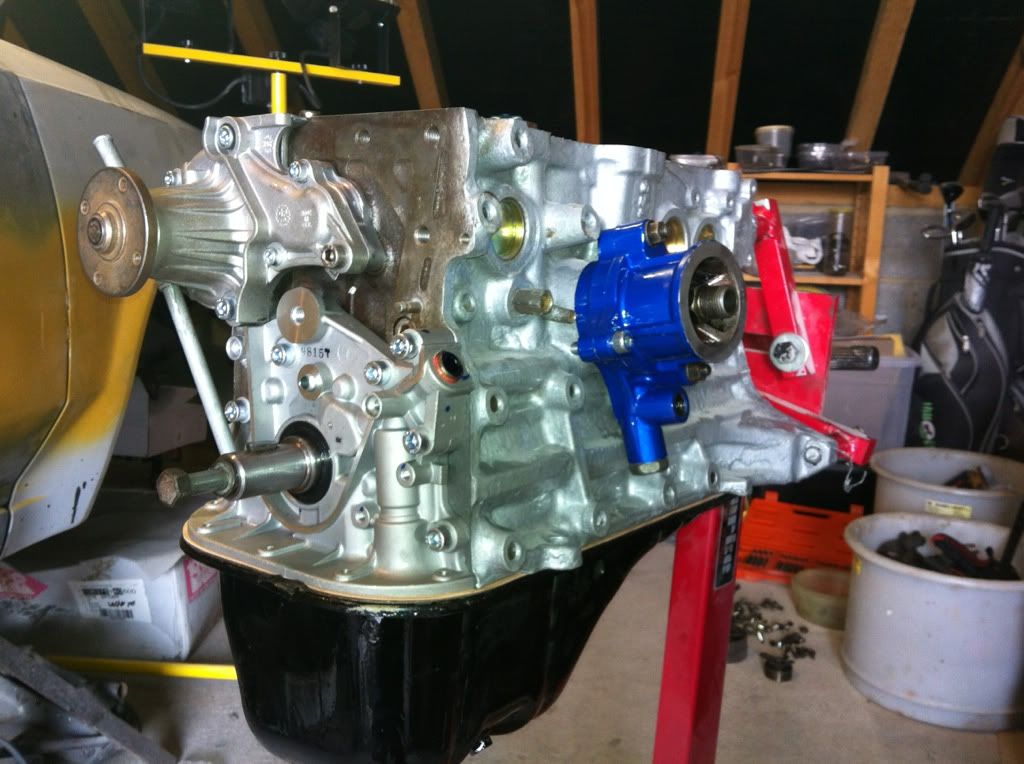
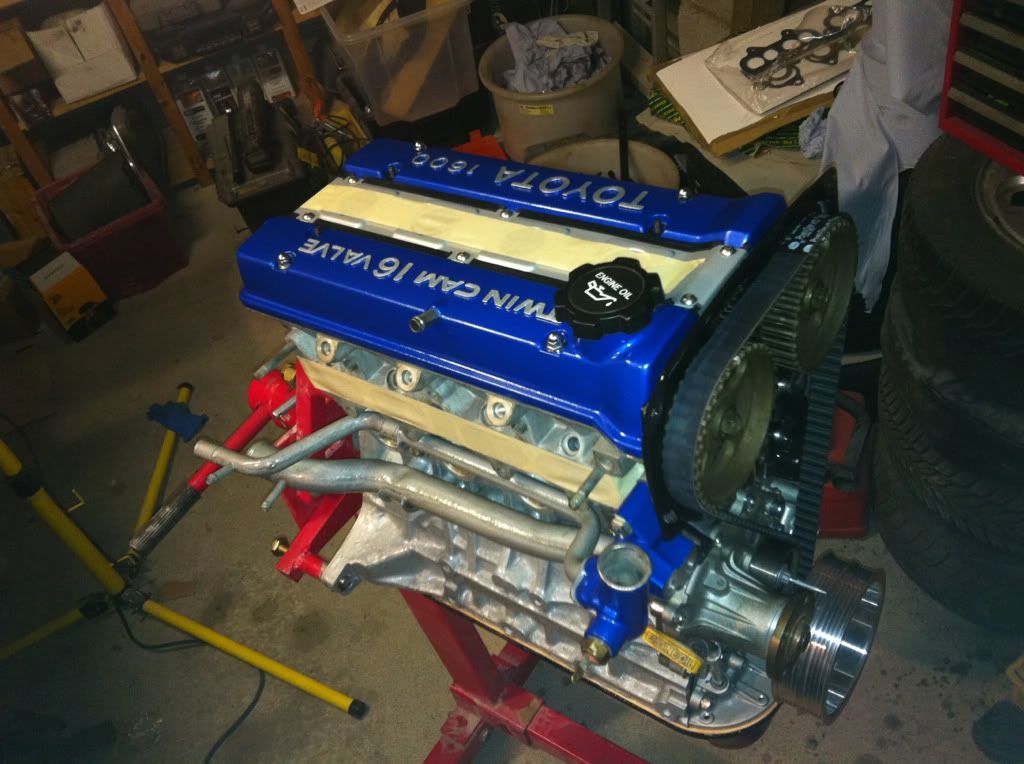
I have to admit i am not 100% confident that i have the timing right, the new pulley has no marks on it, the best i can see are these marks on crank timing belt pulley..
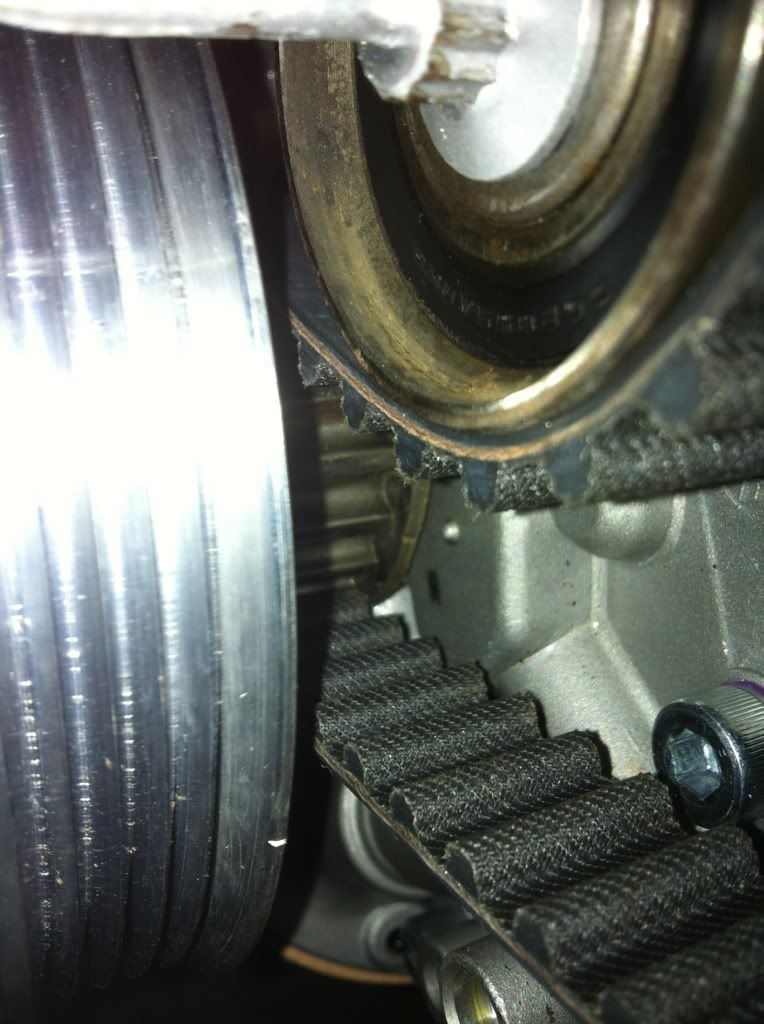
i set the Pistons to TDC before torquing up the head and i am hoping i set the cams correct, doing 2 full turns off the crank puts the timing marks on he cam pulleys back where they are supposed to be so i think its ok... any other ways of me checking.....
the other annoying thing was the washers for the cam covers... can someone confirm if these are the right things..... they don't seem to be even close to the right size.
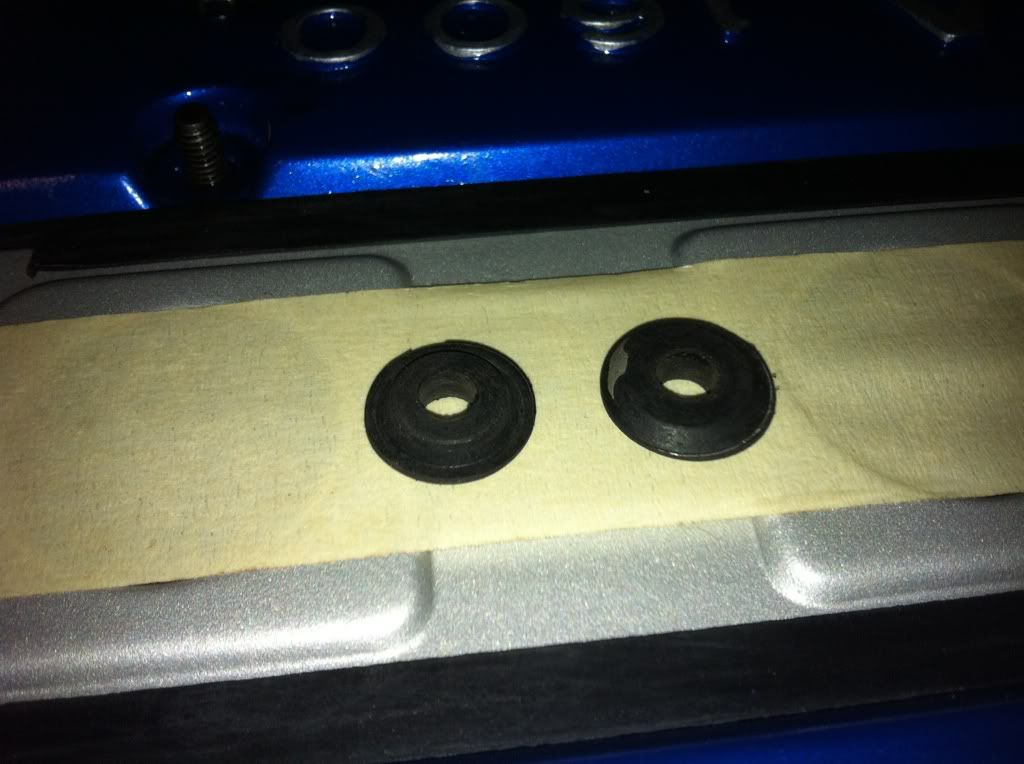
I assume they go under the dome nuts..and not inside the cam cover
I have to admit i am not 100% confident that i have the timing right, the new pulley has no marks on it, the best i can see are these marks on crank timing belt pulley.
i set the Pistons to TDC before torquing up the head and i am hoping i set the cams correct, doing 2 full turns off the crank puts the timing marks on he cam pulleys back where they are supposed to be so i think its ok.
the other annoying thing was the washers for the cam covers.
I assume they go under the dome nuts.
-
Lauren
- IMOC Committee
- Posts: 38632
- Joined: Mon Dec 13, 2004 5:37 pm
- Location: Greater Manchester
- Contact:
Re: Mk1b restoration... its alive..and painted!!
Yep under the dome type nuts. They are supposed to be of the use once variety.
Have to say youre engine looks lovely. My quick rebuild is unfortunately of the have no time and no budget but it's a temporary fix really.
Have to say youre engine looks lovely.
2020 GR Yaris - Circuit Pack
Re: Mk1b restoration... its alive..and painted!!
Looks right to me. Personally I would copy the pulley marks from the original otherwise you'll struggle to do the ignition timing later on.
-
boondougal
- Posts: 520
- Joined: Sun Jul 10, 2005 9:48 am
- Location: Shavington (near Crewe)
Re: Mk1b restoration... its alive..and painted!!
well its years of collecting bit that have made it possible:
New:
Water pump
Oil pump
0.5 oversized pistons
crank balanced
shells
full seal kit
thermostat
Head professionally rebuilt, valves re ground and lapped in, new valve seals
Block decked and 0.5 overbored, new core plugs
most bolts will be new
Great idea on transferring the marks.....
New:
Water pump
Oil pump
0.5 oversized pistons
crank balanced
shells
full seal kit
thermostat
Head professionally rebuilt, valves re ground and lapped in, new valve seals
Block decked and 0.5 overbored, new core plugs
most bolts will be new
Great idea on transferring the marks.
-
boondougal
- Posts: 520
- Joined: Sun Jul 10, 2005 9:48 am
- Location: Shavington (near Crewe)
Re: Mk1b restoration... its alive..and painted!!
Those washers do not even come close to fitting in the recess... stupid things
-
Lauren
- IMOC Committee
- Posts: 38632
- Joined: Mon Dec 13, 2004 5:37 pm
- Location: Greater Manchester
- Contact:
Re: Mk1b restoration... its alive..and painted!!
boondougal wrote:Those washers do not even come close to fitting in the recess.
The crush washers just fit on top, then just put the dome nuts over that.
2020 GR Yaris - Circuit Pack
Re: Mk1b restoration... its alive..and painted!!
They don't look right to me. the proper ones are usually a metal washer with the rubber part bonded to them.
-
boondougal
- Posts: 520
- Joined: Sun Jul 10, 2005 9:48 am
- Location: Shavington (near Crewe)
Re: Mk1b restoration... its alive..and painted!!
i have to admit i'm not convinced...
-
Lauren
- IMOC Committee
- Posts: 38632
- Joined: Mon Dec 13, 2004 5:37 pm
- Location: Greater Manchester
- Contact:
Re: Mk1b restoration... its alive..and painted!!
boondougal wrote:i have to admit i'm not convinced.
Are the ones you have from Toyota?
Ah, looking at those black rubber things, as Phil suggests they are definitely not the correct ones.
If not just order a set from them, I changed mine recently, from what I recall they were black rubber with a white plastic top that went under the dome nut.
2020 GR Yaris - Circuit Pack
-
boondougal
- Posts: 520
- Joined: Sun Jul 10, 2005 9:48 am
- Location: Shavington (near Crewe)
Re: Mk1b restoration... its alive..and painted!!
there not from Toyota, part of a gasket set i have.
I think it might have to be a trip to toyota...
I think it might have to be a trip to toyota.
-
boondougal
- Posts: 520
- Joined: Sun Jul 10, 2005 9:48 am
- Location: Shavington (near Crewe)
Re: Mk1b restoration... its alive..and painted!!
just ordered them from Toyota.. £1 each!
collect today at 2:30 which i thought was good.
collect today at 2:30 which i thought was good.
-
boondougal
- Posts: 520
- Joined: Sun Jul 10, 2005 9:48 am
- Location: Shavington (near Crewe)
Re: Mk1b restoration... its alive..and painted!!
picked up the washers from toyota and they are nothing like the ones that i got in my gasket kit...

the toyota ones are on the left...
the toyota ones are on the left.
-
Lauren
- IMOC Committee
- Posts: 38632
- Joined: Mon Dec 13, 2004 5:37 pm
- Location: Greater Manchester
- Contact:
Re: Mk1b restoration... its alive..and painted!!
Sometimes it's worth using Toyota parts.
2020 GR Yaris - Circuit Pack
-
boondougal
- Posts: 520
- Joined: Sun Jul 10, 2005 9:48 am
- Location: Shavington (near Crewe)
Re: Mk1b restoration... its alive..and painted!!
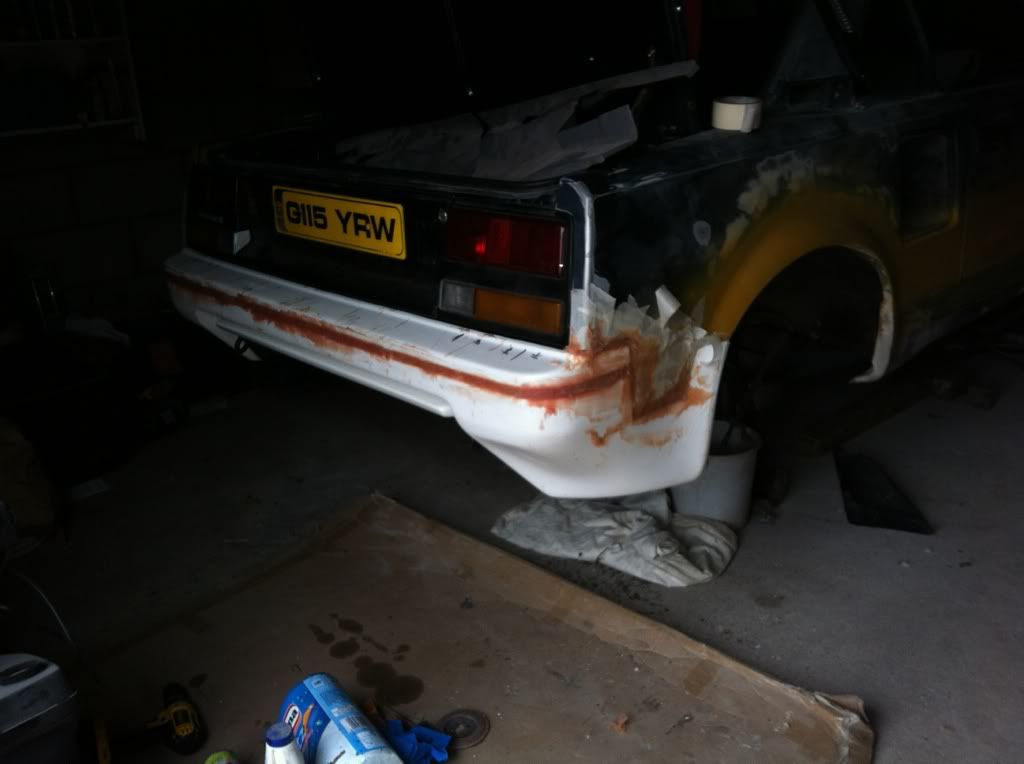
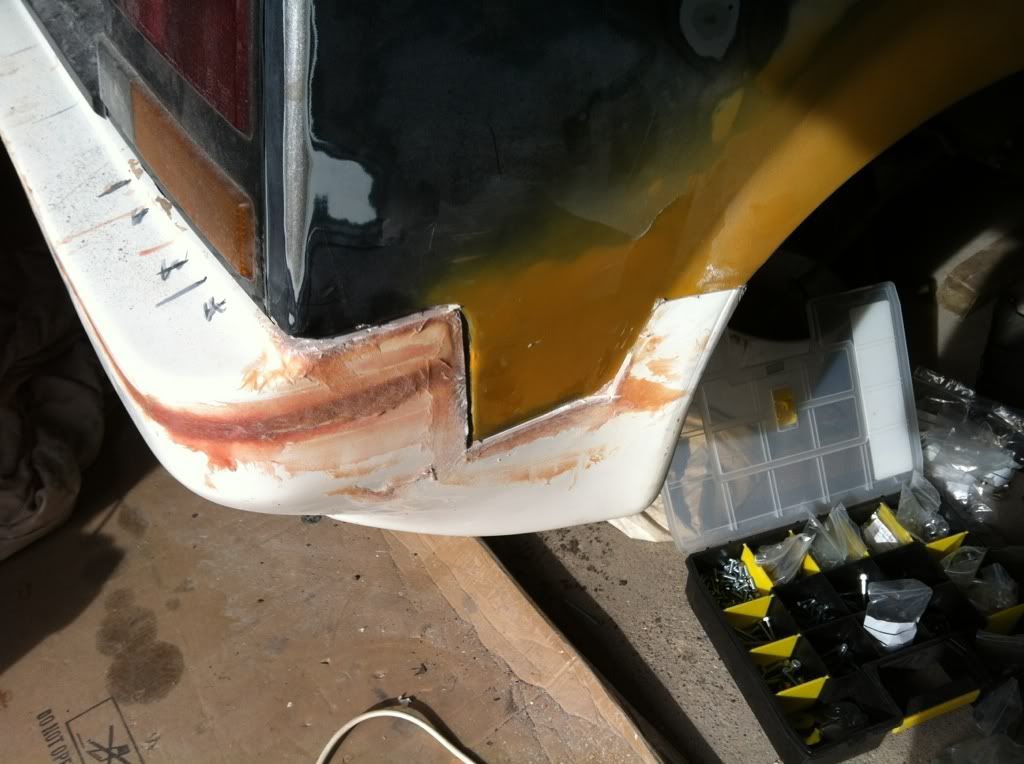
Did some work on getting the bumpers secured today.
The rear bumper is very well secured to the bumper bar...
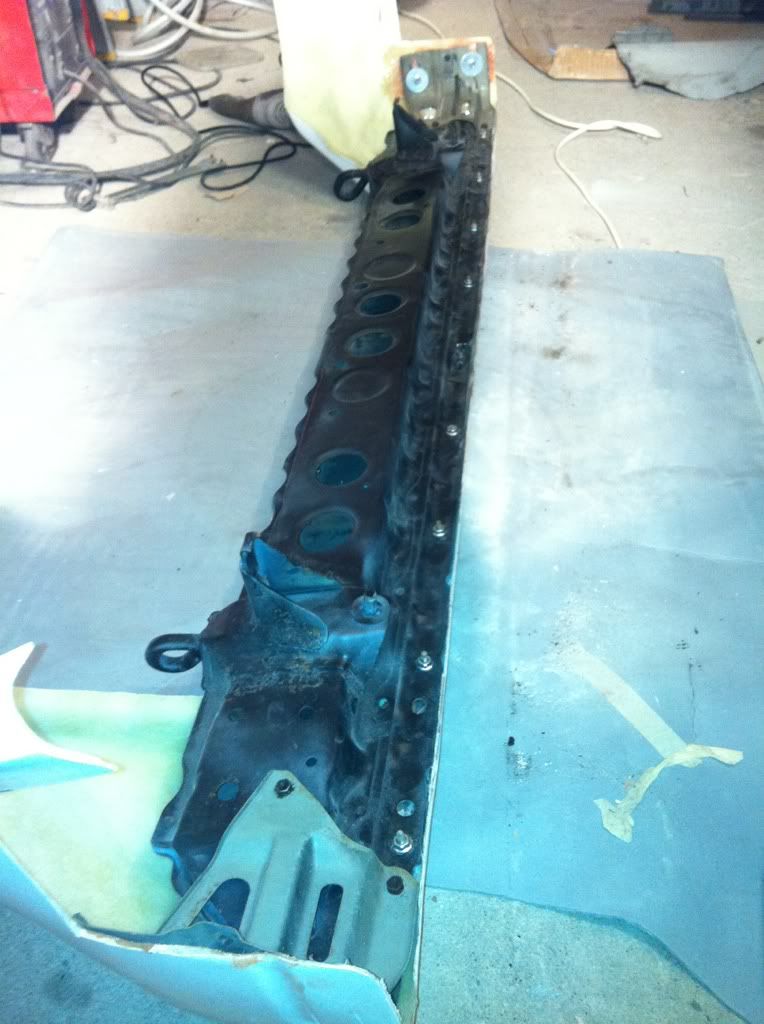
I have used some ally pieces underneath into the original mounting holes.
Once mounted to the car it feels rock solid and lines lotslot better with the arch, still alot to do to get it looking right but in term of getting it secured to the car properly then I was v happy.
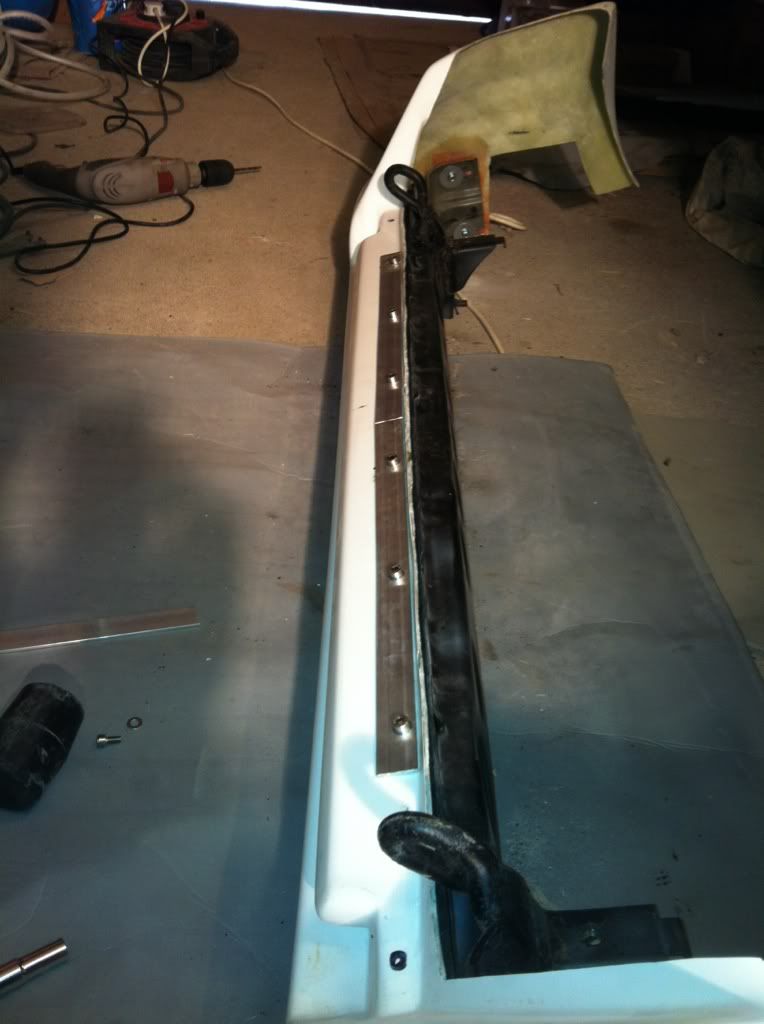
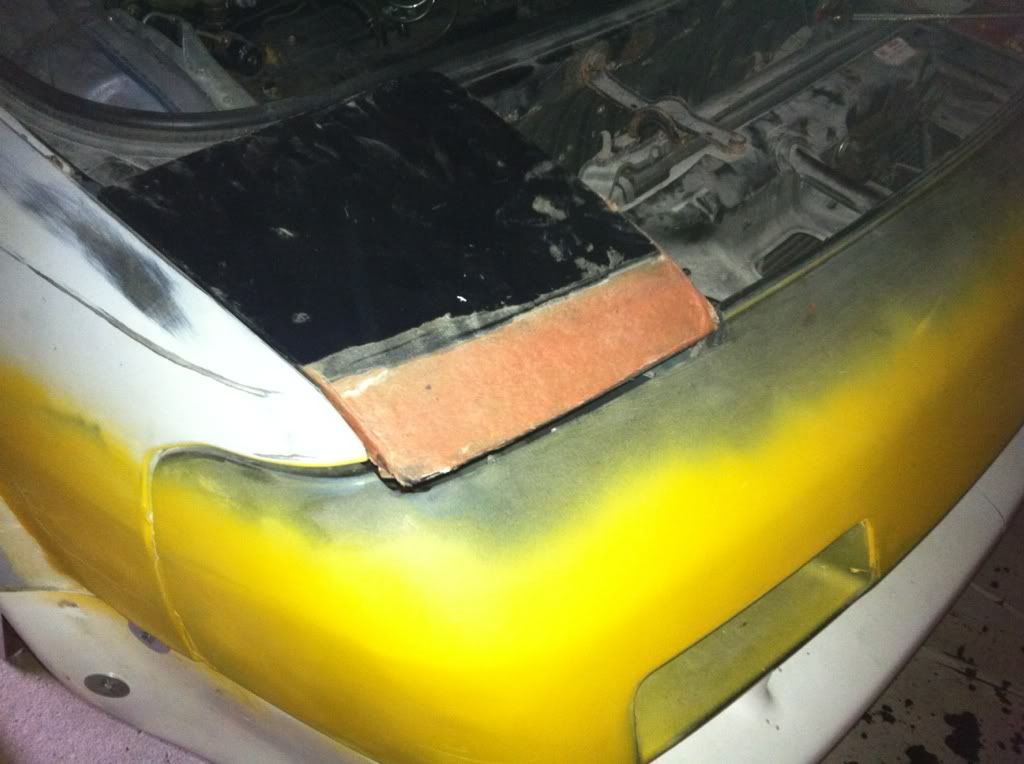
I then turned my attention to the front.
Credit to nic on TB as I have used his basic idea from his zombie thread..
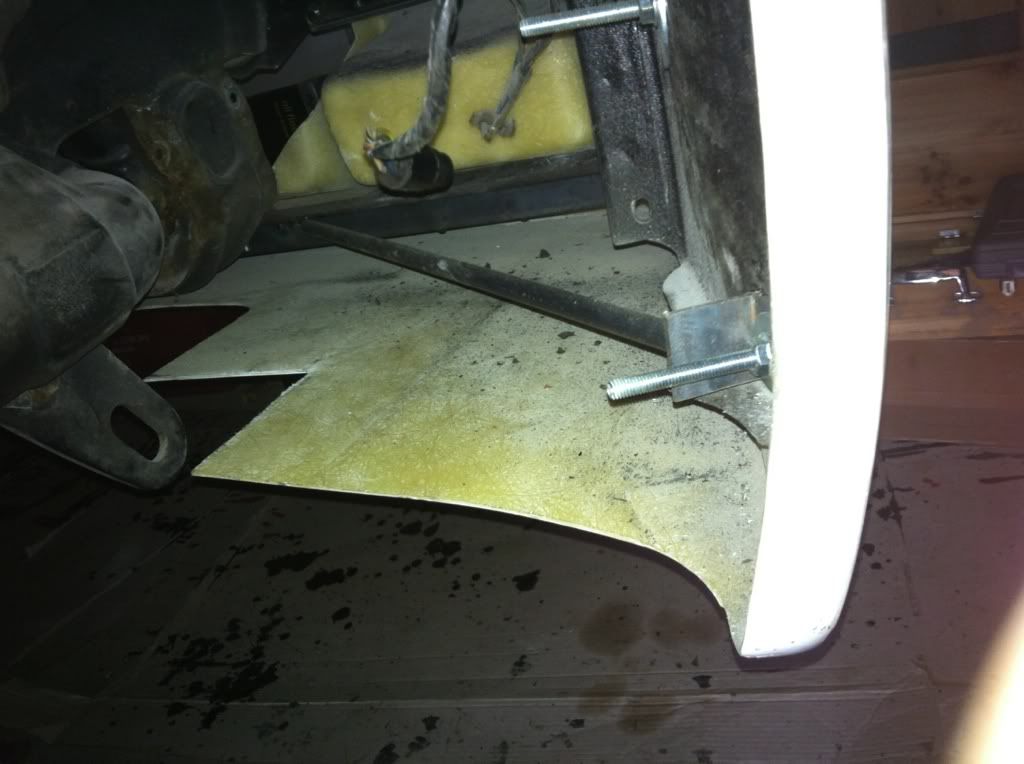
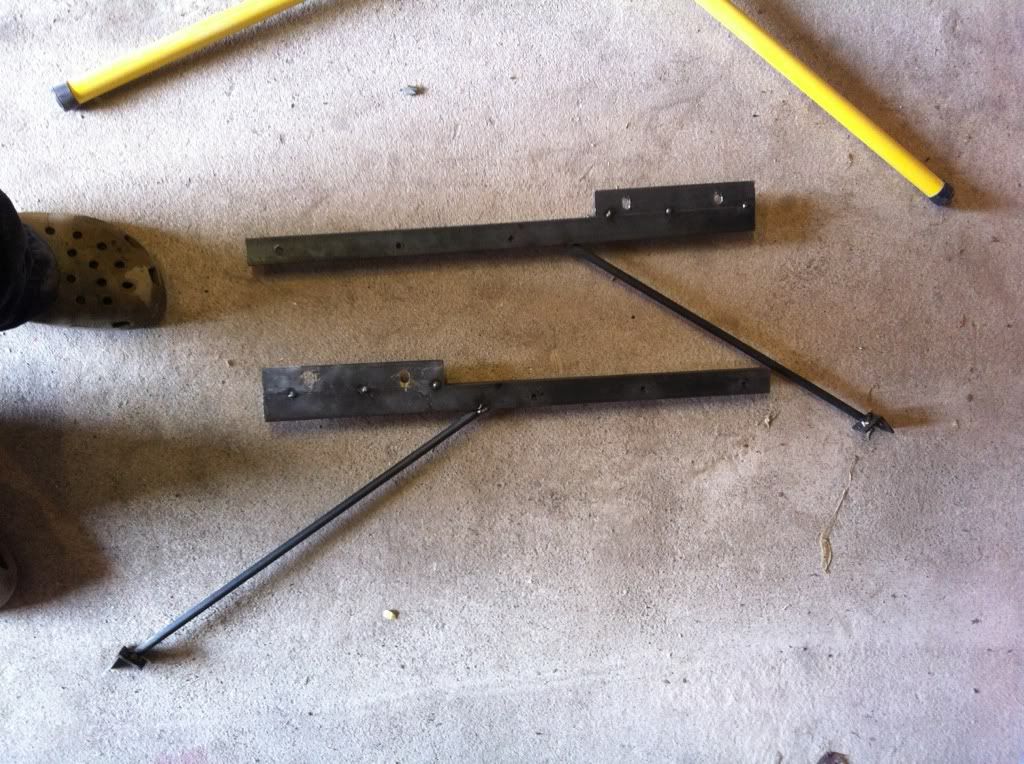
Using angle iron I made a platform for the bumper to rest on, the front recesses sit on the wider section, I could have welded it in but I took advantage of existing holes in the radiator frame, the only mod I had to do was grind a lip off the radiator frame.
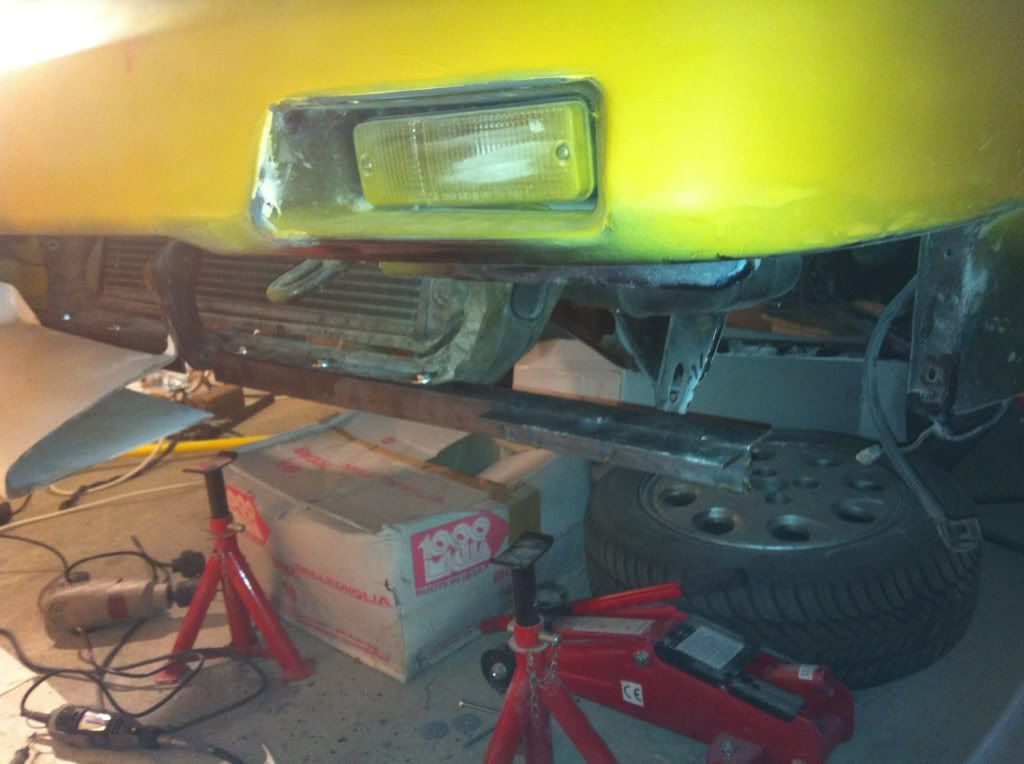
Most people know that the bumper was originally designed for a 1a so it's not a perfect fit for the 1b nose. I decided I wanted to make it a more uniform fit sat back under the nose, in order to do this I have taken about an inch out of the middle. It will need a little more as well I think.
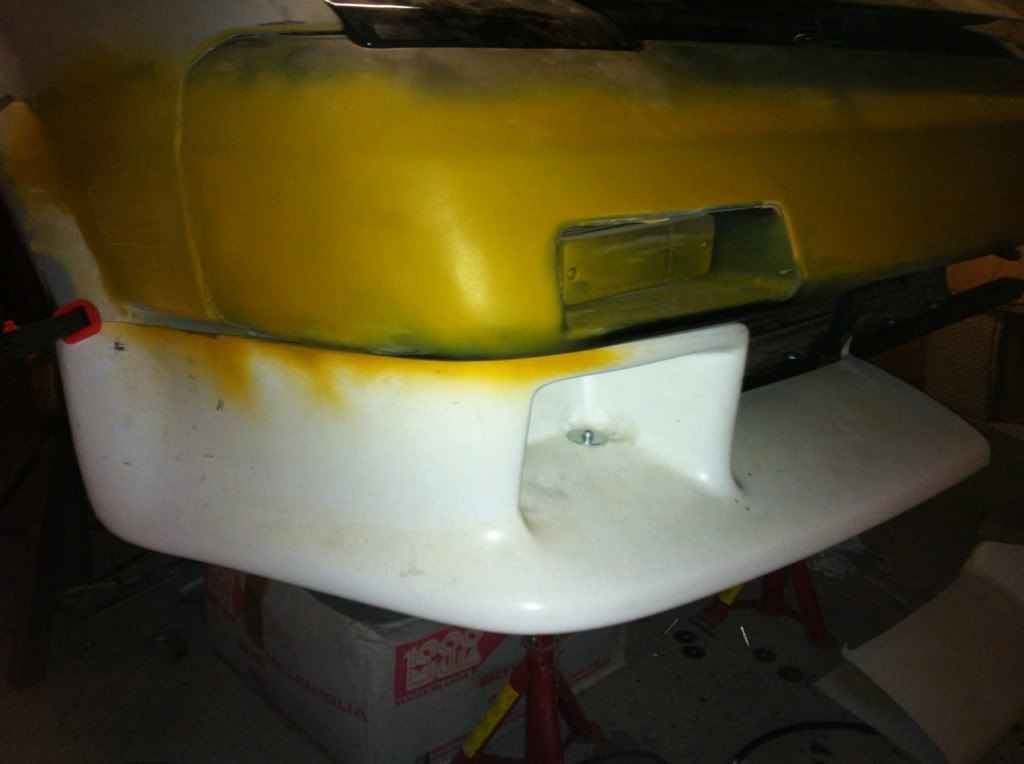
I will be welding nuts to the frame/ bar that I made, the bumper will have some steel plate bonded to the back of the bottom of the recess and some counter sunk bolts used to hold it in place but keep the fixing flush.
For now I have just held it in place with the fist bolt that came to hand.
I have to say though I was pleased with the way it started to come together.
The rear bumper is very well secured to the bumper bar.
I have used some ally pieces underneath into the original mounting holes.
Once mounted to the car it feels rock solid and lines lotslot better with the arch, still alot to do to get it looking right but in term of getting it secured to the car properly then I was v happy.
I then turned my attention to the front.
Credit to nic on TB as I have used his basic idea from his zombie thread.
Using angle iron I made a platform for the bumper to rest on, the front recesses sit on the wider section, I could have welded it in but I took advantage of existing holes in the radiator frame, the only mod I had to do was grind a lip off the radiator frame.
Most people know that the bumper was originally designed for a 1a so it's not a perfect fit for the 1b nose.
I will be welding nuts to the frame/ bar that I made, the bumper will have some steel plate bonded to the back of the bottom of the recess and some counter sunk bolts used to hold it in place but keep the fixing flush.
For now I have just held it in place with the fist bolt that came to hand.
I have to say though I was pleased with the way it started to come together.
Re: Mk1b restoration... its alive..and painted!!
more pics of the front bumper after you are done with fitting please 
a guy on TwoBrutal has removed 4cm from mid-bumper to get it right. i am going to do it in similiar way but i am scared of all the brackets and mounting points i will have to fabricate 

i wonder if anyone gets them in one piece
a guy on TwoBrutal has removed 4cm from mid-bumper to get it right.
i wonder if anyone gets them in one piece
-
boondougal
- Posts: 520
- Joined: Sun Jul 10, 2005 9:48 am
- Location: Shavington (near Crewe)
Re: Mk1b restoration... its alive..and painted!!
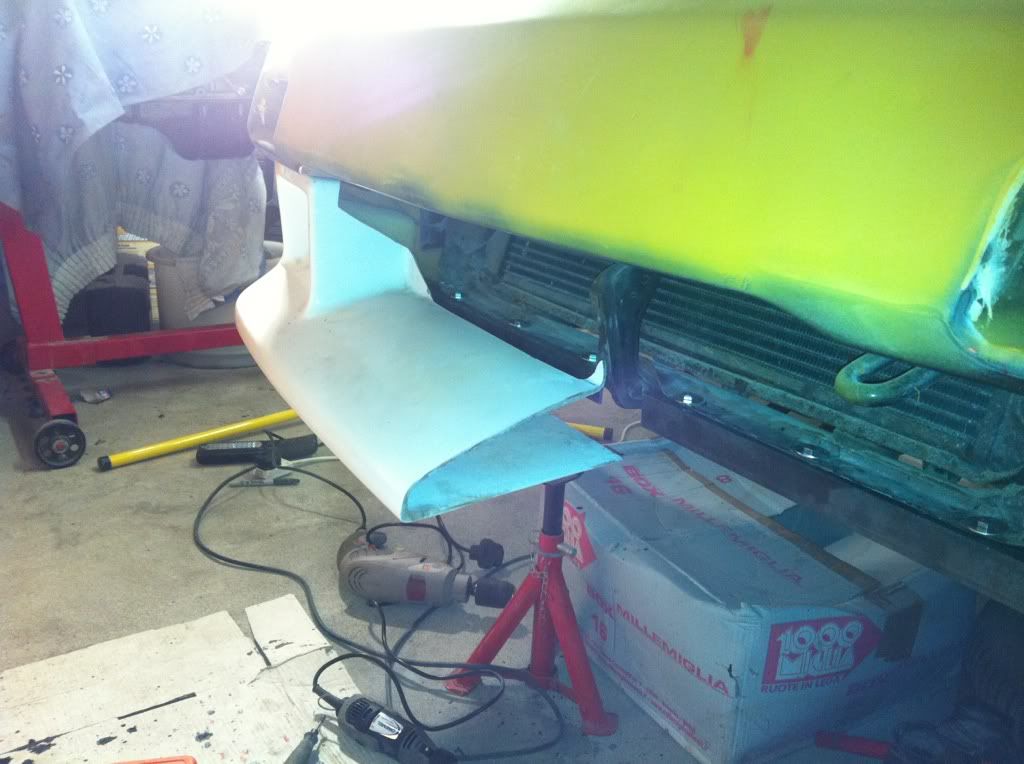
well i have been doing a few bits on the car...
Spent a fair bit of time getting the front as close to right as i am capable, its mainly just been about how to secure it most sensibly really,
Well this is what i currently have:
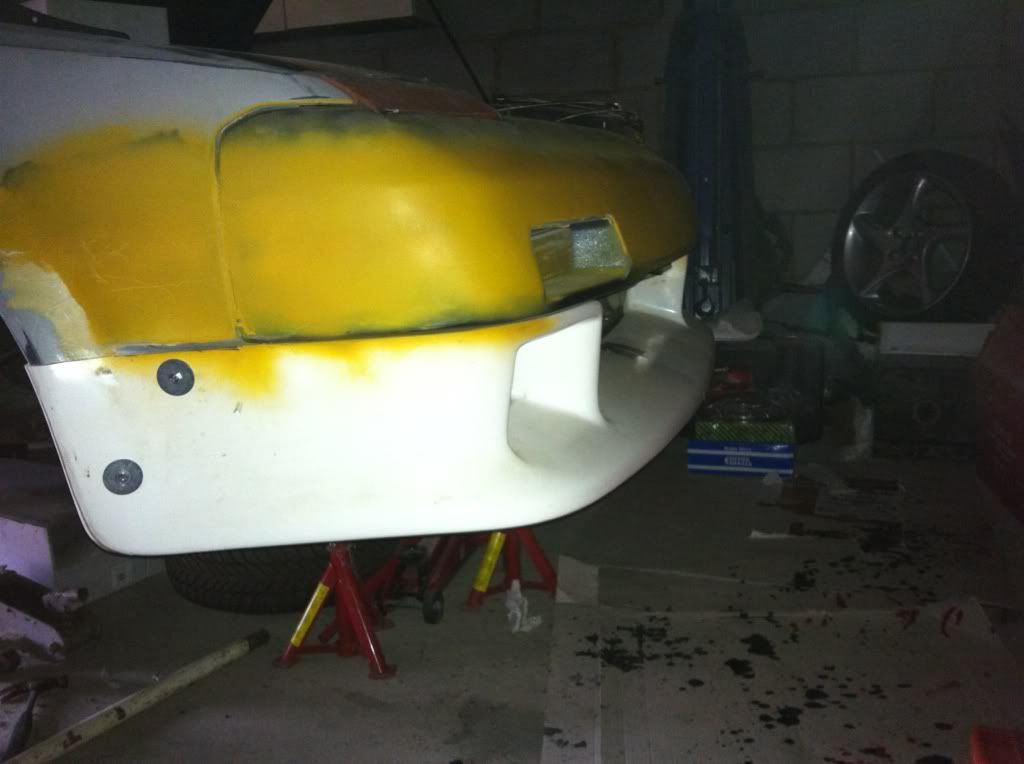
Obviously not the finished article but seems solid as a rock and is just about in the right place and symmetrical- ish
I appreciate that bolting it on from the outside is a bit crude and i think if i would do it again then i would maybe bond bolts onto the inside of the bumper but once i take the bumper off all the holes will be reinforced with a backing plate and all the bolts will be flush fitting countersunk Alan key jobs that i think will look good. I have a few weld nuts to add to the frame to make it easier for removal and fitting and obviously a fair bit of fibrel-ing to do but on the whole i am please with it.
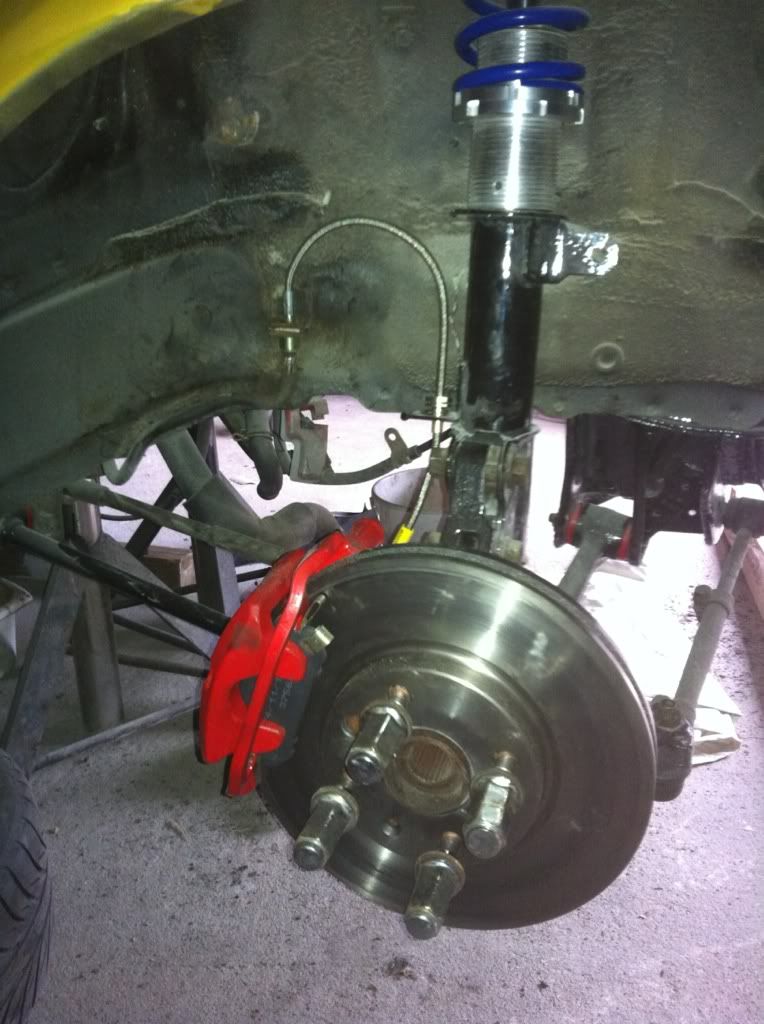
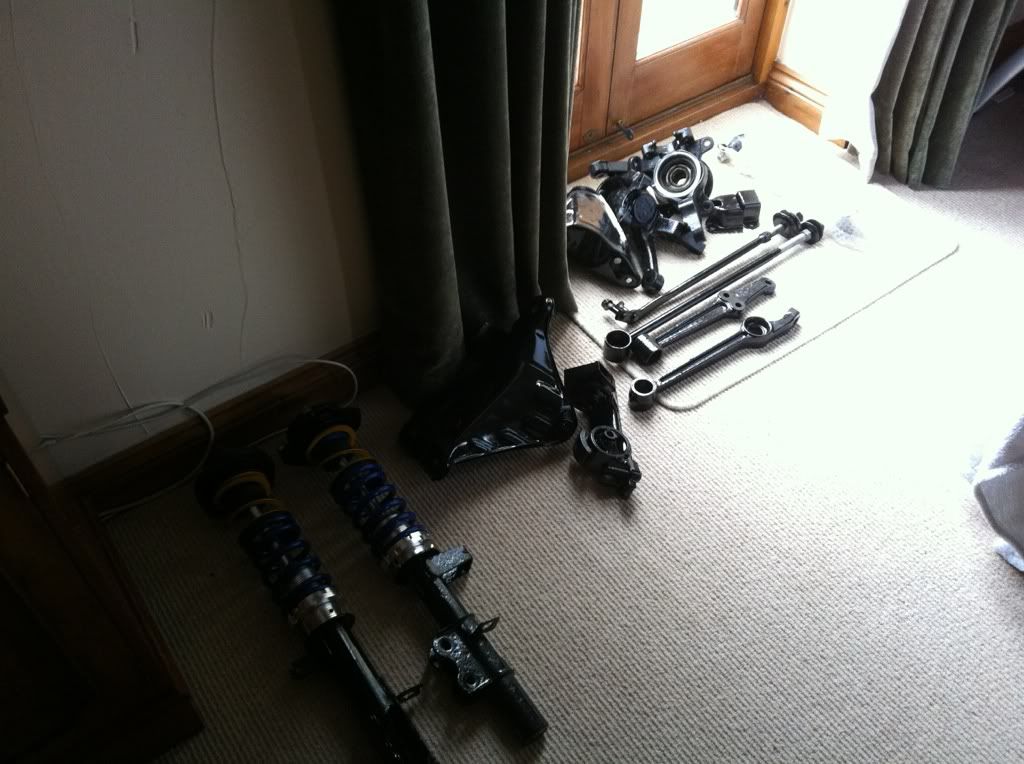
I finished refurbing the brakes- great thanks to a memeber on another site for lending me the rear calliper SST...
Fitted the corsa discs and then the braided hose line.. Just 3 others to do.
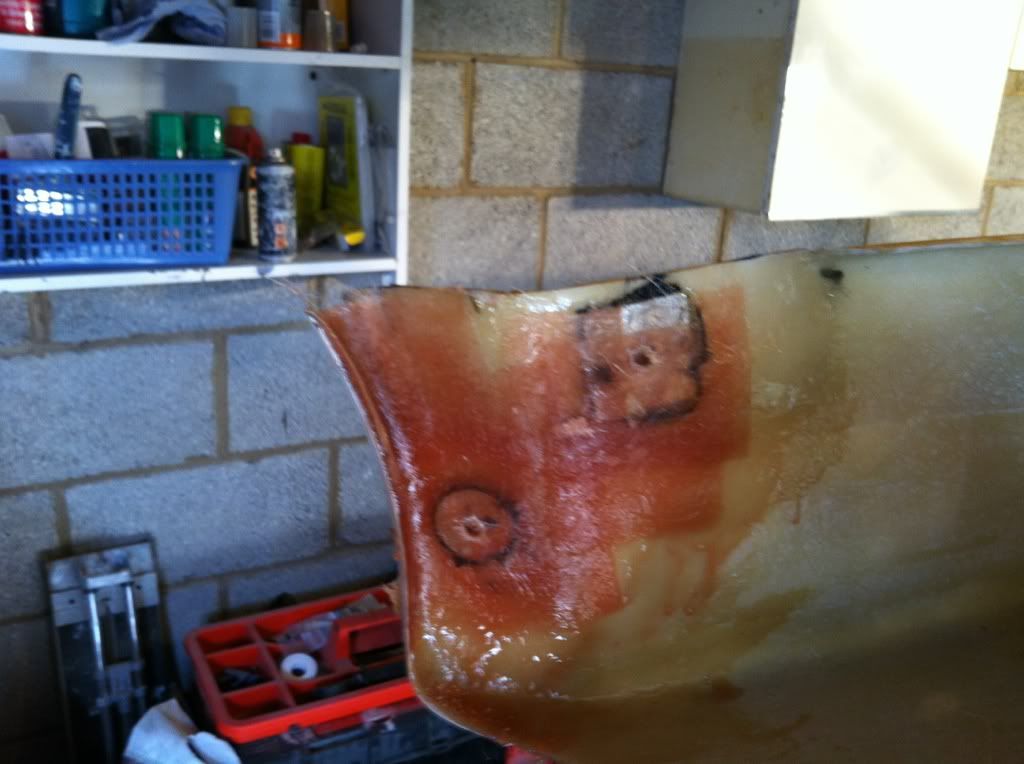
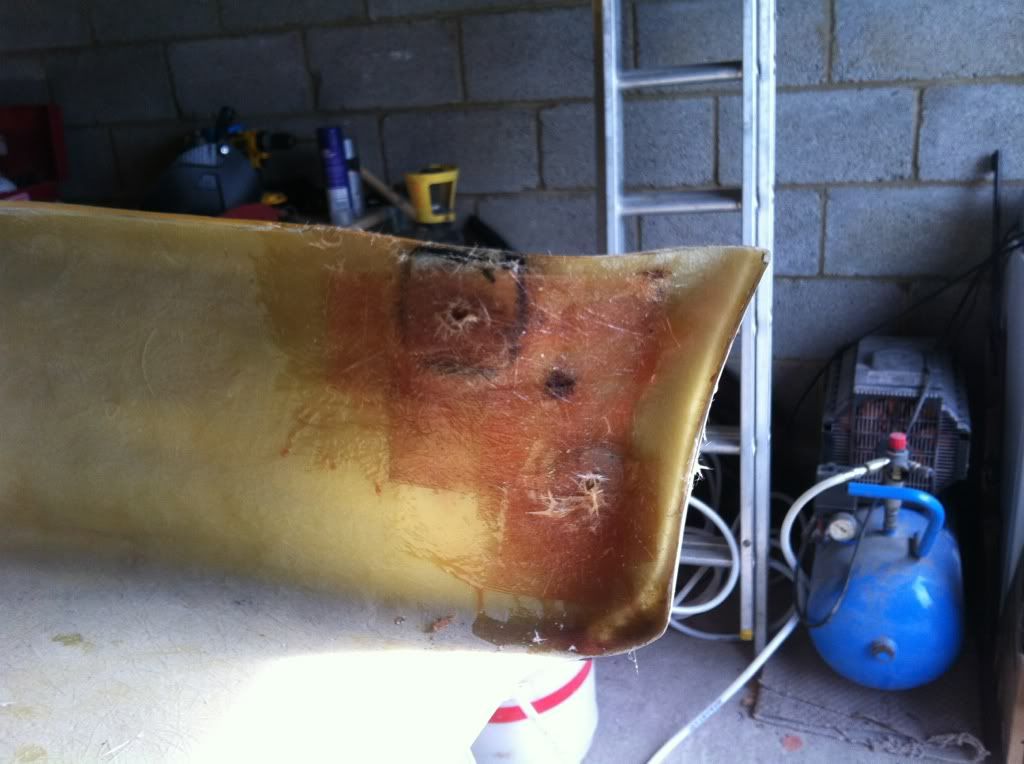
I also wasn't too chuffed with the gaps on the rear bumper so i set about filling the gap so that i can get some nice clean gap lines... I know it looks rough as at the moment but i am confident it will come good.
I also started to sort the head light covers, extending them to get rid of the eyebrow afterthought that is on the bumper...
credit to a certain PW- blatant rip off of his idea.
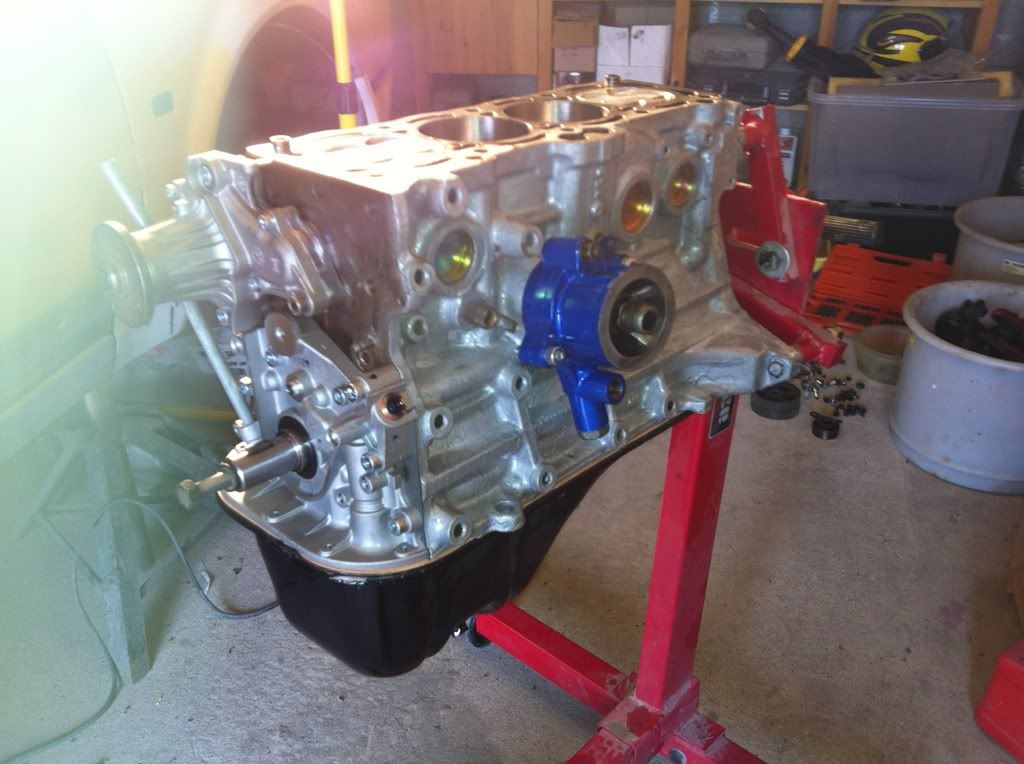
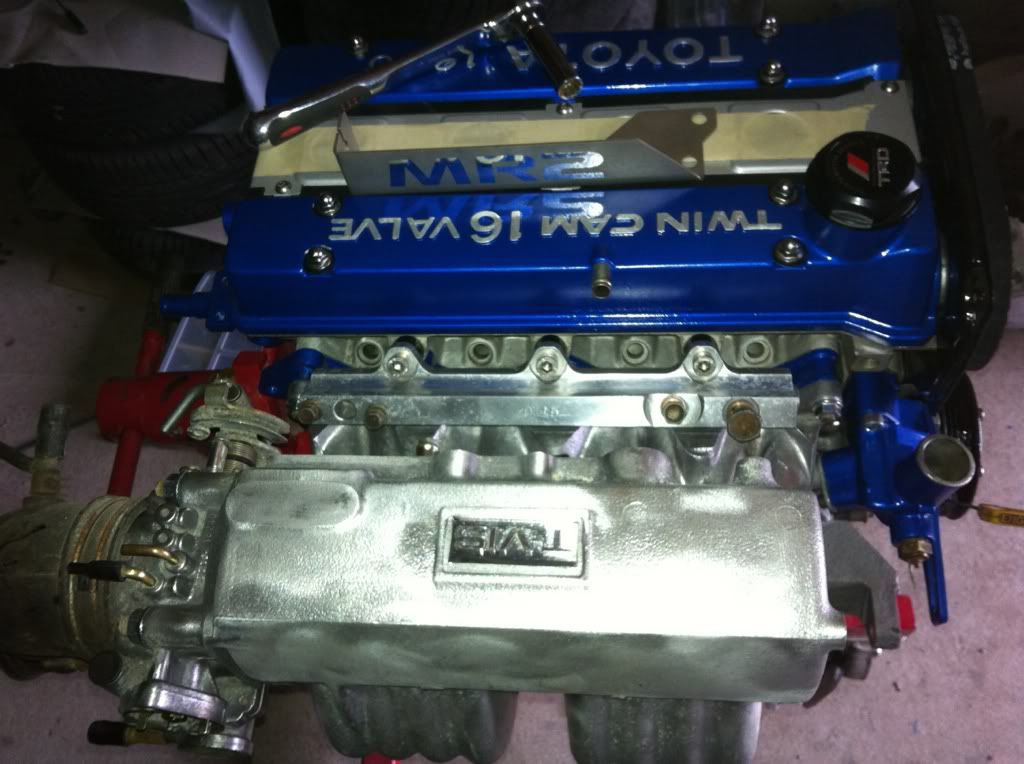
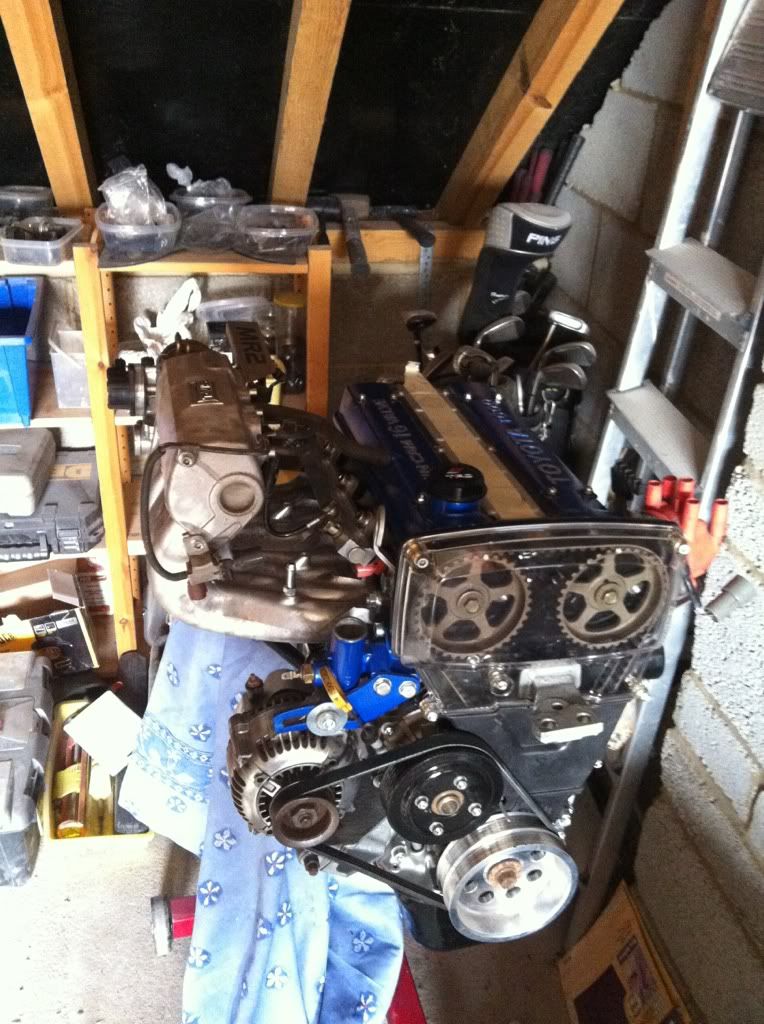
I also did a bit more on the engine... i pulled the TVIS and throttle body unit out from its dark depth and started to strip it and give it a clean - In the end i actually ran them through the dish washer... only after a really good clean in gunk first.
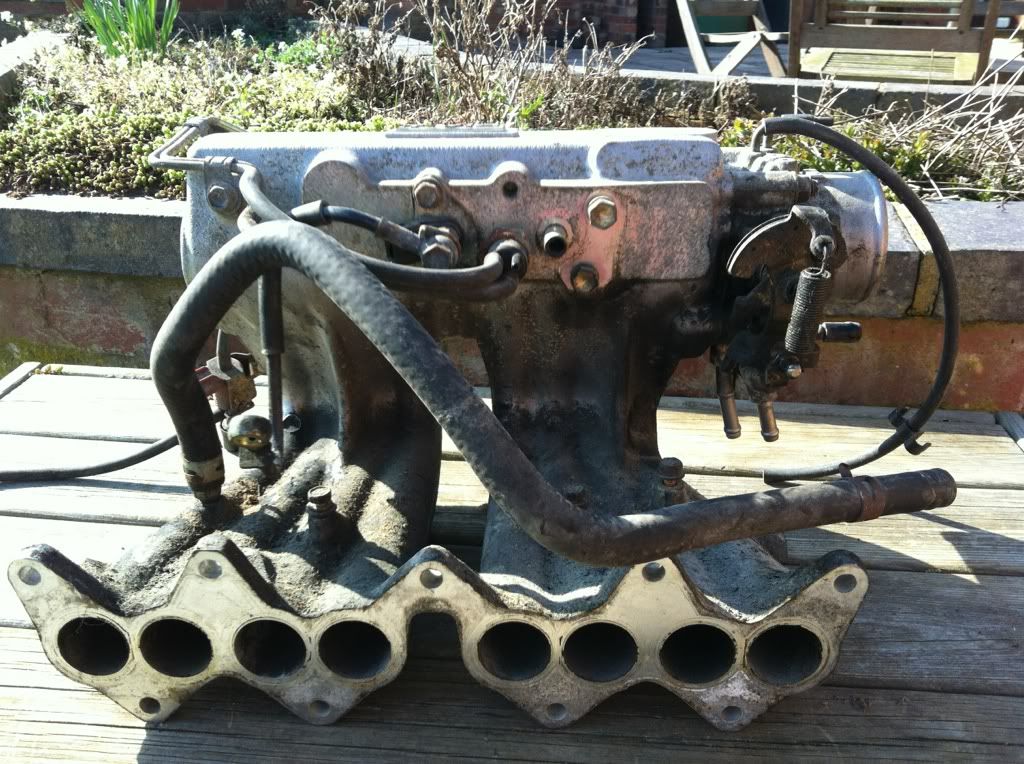
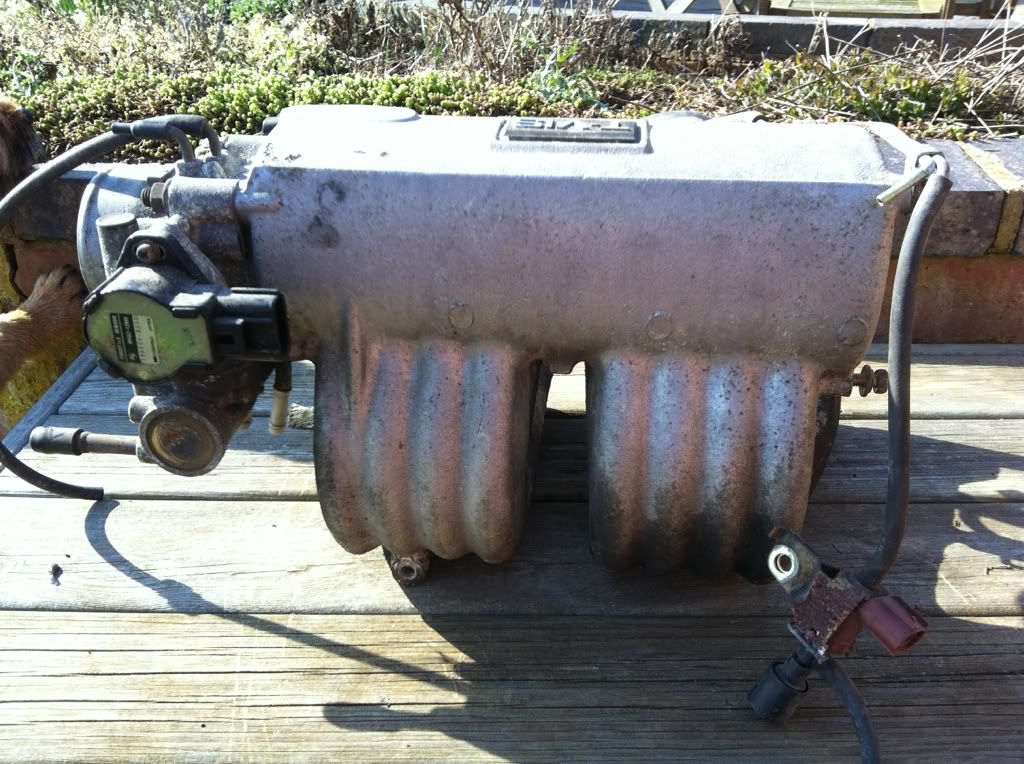
cleaned and test fitted
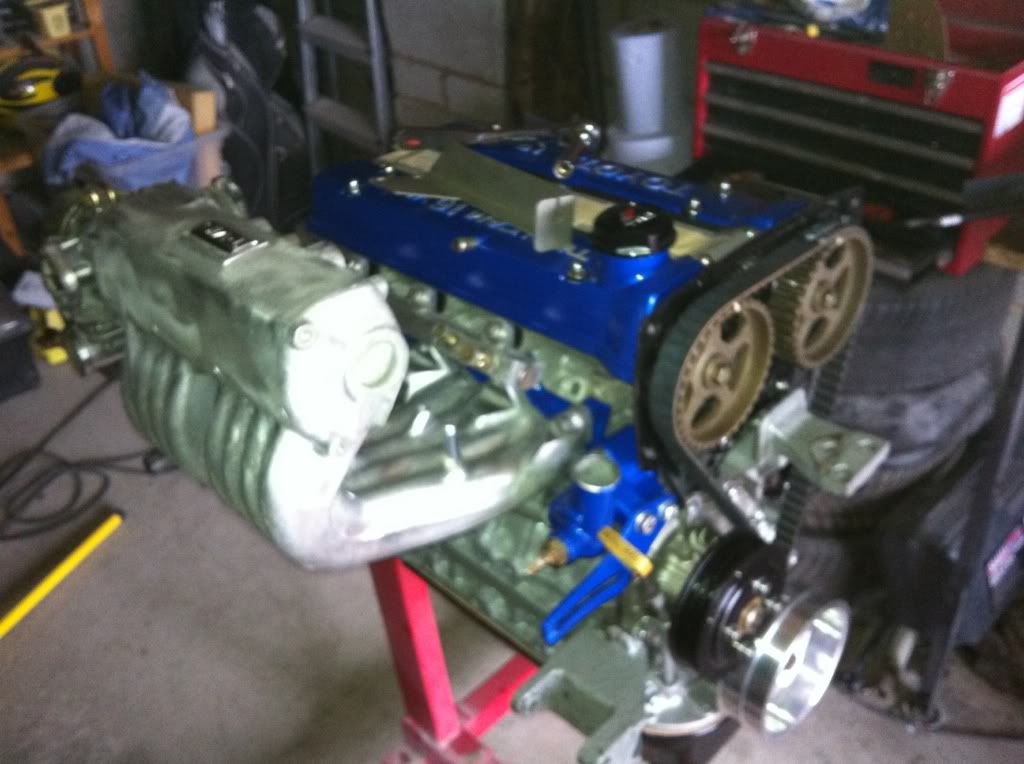
I have decided to build it all up on the stand as much as possible, this way i can"remember" where everything goes and also tick off all those little brackets / sensors / pipes that i took off years ago and have completely forgot where they go. Also throws up things that need a coat of paint.
After advice from here i also transferred the timing marks to to the new pulley
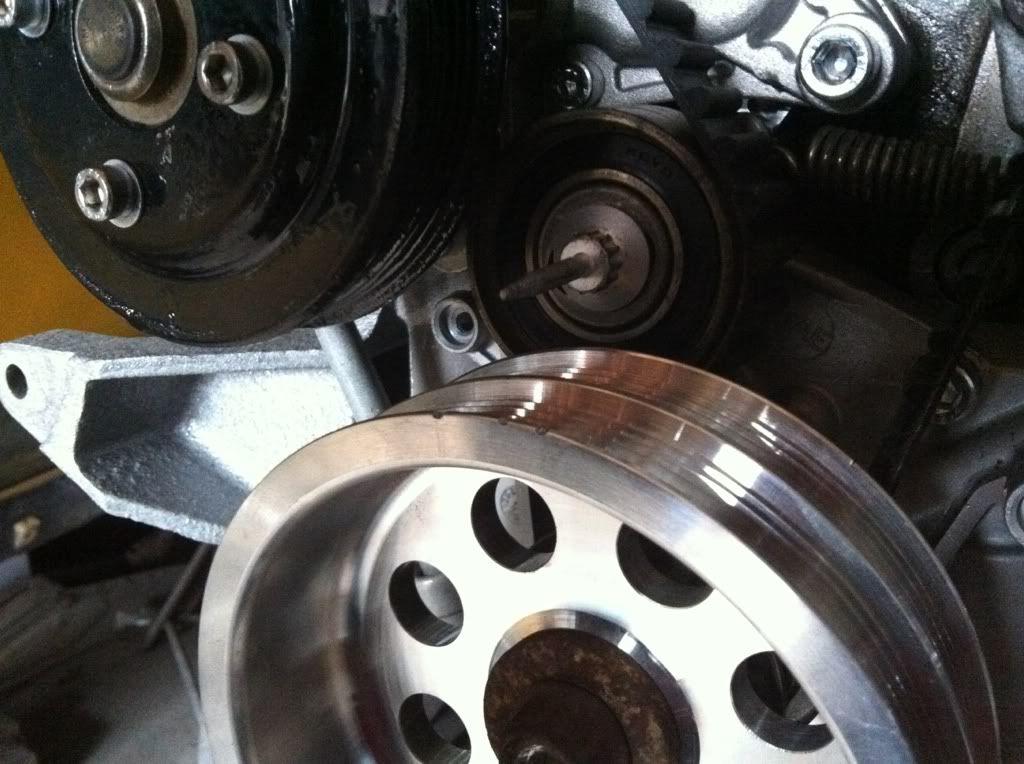
I also revisited the cam belt- i'm glad i did as i definitely had it too loose on the outlet cam side. anyway made sure all the marks lined up and refitted it...easy when on the stand.
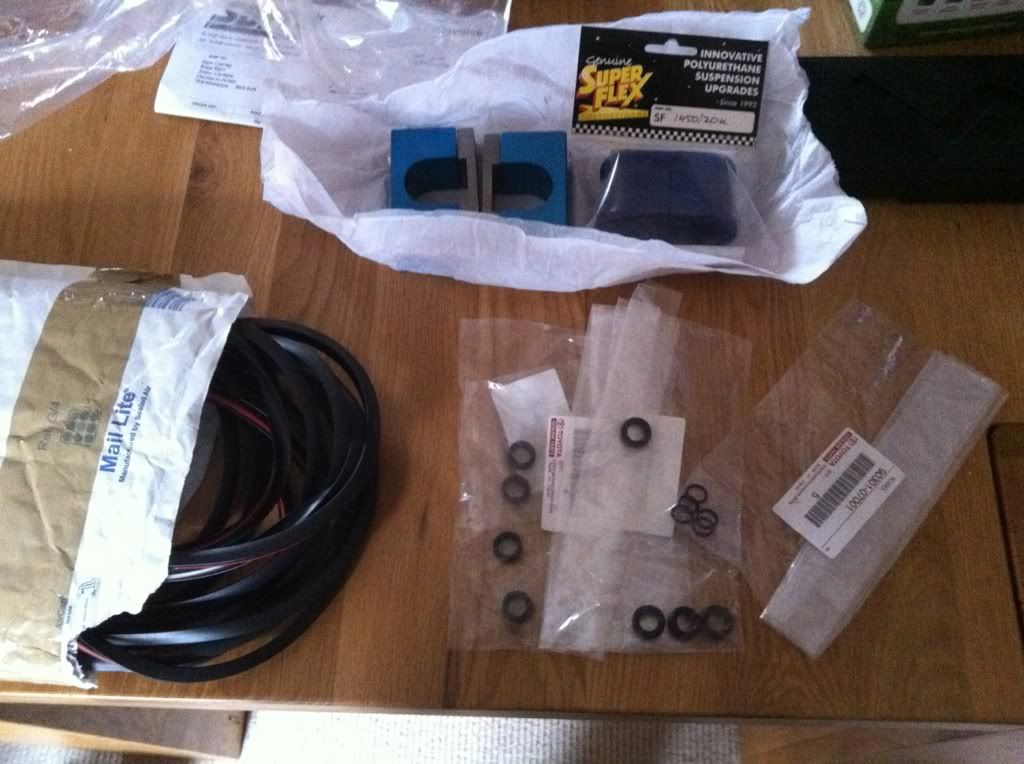
I have also been collecting a few bits,
TRD 20 bhp oil cap mod can also be seen in the pics above.
lower plastic cam covers sourced along with a replacement engine fan, oil pressure sender unit, dizzy arm and that bit of plastic trim that the loom sits in as it goes over the engine.
Starting to want to get all this lot assembled back on the car...
A few bits under the car/in the arch to sort/finish before i do that though!
Spent a fair bit of time getting the front as close to right as i am capable, its mainly just been about how to secure it most sensibly really,
Well this is what i currently have:
Obviously not the finished article but seems solid as a rock and is just about in the right place and symmetrical
I appreciate that bolting it on from the outside is a bit crude and i think if i would do it again then i would maybe bond bolts onto the inside of the bumper but once i take the bumper off all the holes will be reinforced with a backing plate and all the bolts will be flush fitting countersunk Alan key jobs that i think will look good.
I finished refurbing the brakes
Fitted the corsa discs and then the braided hose line.
I also wasn't too chuffed with the gaps on the rear bumper so i set about filling the gap so that i can get some nice clean gap lines.
I also started to sort the head light covers, extending them to get rid of the eyebrow afterthought that is on the bumper.
credit to a certain PW
I also did a bit more on the engine.
cleaned and test fitted
I have decided to build it all up on the stand as much as possible, this way i can
After advice from here i also transferred the timing marks to to the new pulley
I also revisited the cam belt
I have also been collecting a few bits,
TRD 20 bhp oil cap mod can also be seen in the pics above.
lower plastic cam covers sourced along with a replacement engine fan, oil pressure sender unit, dizzy arm and that bit of plastic trim that the loom sits in as it goes over the engine.
Starting to want to get all this lot assembled back on the car.
A few bits under the car/in the arch to sort/finish before i do that though!
-
boondougal
- Posts: 520
- Joined: Sun Jul 10, 2005 9:48 am
- Location: Shavington (near Crewe)
Re: Mk1b restoration... its alive..and painted!!
Few small updates, i have mainly been sanding and painting parts so nothing really exciting to report i am afraid.
I dis- assembled the front valance and set about welding up the frame i made and reinforcing the bumper fixing points:
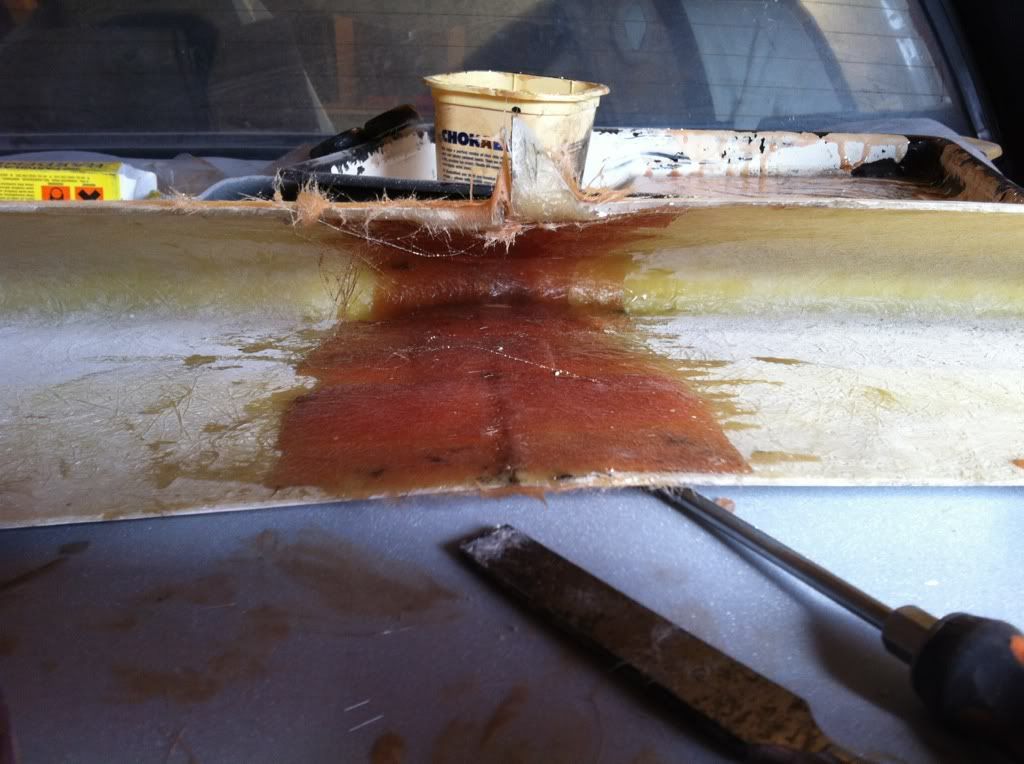
I have also cut in the gap lines that i am after on the rear bumper... much better now although still alot of work to do...
I also continued to assemble the engine on the stand... i made this to clean out the injectors:
I was successful- ish, i definitely got cleaner through the injector but it was very messy and i don't think i would be doing it again this way.
Here is the engine as it is at the moment... next step is to get it on the floor and get the gearbox on it.
I dis
I have also cut in the gap lines that i am after on the rear bumper.
I also continued to assemble the engine on the stand.
I was successful
Here is the engine as it is at the moment.