 The TRD
I'm writing this as a work in progress and will continue to add further pics and info as I get it.
(pictures to be added)
When it first started
I purchased my MR2 back in 2004 as a black
'92 GT Turbo.
The car was almost perfect coming in as a grade 4.5.
Before I even bought the 2 I knew it was destined to be fitted with a TRD Widebody.
I hade seen the kit in various guises, including many one off fitments.
I stusied the internet for hours and knew the widebody was for me!
The car started out with.
.
.
.
.
.
.
.
.
.
.
.
.
.
Fujitsubo Legalis R
Unknown springs
(way too low and stiff)
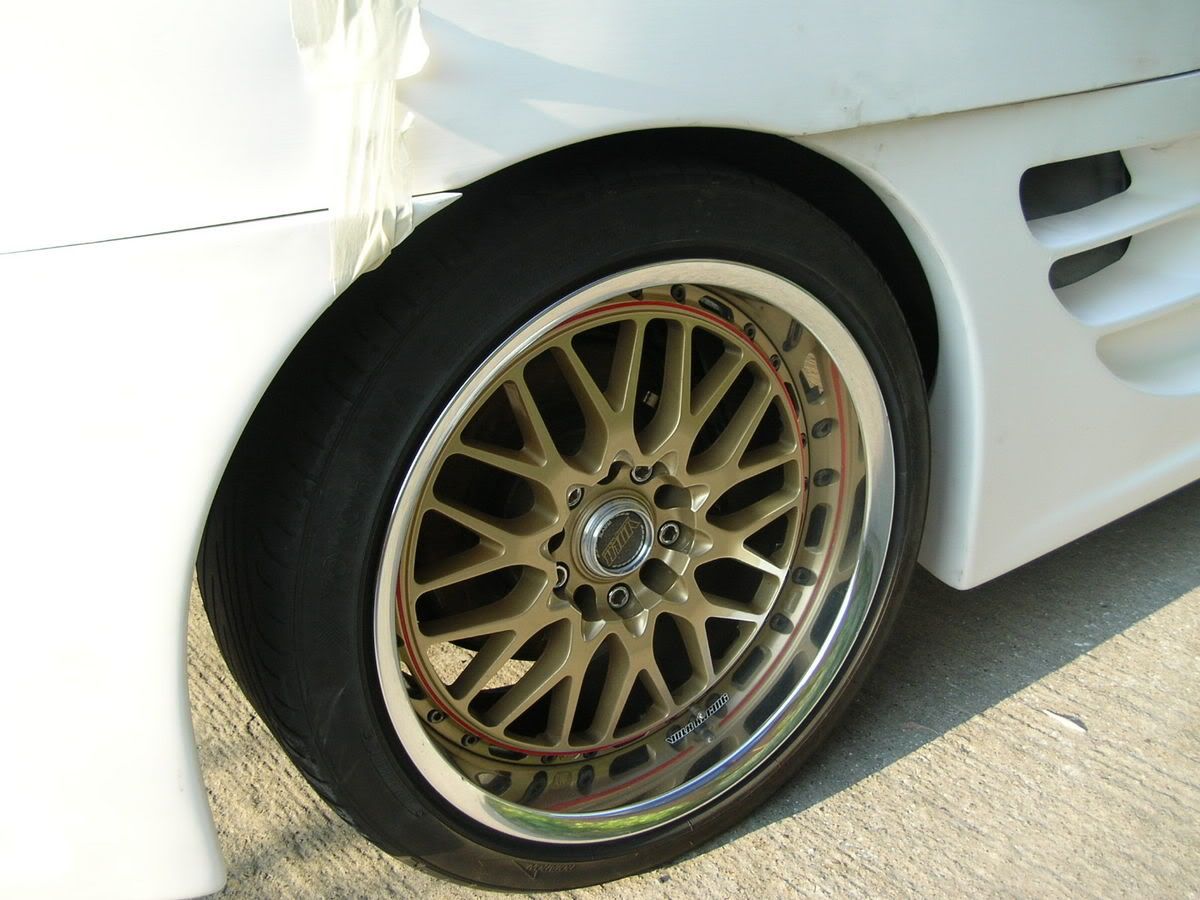
16" Nismo
(

) wheels
Blitz TT
Sony Stereo
 In original Skin
I picked up the car and loved it! The drive was amazing the turbo fantastic and the looks dreamy.
I knew I had to have it.
I bought the car with 30,000 miles, and to date the clock sits at just over 33,000.
First attempt at an exhaust
I started off by making a downpipe and new exhaust for the car.
The exhaust was based on a departure design, but alas in the end was too loud for me.
It is know owned by another owner on here.
I still loved the way it burbled and looked but was just to loud for me.
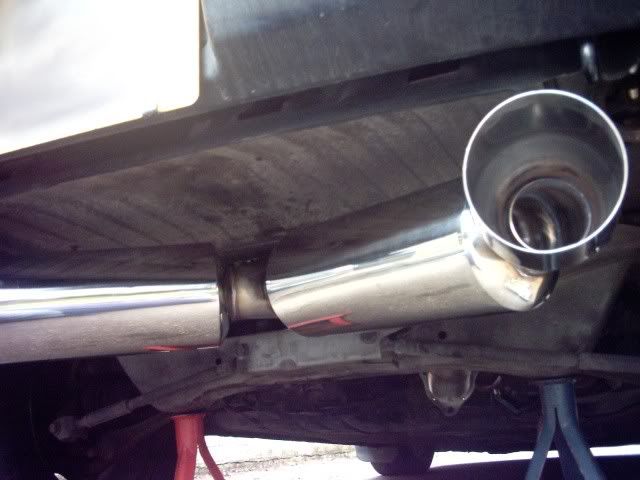 1st Exhaust 1
 1st Exhaust 2
After fiddling with the exhaust I decided it would be time to upgrade induction and the intercooler.
First off my brother crafted me a fine looking HKS filter adapter.
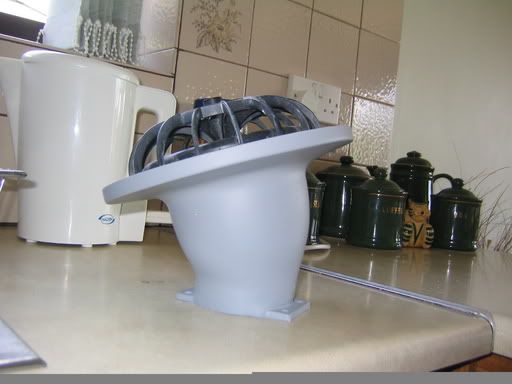 HKS Filter
This was done using clay as a mould and then simply using fibreglass, it sounded great but I soon decided to go for a change and fitted an intercooler based around a border design that I also made myself.
This incorporated an Apexi filter.
The kit worked great, and again I believe is still in use by a member.
I only decided to change the kit as I was going for much more power and wanted to fit a boot mount or a Chargecooler.
When it went wrong
I'd been saving for the TRD kit as I knew it would really damage the bank balance factoring in wheels, suspension, respray etc.
One day on the way to work I had a small
'ding' with a Toyota Hi-Ace who didn't see me.
With a cracked bumper I was upset.
I patched her up and saved harder for the kit.
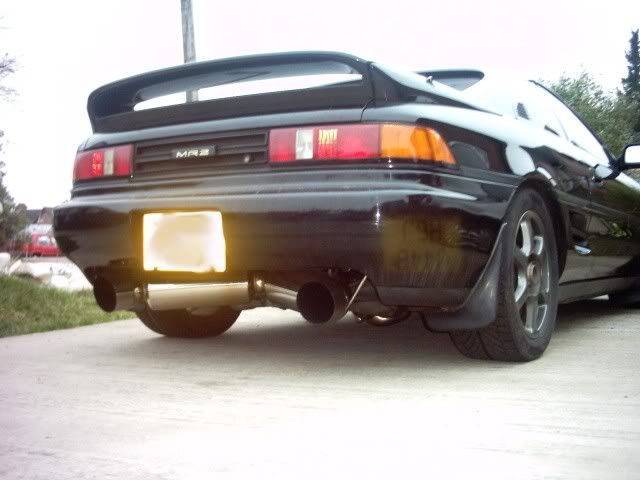
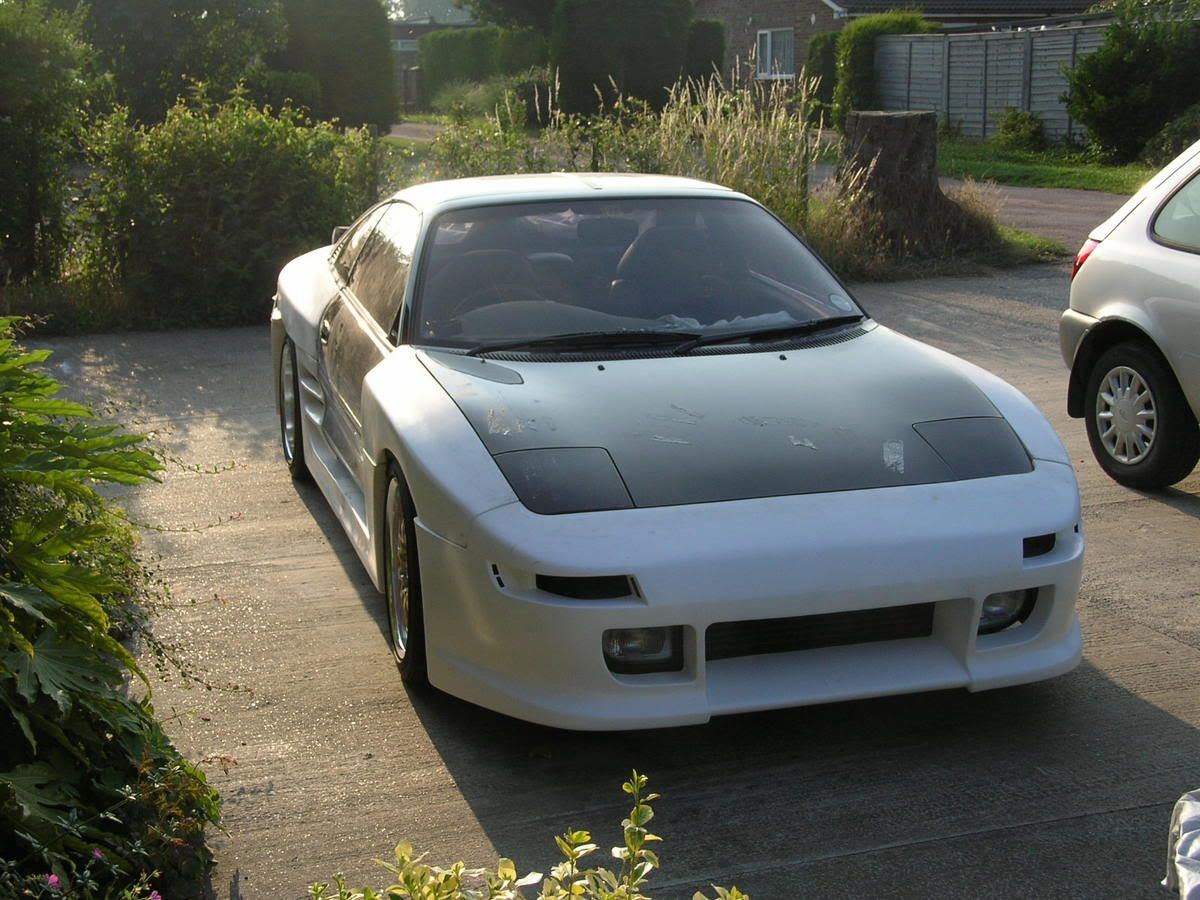
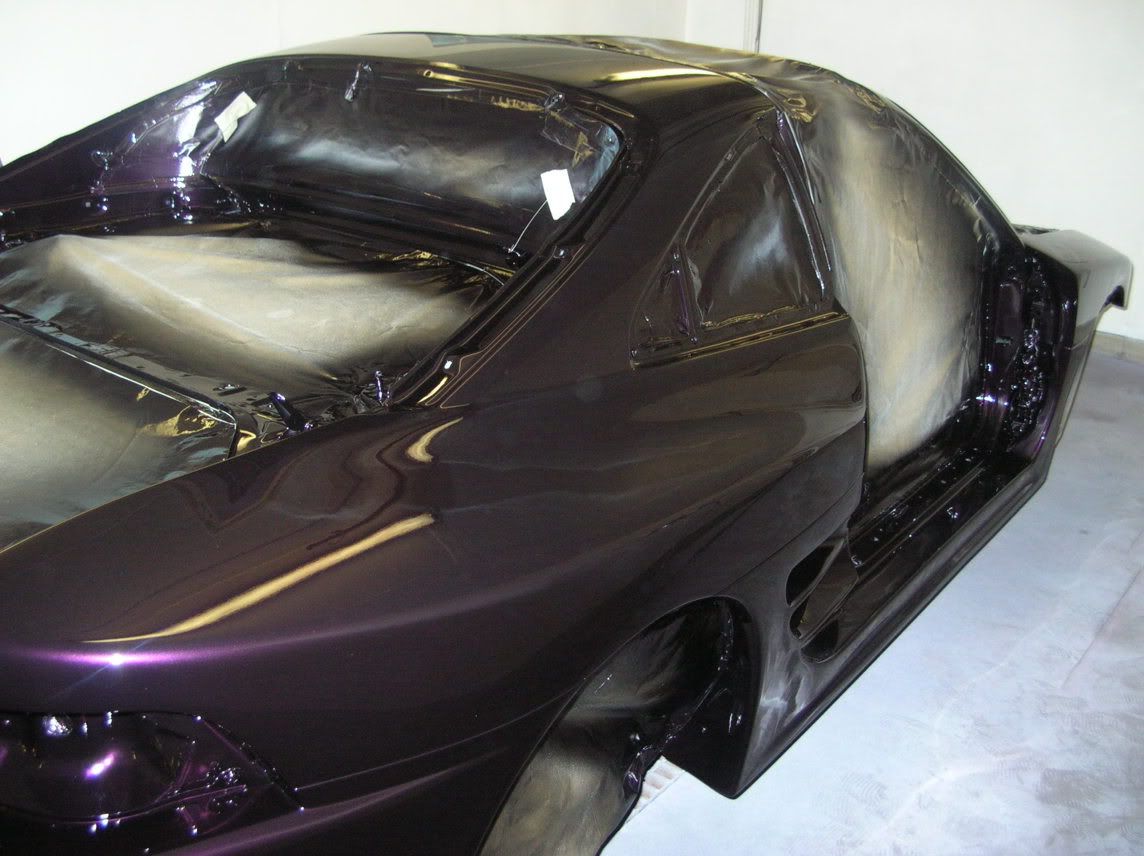
Fitting the Widebody
Fitting the wide body was frought with difficulties and complications.
I would advise anyone who is seriously thinking about the project to get the money ready in advance plan out the kit over 1 year and then double the budget! I started in April one year and finished at the end of september with a lot of missed pub sessions and hard work in the hot summer sun.
Fitment issues were many and large.
The major problems I experienced with my kit were as follows,
Rear Bumper two wide.
The bumper had to be cut and then rejoined.
When the bumper is rejoined on the car you can easily add a light layer of glass to hold everything in position.
After the thin layer sets carefully remove the bumper and then beef it up from behind using plenty of mat and aluminium strips as necessary.
The drivers skirt was also too short so a similar process was used to make up the missing material.
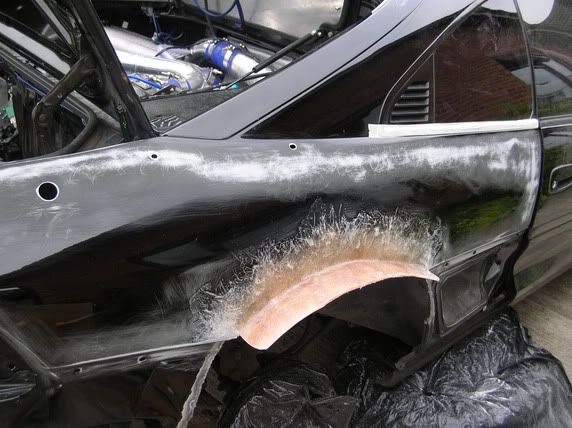
Rear arches did not fit correctly.
They were designed to fit up to the rear windows but simply did not! As such i ended up chopping them and smoothing them in mid wing.
I did this by roughing the paint with 60grit then sticking the kit on with fibreglass resin and matt.
Then finished off with plenty of filler and polyester reface.
The front bumper was a shocking match to the wings and required a lot of filling and shaping to get it to fit correctly.
It is now bolted on pretty tight and held in position nicely.
I could go on for hours about the kit but it would probably be best to answer questions and post pictures as requested.
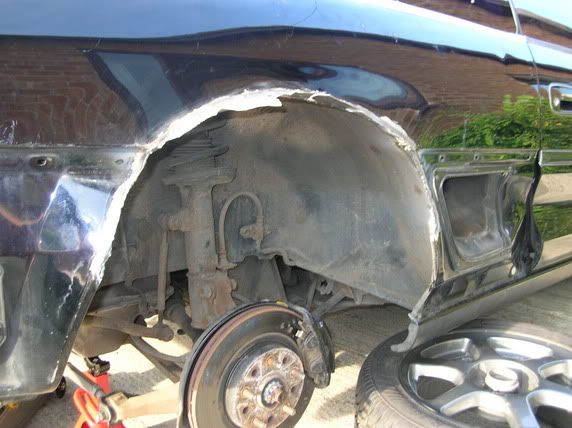 Arch fettling!
 Making new inner skins
 Trial Fit
 Hmmmmm
 Rev 3 lights Rev2 EGlo Centre panel
 Body painted
There may be trouble ahead.....doop..dee...doop...doop...dooop
Body painted
There may be trouble ahead.....doop..dee...doop...doop...dooop
With the body kit fitted and looking great the suspension and a rear wheel bearing decided they had had enough! I priced up Toyota spares and others such as Bilstein.
Being a rev2 I could not rebuild the struts so finally decided my money would be best spent on a set of Tein Super Street Dampers with top mounts.
These are amazing and are definately my best value for money mod to date.
The handling is transformed and the ride is firm and comfortable.
They make this funny squishy noise whilst driving as well which always makes my mates smile.
I have adjusted the ride for handling and to ensure the kit does not ground out, however as the car becomes ever more a weekend driver it might sneek a little closer to the tarmac

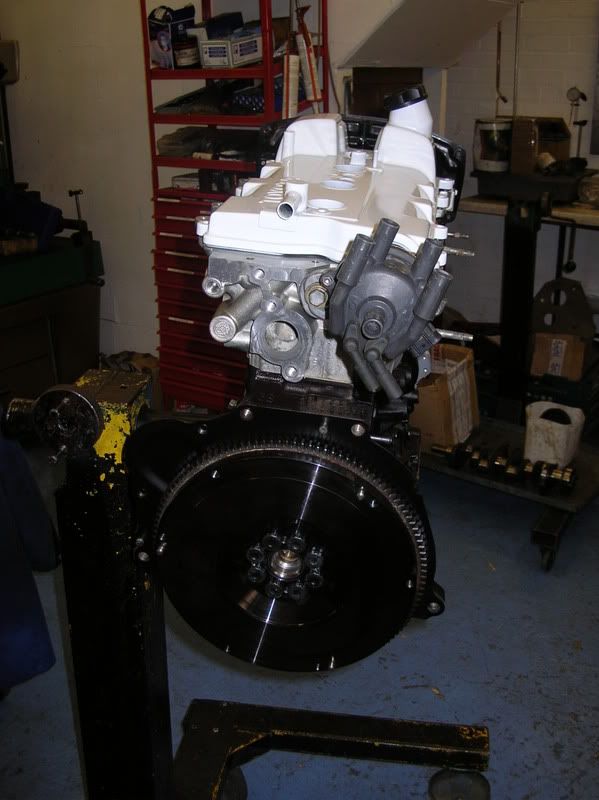
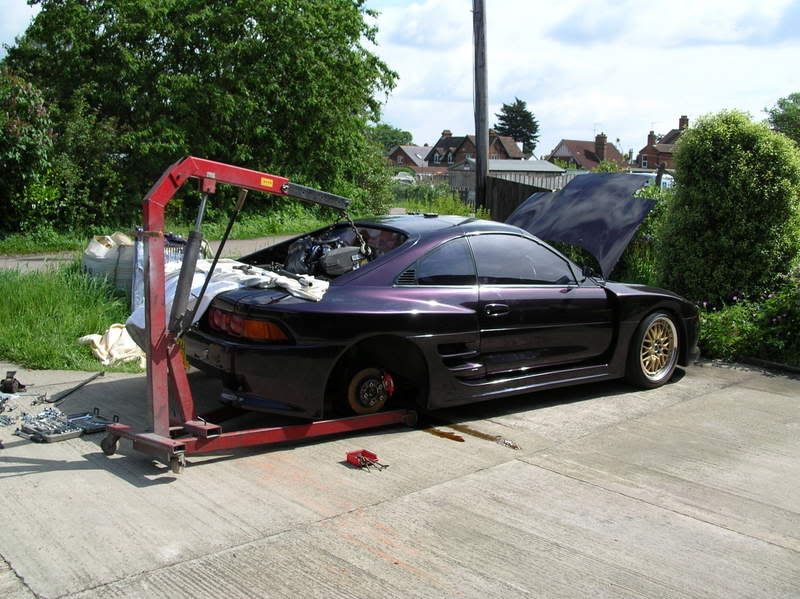 Engine removal at home
Snap Crackle and POP!
Engine removal at home
Snap Crackle and POP!
Yep, my run of luck would continue and with some spirited roundabout driving my number one big end wiped.
A stripdown reveiled a damaged rod and crank.
On further examination it was found that the crank was cracked on the number one rod bearing land.
I purchased a second hand crank which I planned to have lightened only to find exactly the same defect.
To date I have been told this is very unusal and even phoned toyota to confirm if they had any type faults, nothing showed up.
To cut a long story short the engine is currently being rebuilt and the spec list is as follows.
.
.
.
.
.
.
.
.
.
.
.
.
.
.
.
.
.
.
.
.
.
.
.
.
.
.
.
.
.
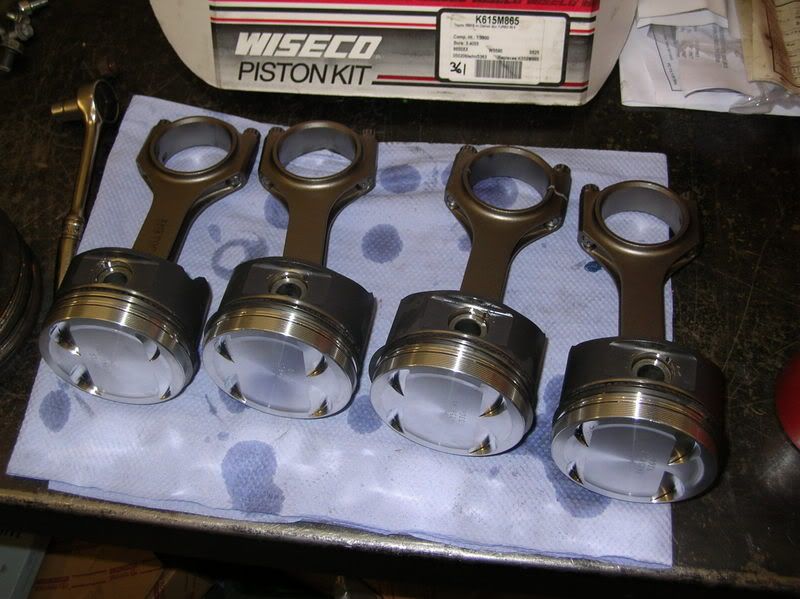
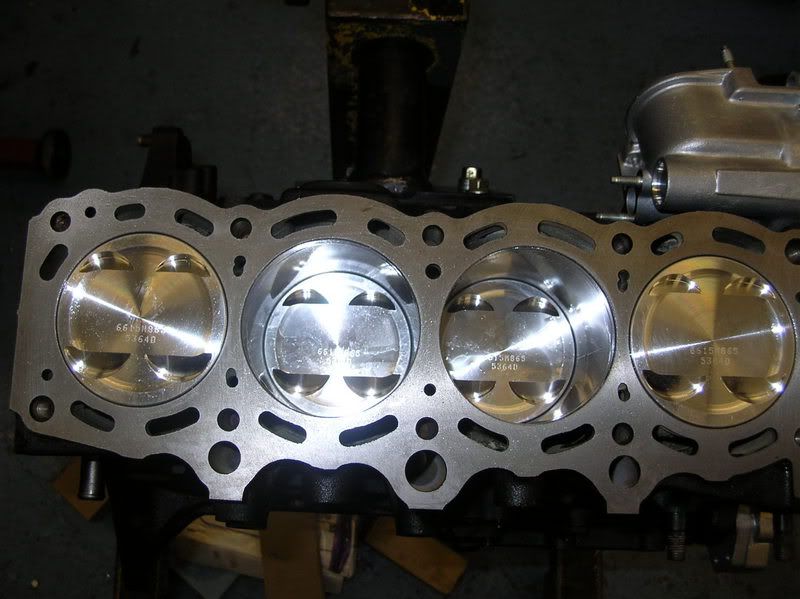
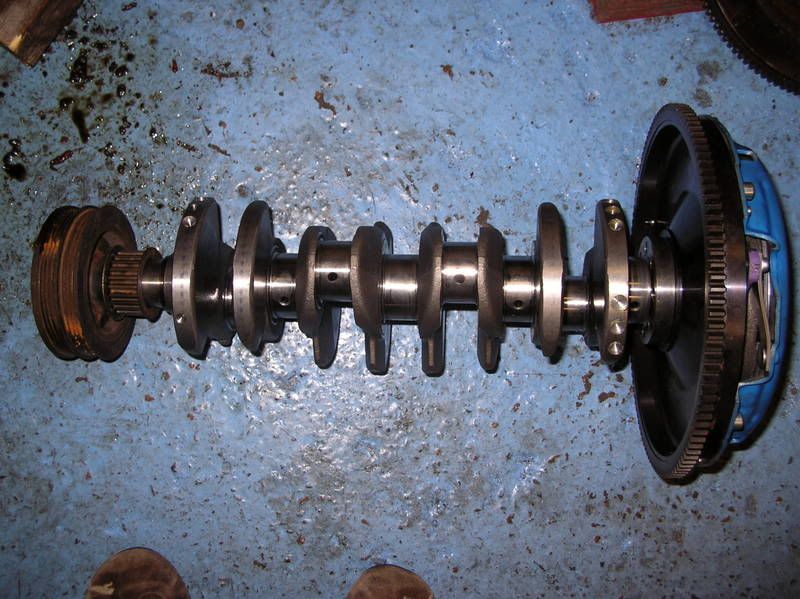
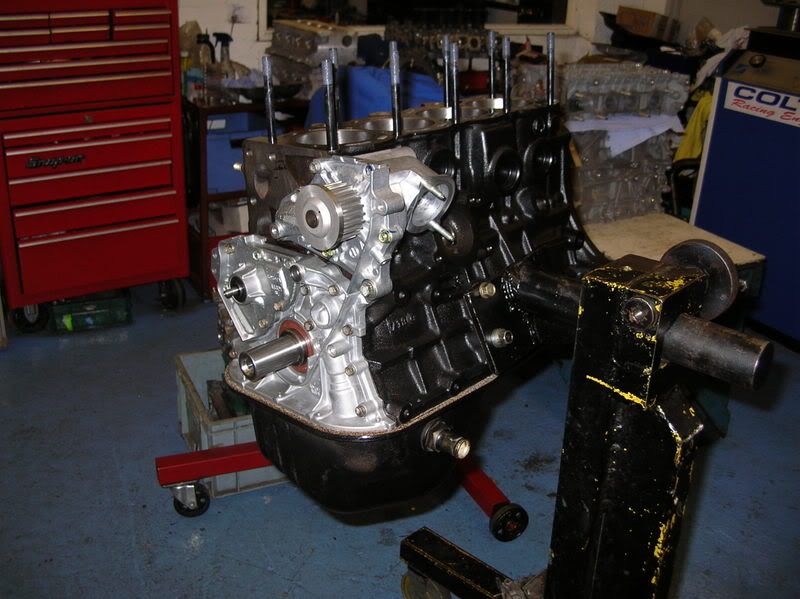
Wiseco 86.5mm Pistons
Eagle Rods
+ ARP Bolts
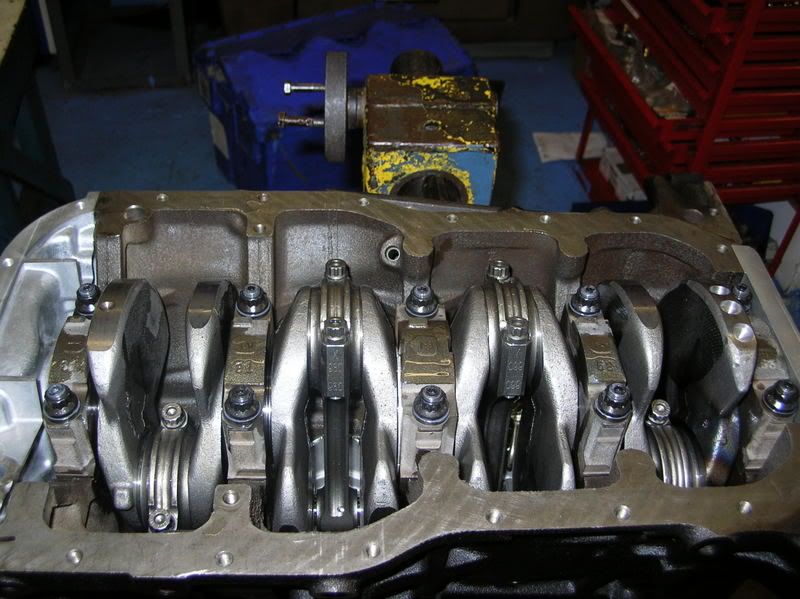
Stock Blanced Toyota
(new) Crank
DuraGlide Main Bearings
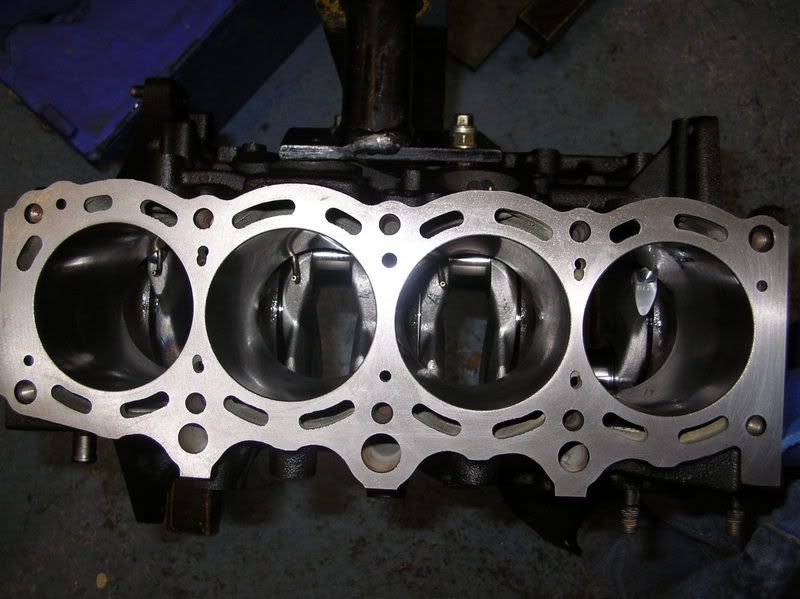
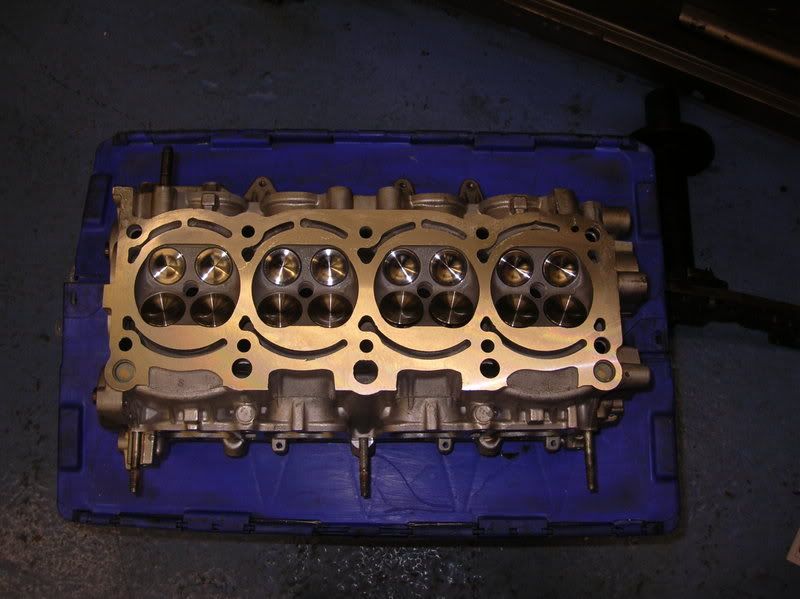
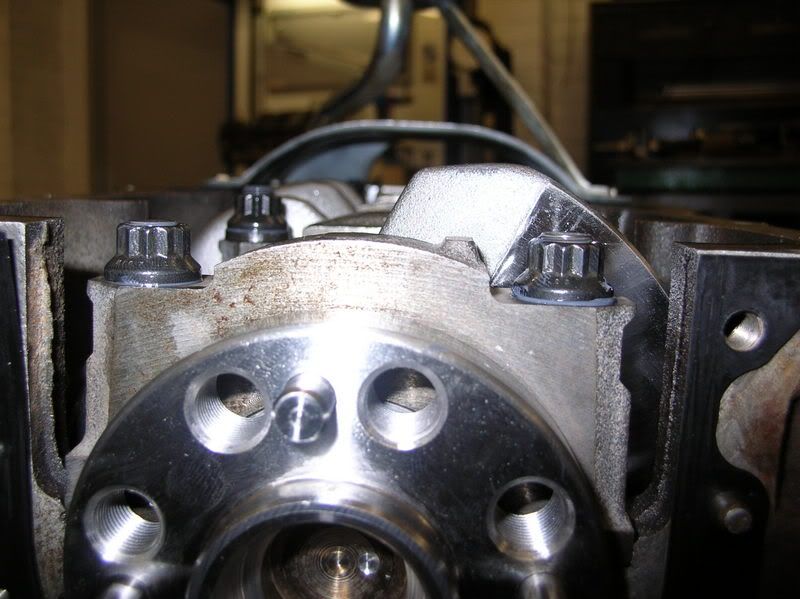
Cometic 1.0mm HG
+ ARP Bolts
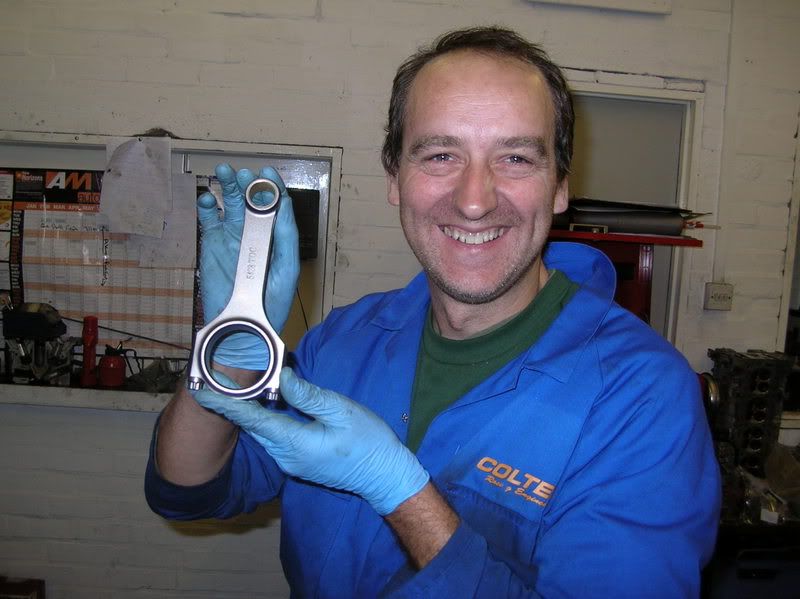
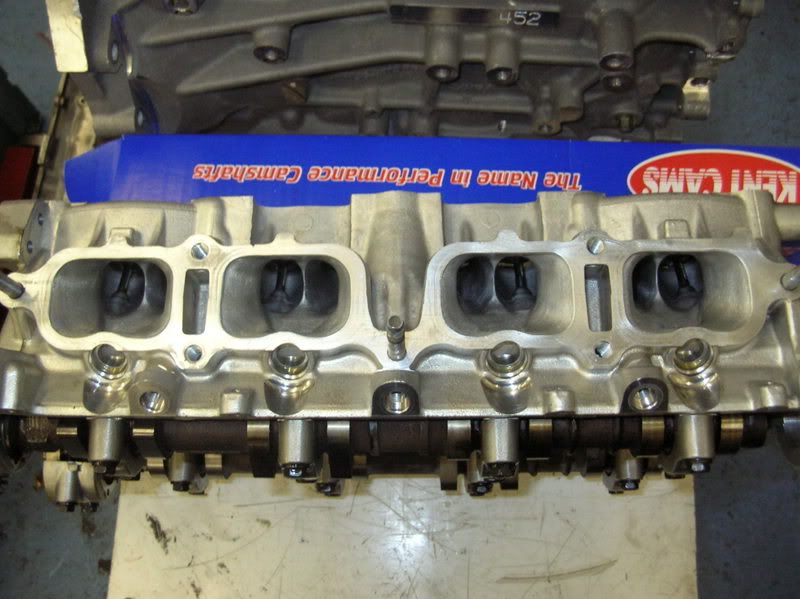
Coltec Racing Head Port
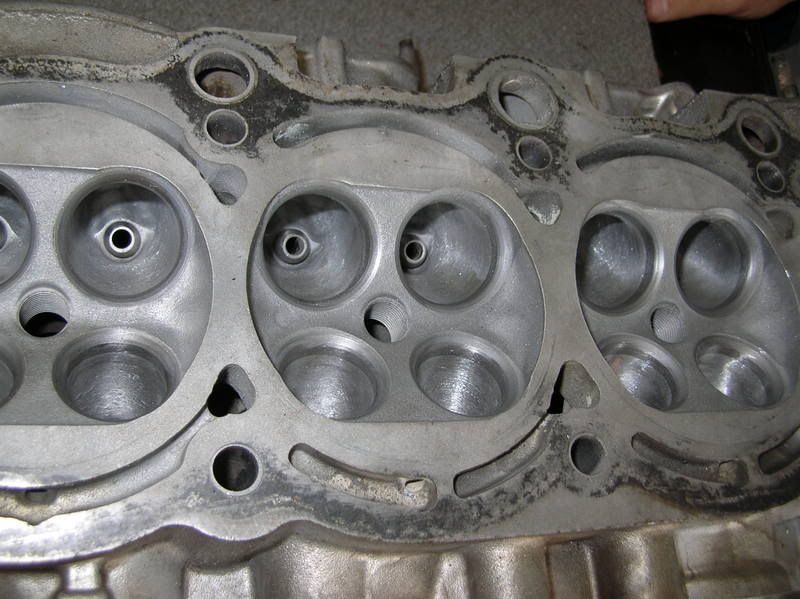 Head Port for new valves - 3 Angle seats
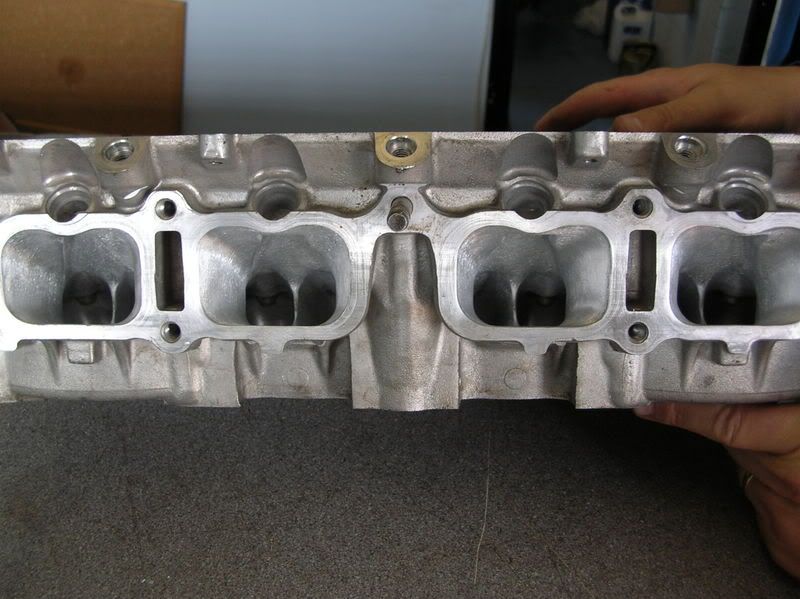 Head Inlets
Ferrea 1mm Oversized valves
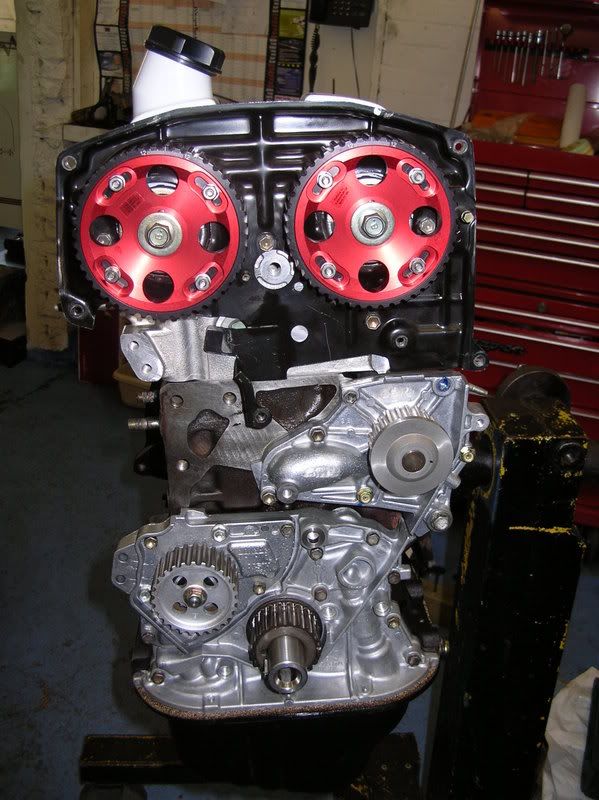
Rev3 inlet cam Rev2 exhaust
Fidanza Cam Gears
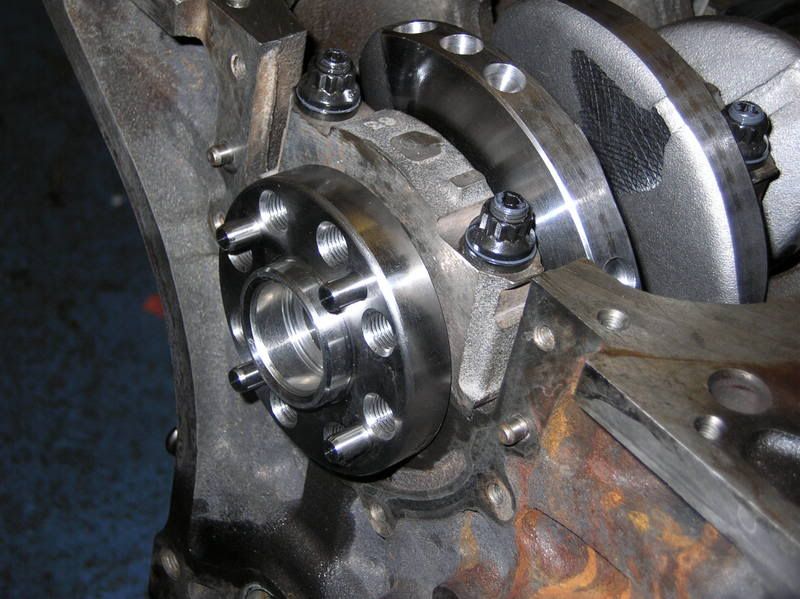
New oil and water pumps
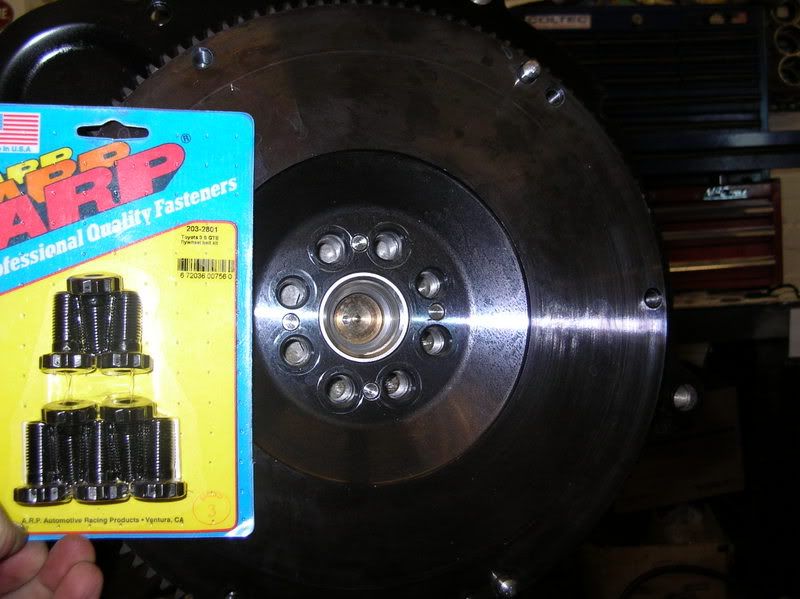
HKS Cromoly Flywheel
RPS Street Max Clutch
Own Fuel system
Stock Lift pump and new filter
1litre swirl pot
255lph HP pump
BTCC High Flow Filter
Twin feed rail
FSE regulator
?? Injectors
2d Aquamist W/M
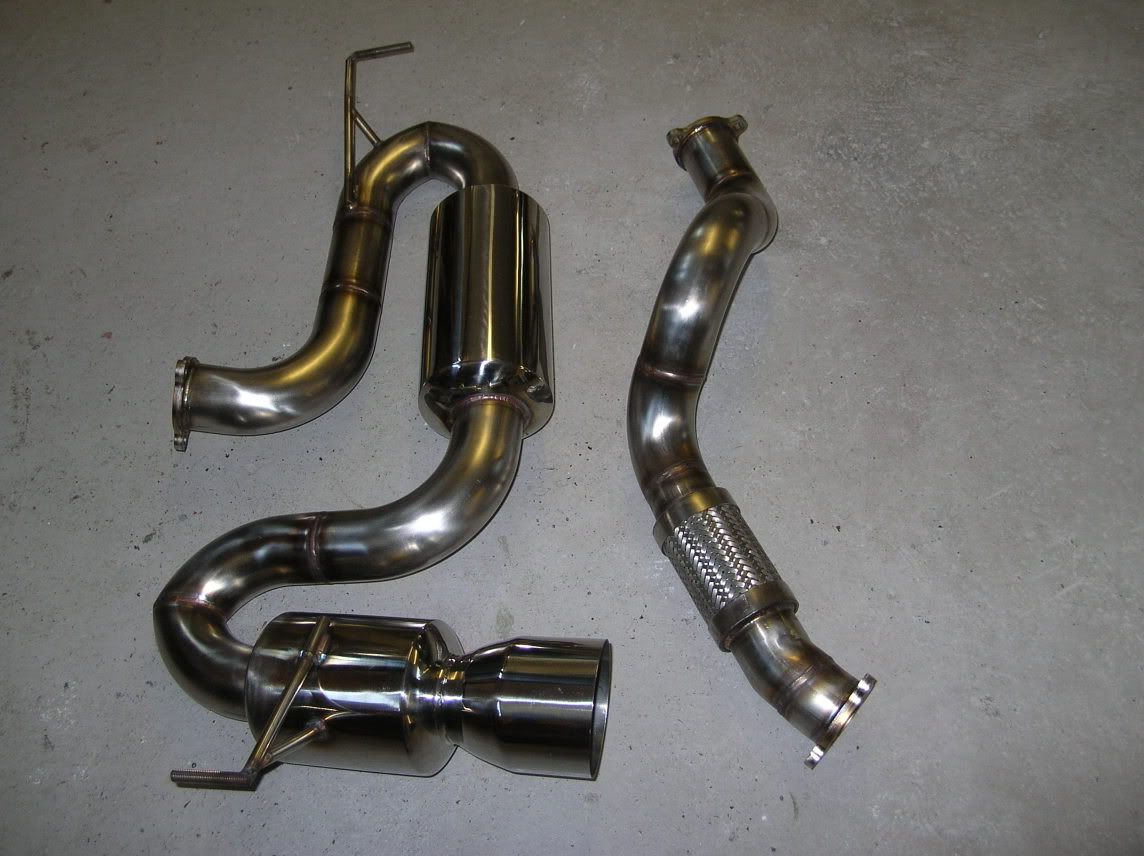
Own inlet and exhaust manifolds
Own 3" Exhaust System
 Exhaust
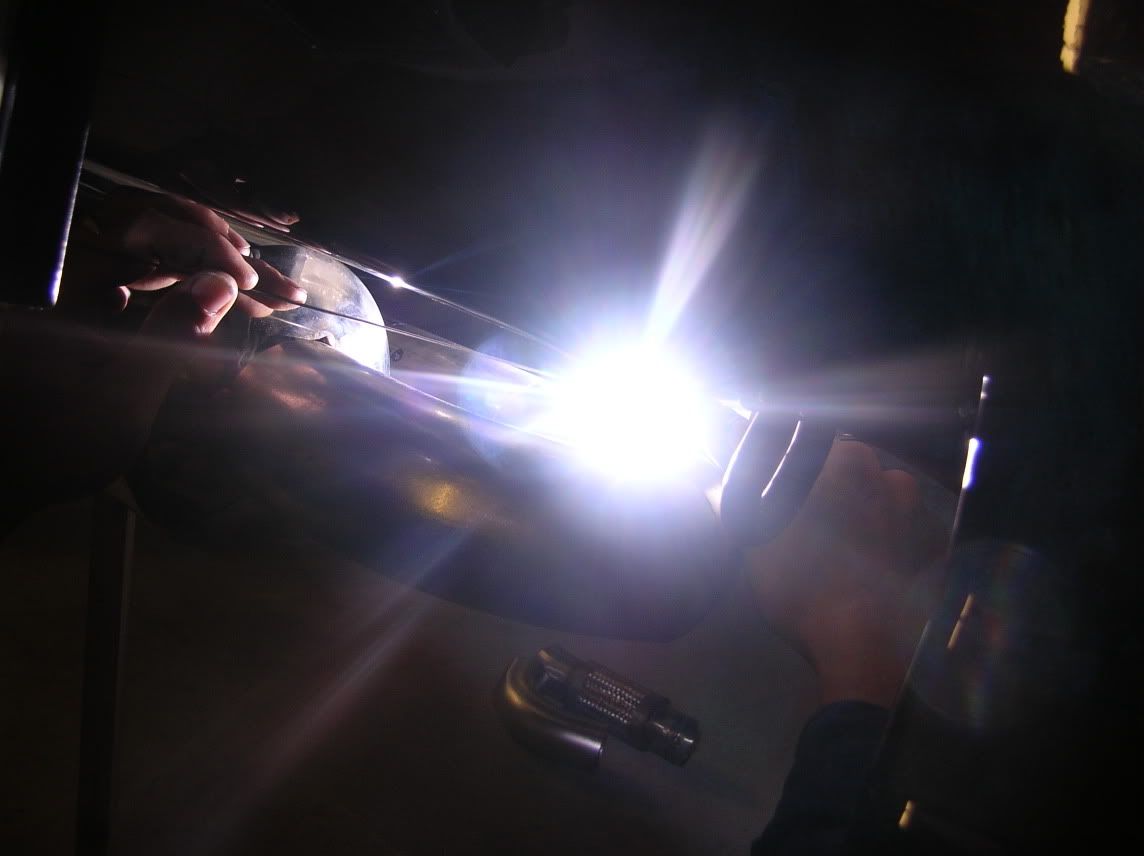 Welding
Own 2.5" piping
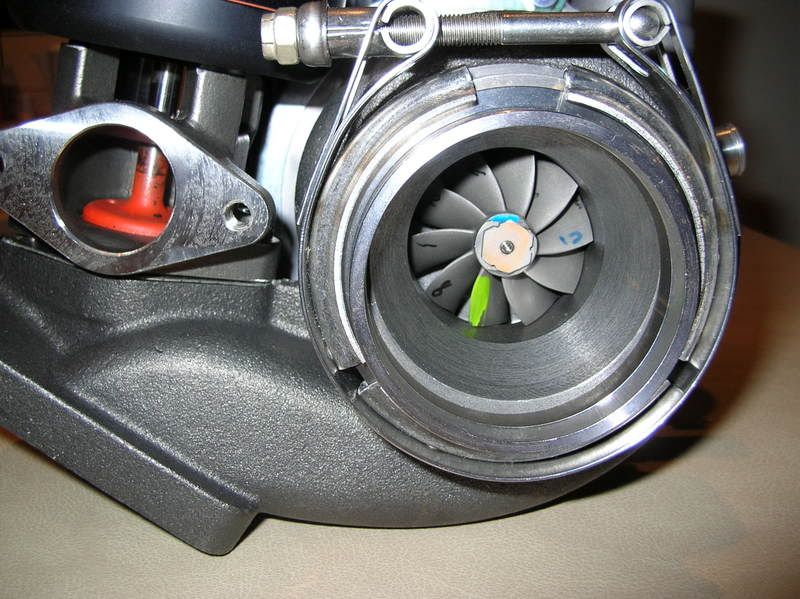
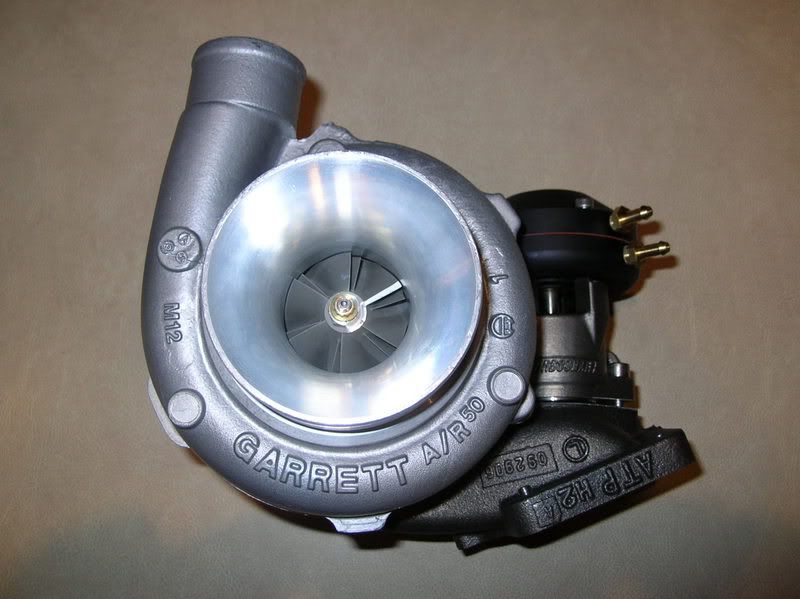
Garrett GT3071r 0.63ar
AEM Brute Force Dryflow 4" filter
Turbosmart Ultragate
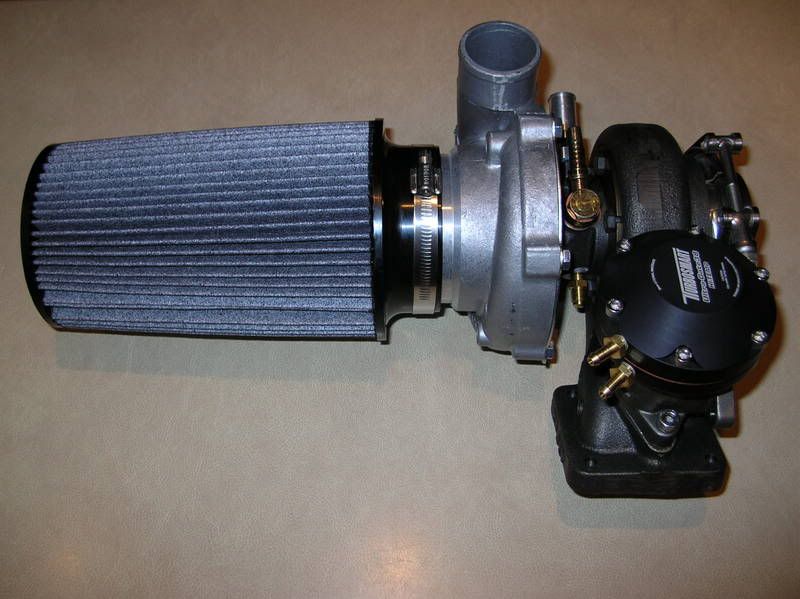 Turbo Setup 1
 Turbo Setup 2
 4" inlet
2x Greddy Type S BOV's on re-circ
Own Boot mount 600x300x75mm core
Twin 12" puller fans
(switched by ECU)
Own N/A engine lid with 9" pullers
(1st in UK?)
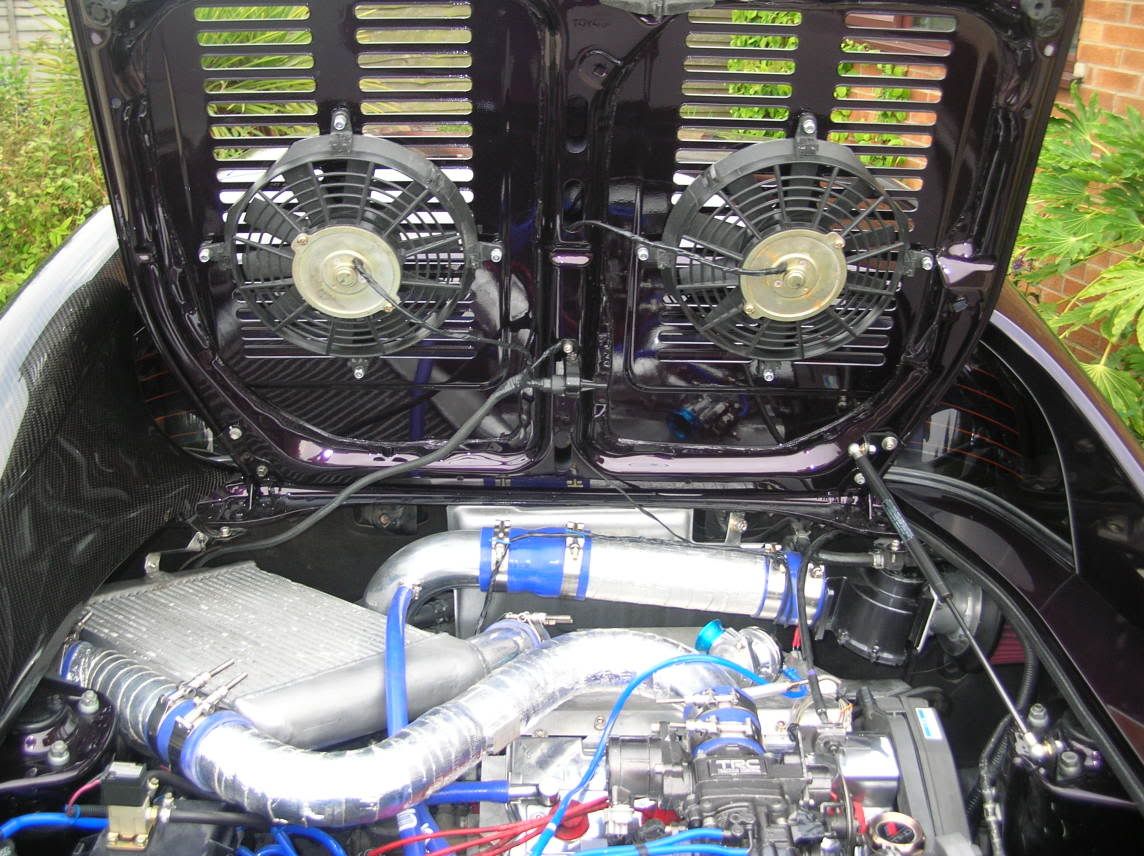 Original setup shown with Top Mount Intercooler
AEM EMS
AEM Thermocouple amplifier
AEM UEGO wideband O2 controller
AEM serial datastream gauge
Acer Laptop
The AEM parts will be integrated together to form a single management system.
The Thermocouple Amplifier is used to take a millivolt output from a thermocouple and convert it to a 0-5V input to the ECU which has 17usable channels.
These inputs can then be programmed to run outputs such as fans or water injection.
The serial datastream gauge is also pretty amazing.
It can take reading form 19 different inputs and display them on one gauge
(one at a time, its not that amazing).
The lights can be programmed as can warning levels for alarms and outputs can be driven from the gauge based upon user defined conditions.
I sourced all of the parts for the rebuild myself as its far cheaper than buying in the UK.
The AEM gear is amazing and I've been fiddling already.
The turbo and wastgeate setup is pretty unique as the wastegate is integral to the turbo exhaust housing.
The next steps on the turbo setup are to install hosing for oil and water and finish manifold fabrication.
My ultimate goal is for 400ft/lb's
Any questions fire away and I will put up more photo's etc.