
The journey of one man and his Mule(s)
Moderators: IMOC Moderators, IMOC Committee Members
-
Magic Beans
- Posts: 4789
- Joined: Thu Nov 24, 2011 1:01 pm
-
pistol pete
- Posts: 7068
- Joined: Mon Feb 11, 2008 5:47 pm
Re: The journey of one man and his Mule(s)
good luck. .....
.....
MR2 Sprint zombie outbreak response vehicle
https://www.facebook.com/pages/Zombie-S ... 0272127049
https://www.youtube.com/channel/UCNBrEd ... s-qbox0FwQ
https://www.facebook.com/pages/Zombie-S ... 0272127049
https://www.youtube.com/channel/UCNBrEd ... s-qbox0FwQ
Re: The journey of one man and his Mule(s)
Have fun with that 
2001 BMW M5 (Bahnstormer) | 2004 RX8 231 (the Racecat) | 2001 Volvo V70 (Swedish eBay barge)
Previous:
1989 MR2 Mk1b T-bar| 1988 MR2 SC Super Edition
Previous:
1989 MR2 Mk1b T-bar
Re: The journey of one man and his Mule(s)
plates look much better
remember measure 50 times and cut once 
remember measure 50 times and cut once

Re: The journey of one man and his Mule(s)
Plates look great. Good luck with the under tray fabrication!
-
Magic Beans
- Posts: 4789
- Joined: Thu Nov 24, 2011 1:01 pm
Re: The journey of one man and his Mule(s)
Thanks 
So far so good
I'll be glad when it's done though, as I've done nothing but think about it for the last week! Both in terms of planning and execution. My head's  These things haunt me until they're done and to a suitable standard
So far so good
I'll be glad when it's done though, as I've done nothing but think about it for the last week! Both in terms of planning and execution.
-
Magic Beans
- Posts: 4789
- Joined: Thu Nov 24, 2011 1:01 pm
Re: The journey of one man and his Mule(s)
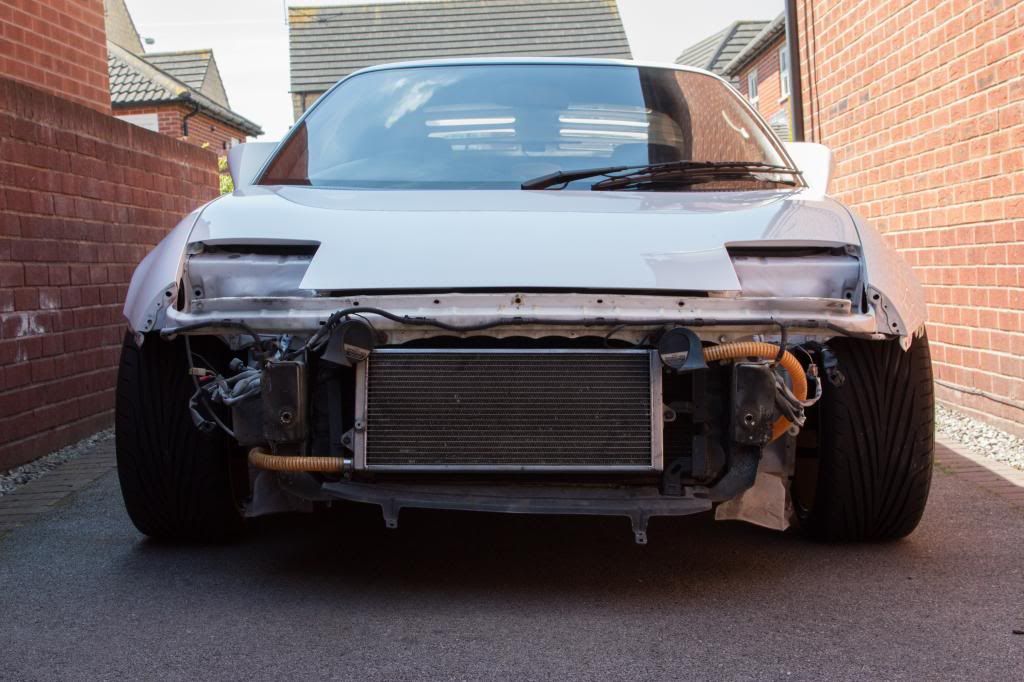
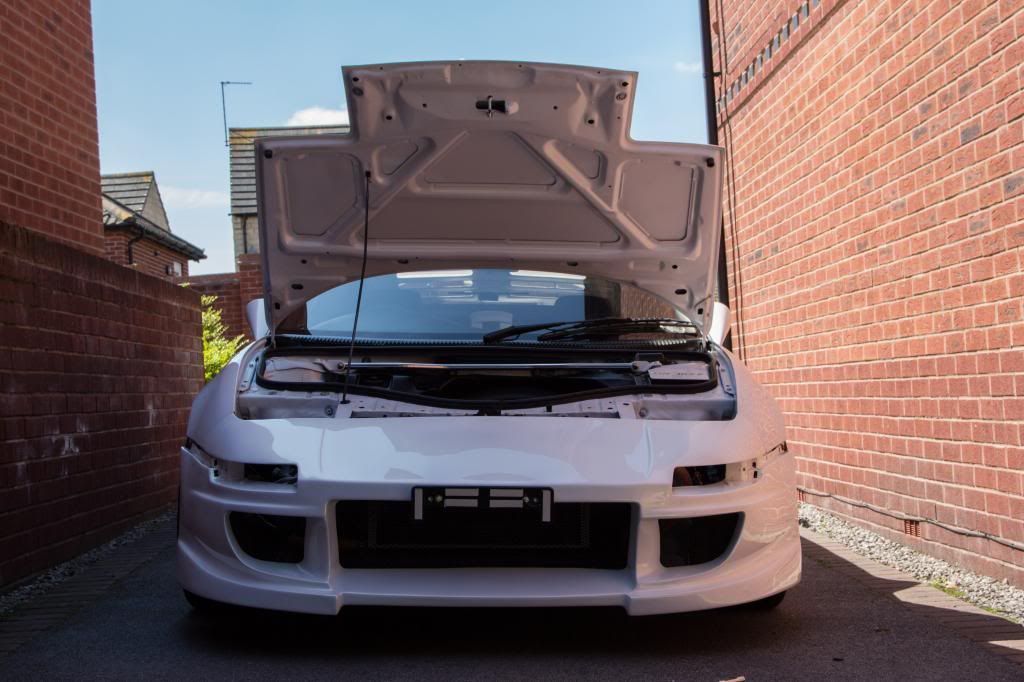
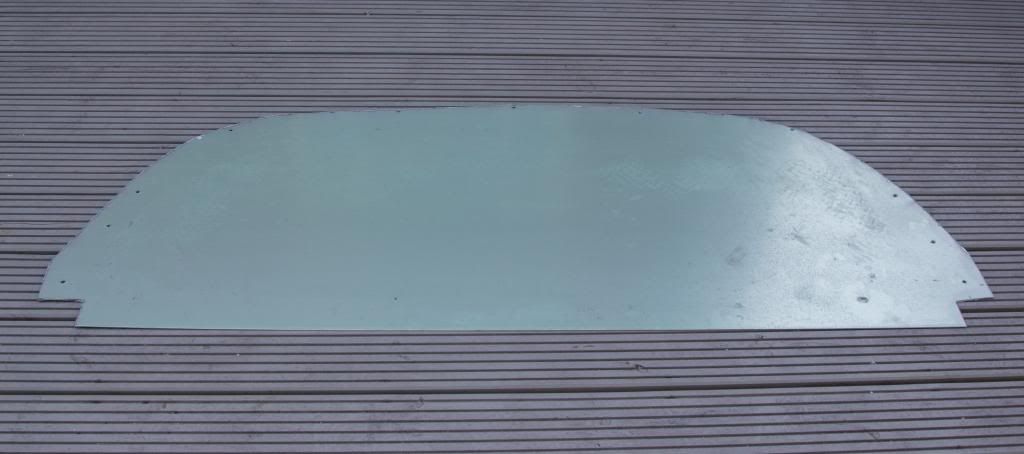
And so to turning a give sheet or aly and a concept into a fitted and functional flat undertray. To say this thing has haunted my mind is an understatement. I'm found myself sat day dreaming of the logistics of the whole project for the last few days. Something which has been picked up on in management meetings, when I've been quoted as having a face which says "Phil's not here right now. Please call back next week"
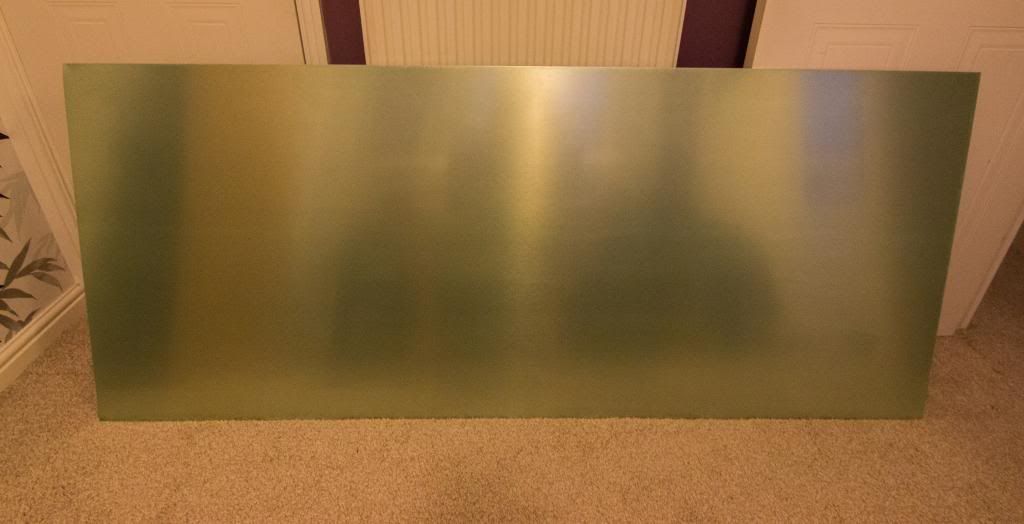
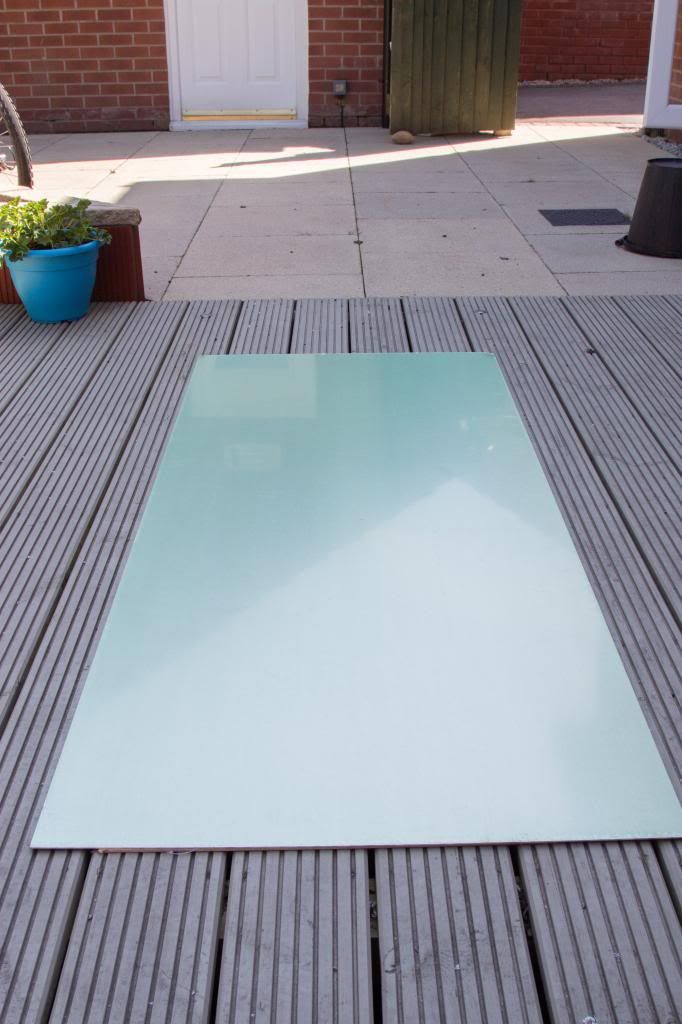
We last this story with me having taken delivery of a massive parcel and wondering what the hell I'd got myself into Well let's have a look see

2mm thick, which in theory means less flexing when the car's moving.
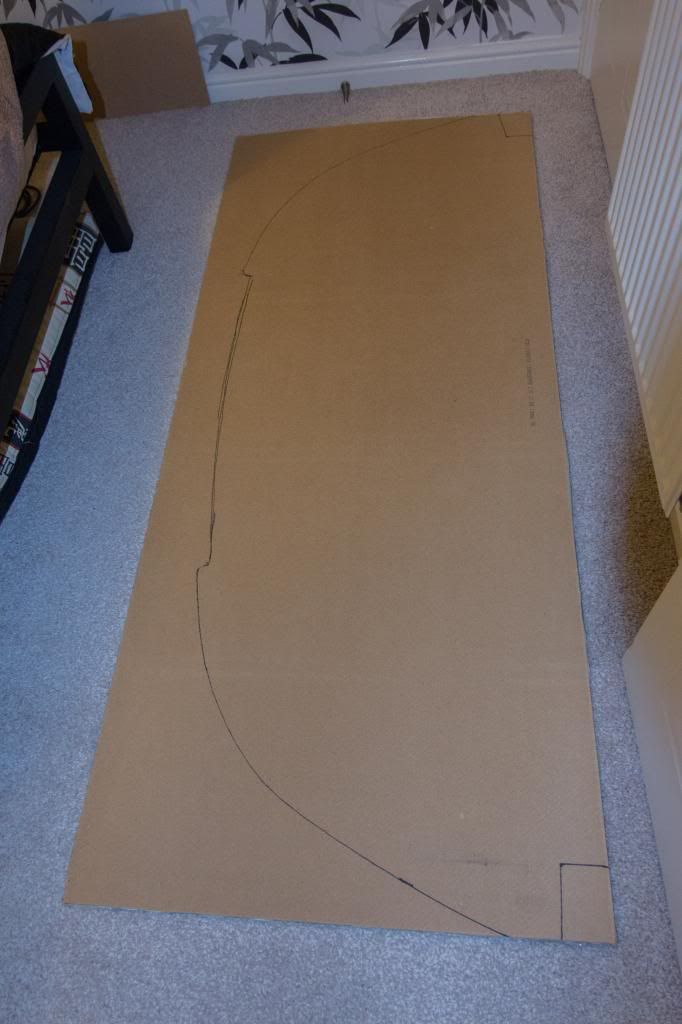
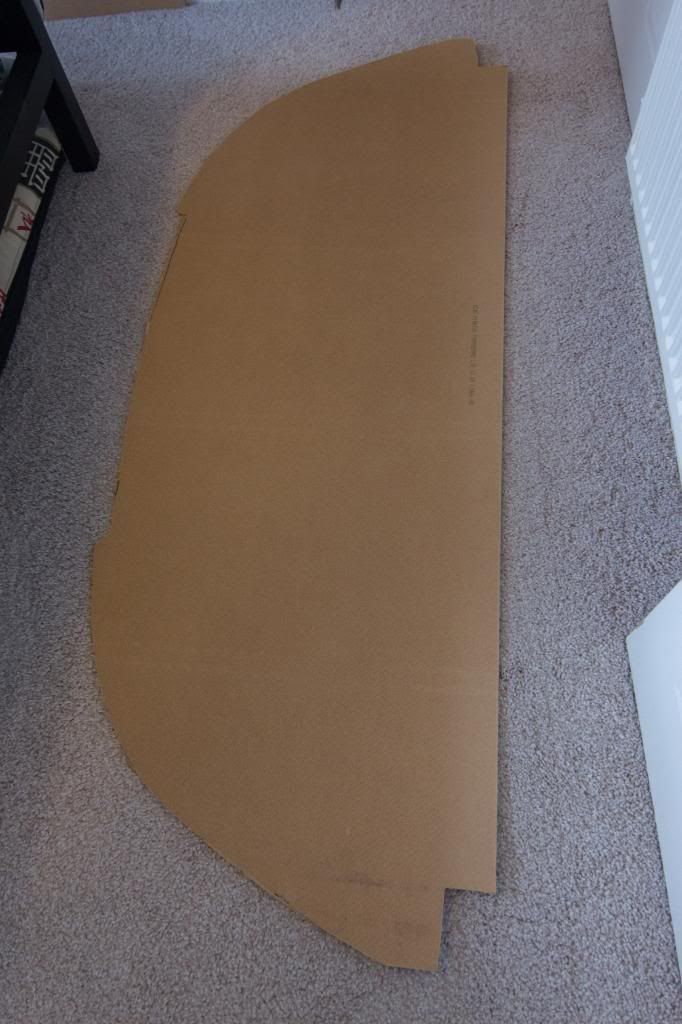
Thankfully the packaging was thin fibre board, which actually turned out to be a blessing, as it was the same size as the sheet and could be used to make the template  This was a test to see how the proposed lines might work
Time to draw the outline and a rough guide
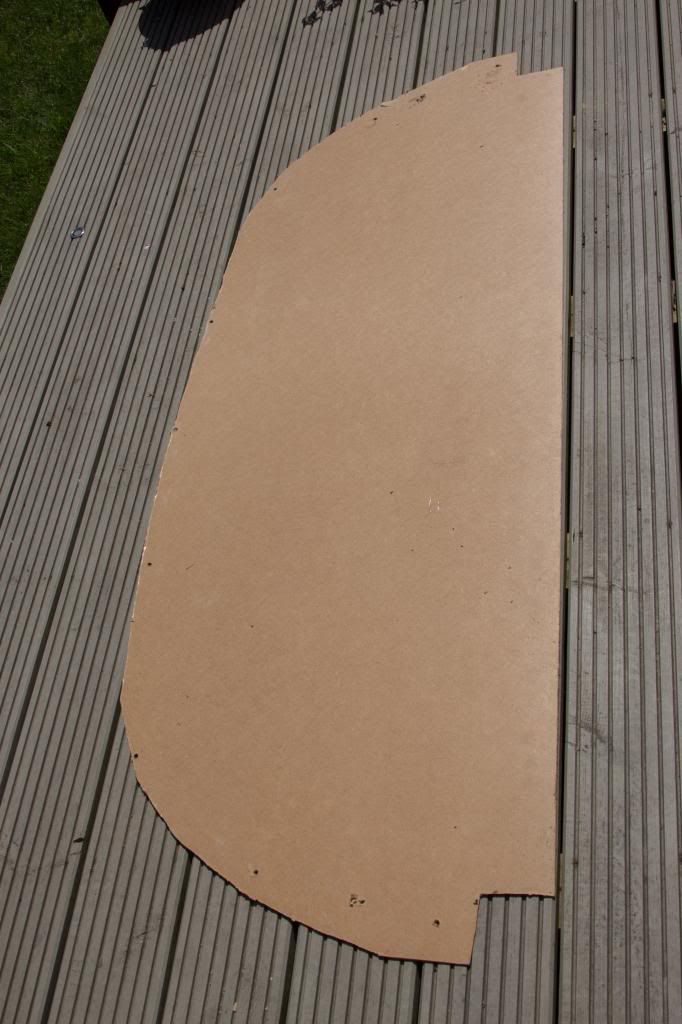
So this is the basic outline, although it was set to be heavily refined
First cut of the template
Cut to a few hours later, lots of tweaking and refining
Which was enough for the day.
Woke up this morning to see the great supplier of vitamin D in the sky  So cracked on with the job in hand
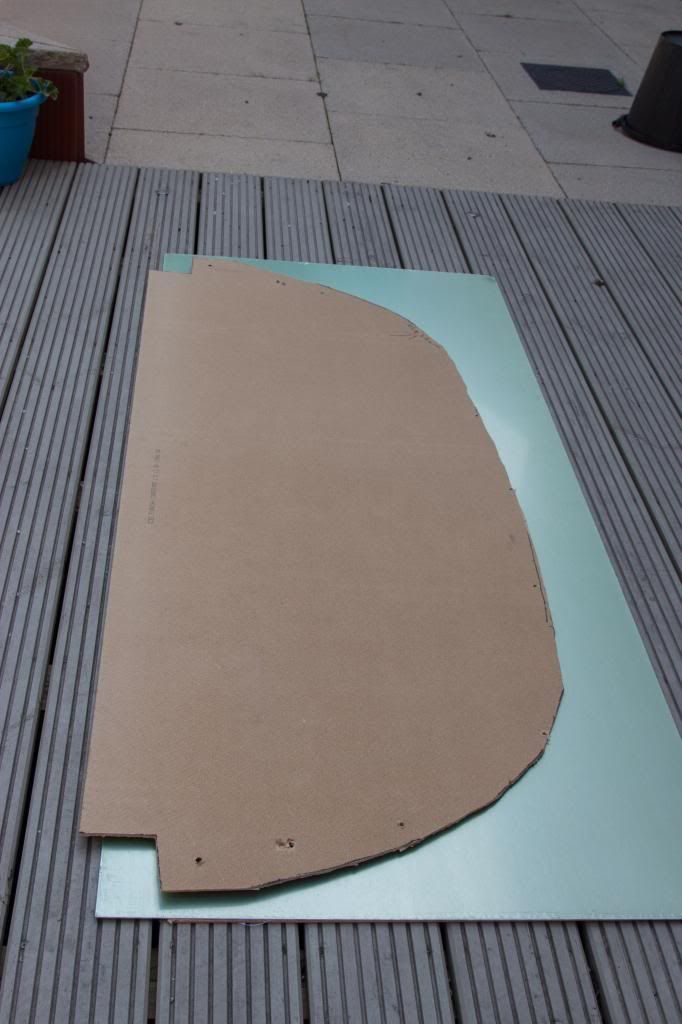
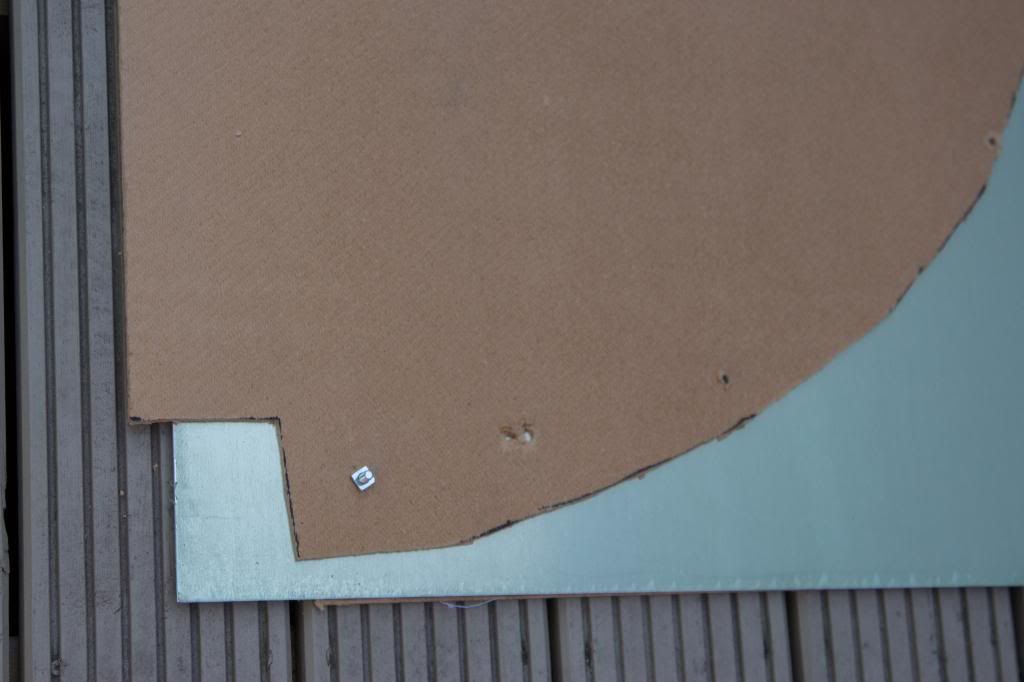
Measurements checked, double checked and triple checked, it was time to put the first holes in
I wanted to reduce the flared edges by 25mm, so marked up a 25mm reduction on the board. Giving me a line to mark the holes to
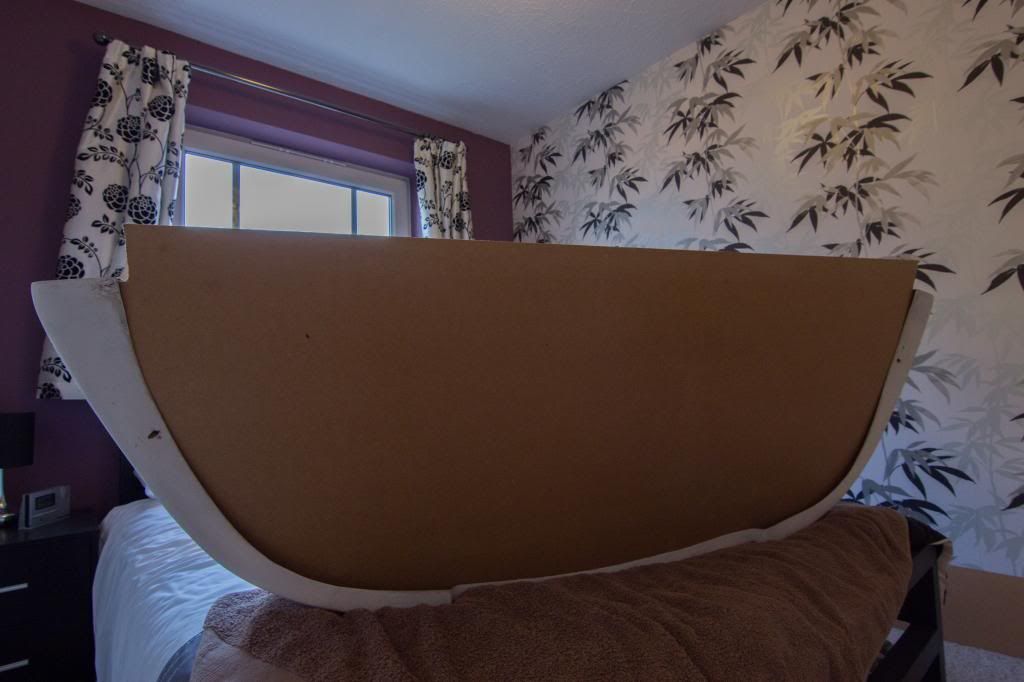
All holes done it's time for a test fit
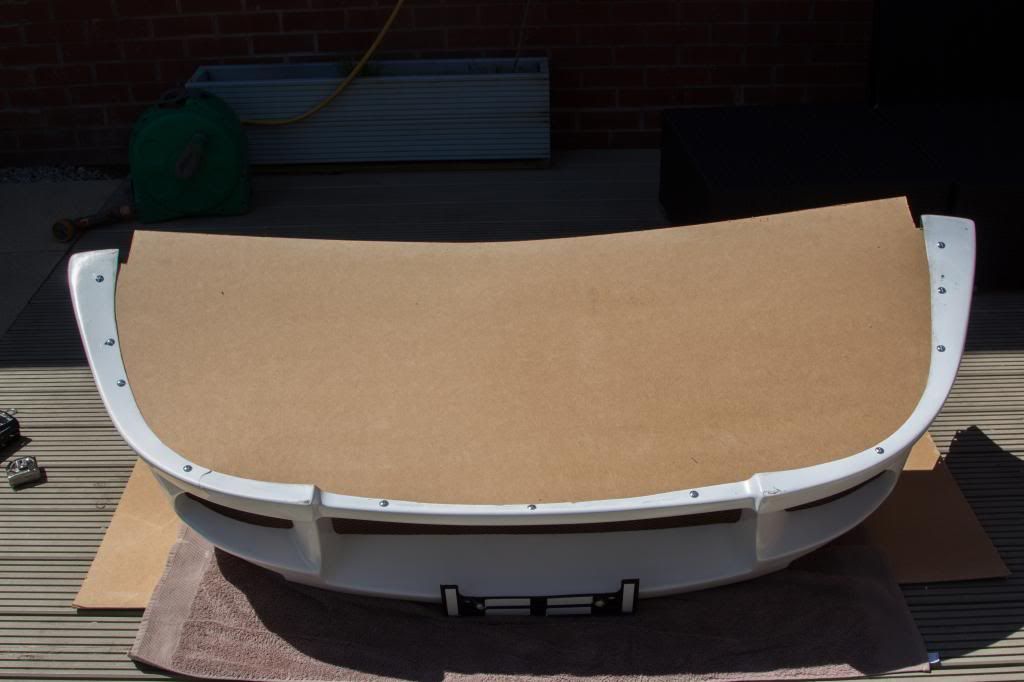
Deja vu
Well would you look at that
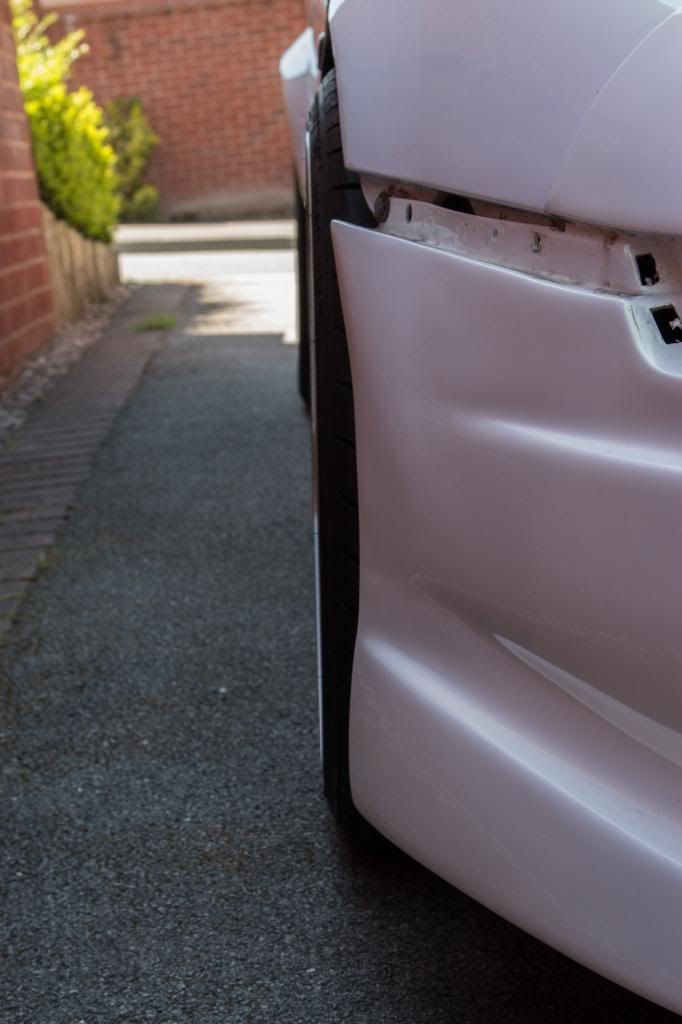
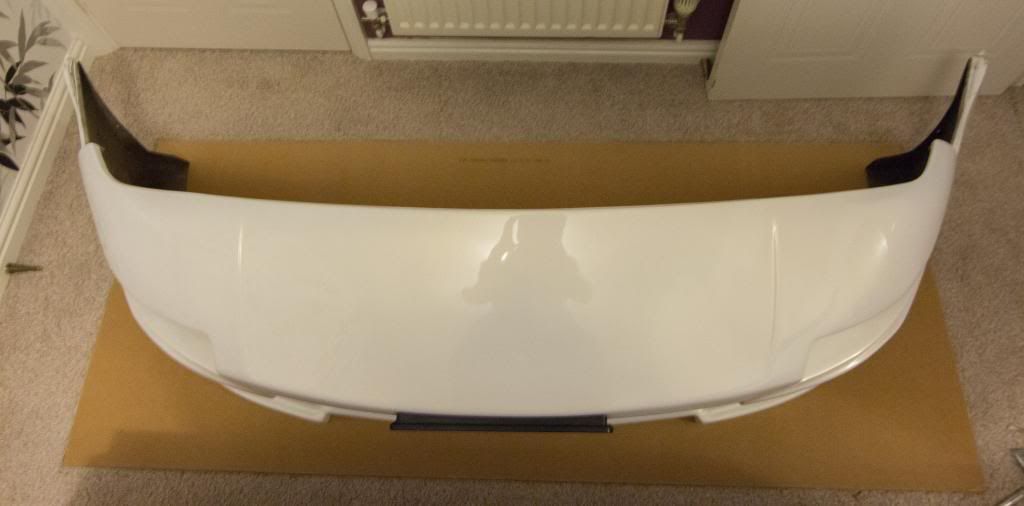
I'm planning on using the stock undertray plastics to hold the inner edge(line running along the edge of the tyres) in place, avoiding resonance. OS piece was fine
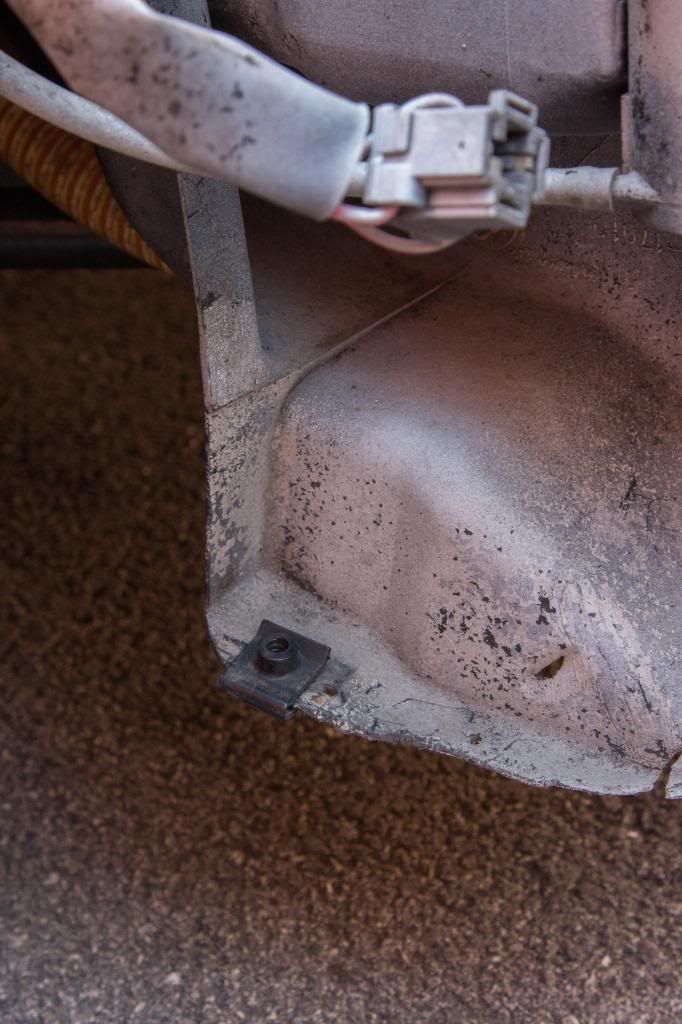
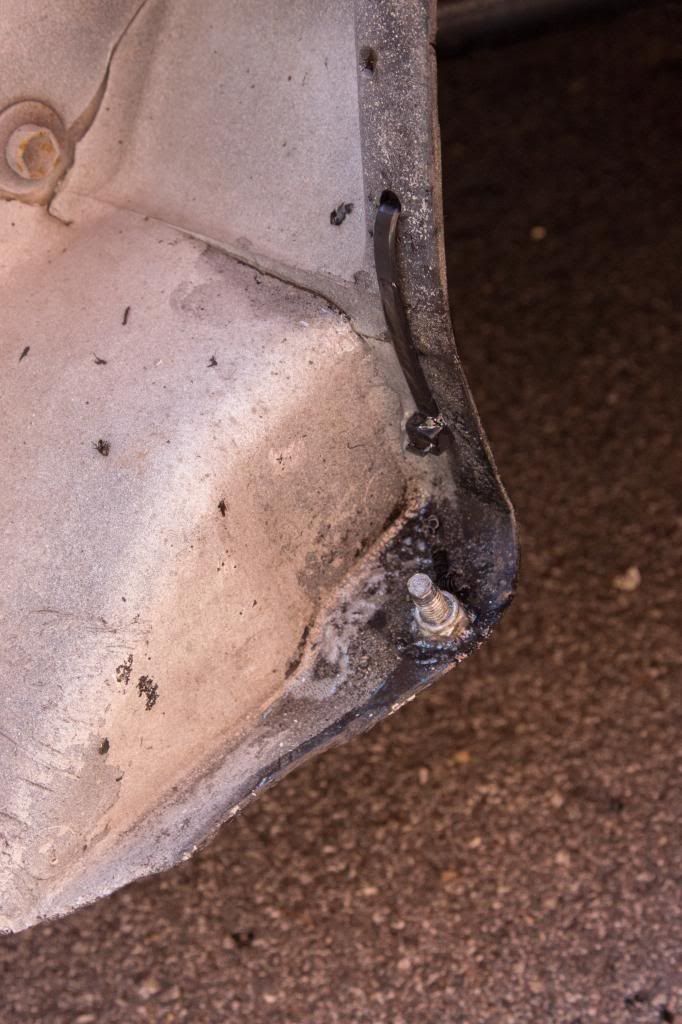
The NS piece wasn't so hot and had a split along the edge which needs to take the load. Nothing a couple of holes, a plastic tie and some evil strong glue over the whole area won't fix though
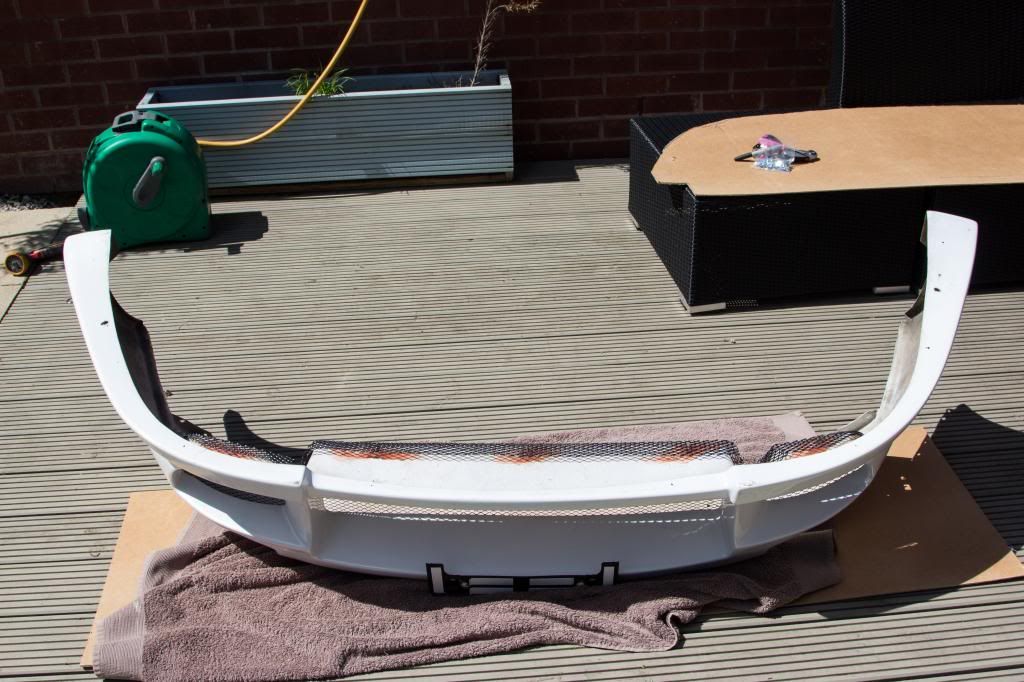
Onto the main event I guess
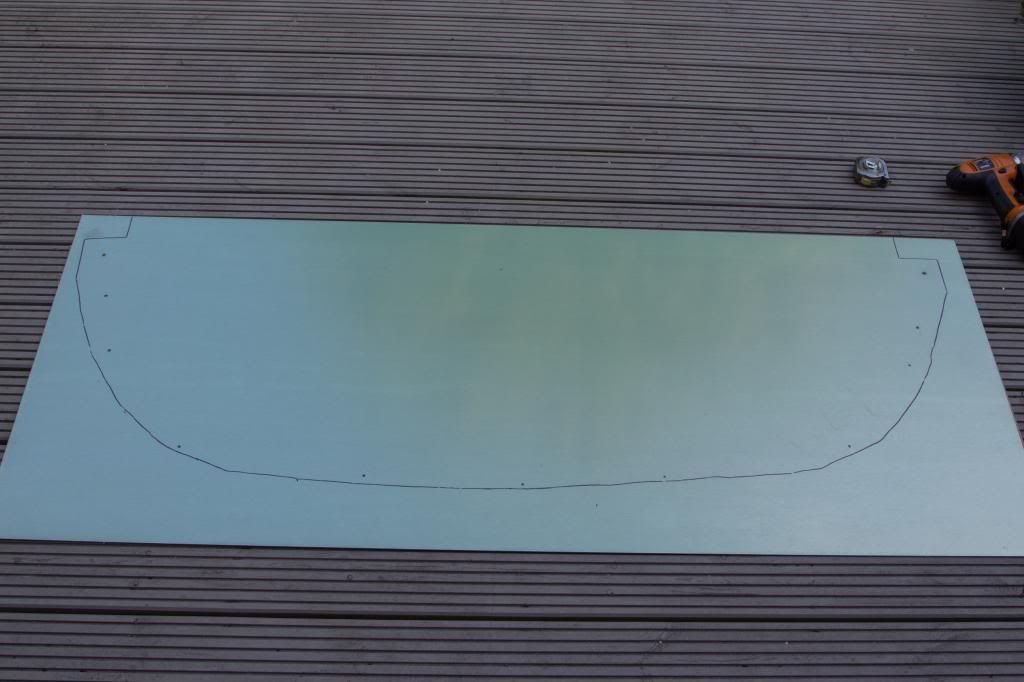
One of the observations made during the test fit was that the extra material I'd left for the speed flaps was too much in reality. I did leave 60mm across the whole edge, however in reality 35mm is much more suitable and reduces the risk of it rubbing on speed bumps etc. So the template was shifted to compensate
Everything in the right place I thought it easier to drill a couple of the holes needed out in advance, so the two pieces could be held together, making the marking out easier and more accurate
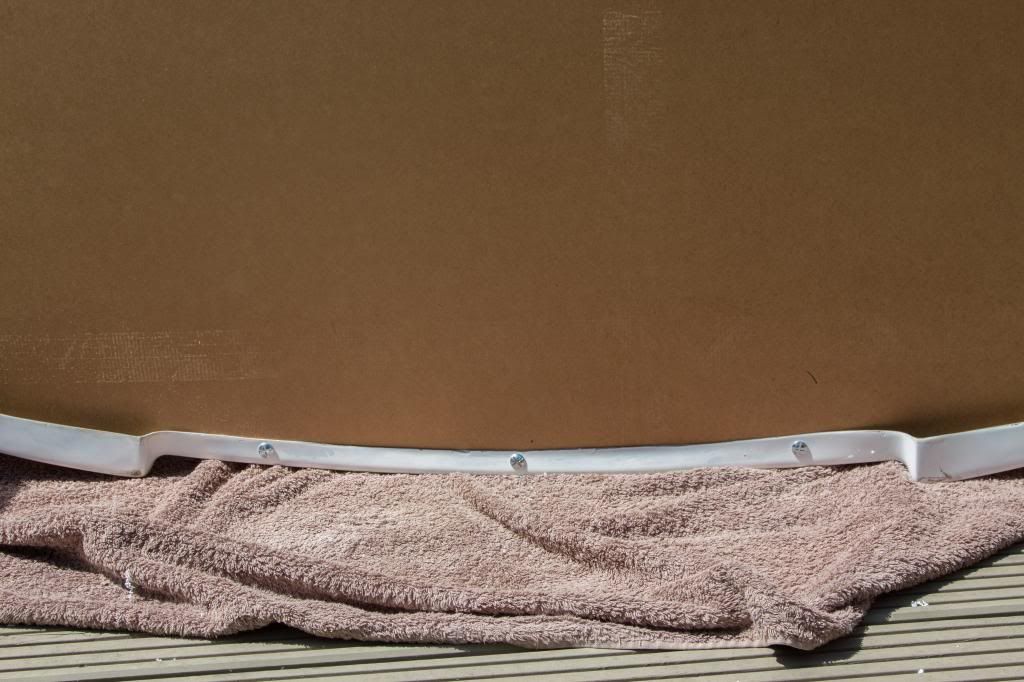
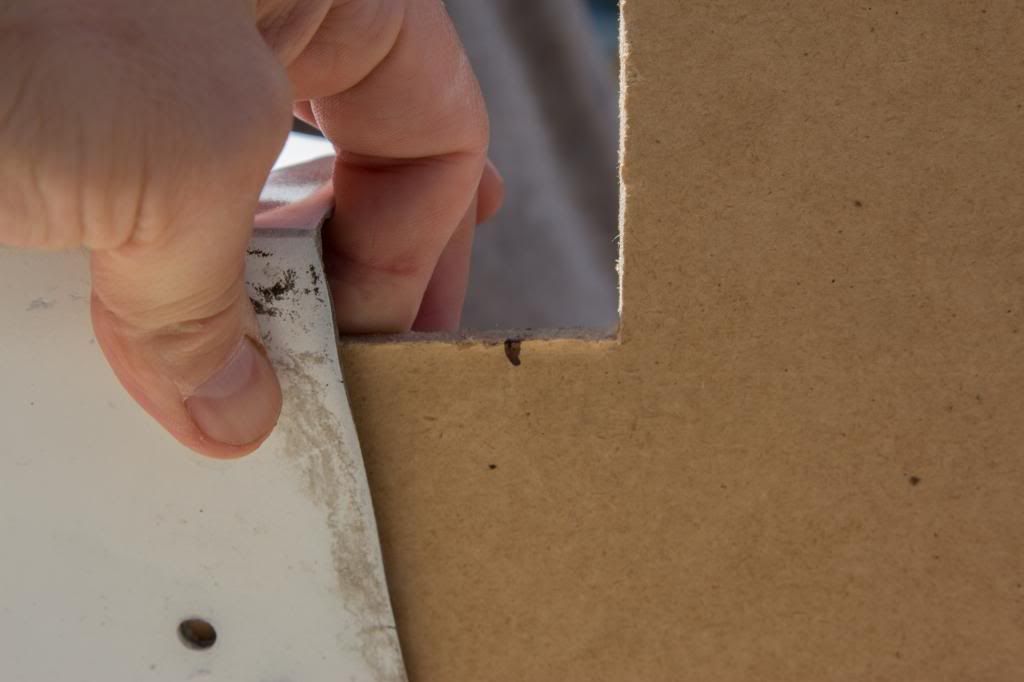
Marked up and ready for cutting. The inner edge (which meets the inside of the bumper) isn't perfect, however it's not going to be seen, so as long as the out edges and holes are spot on it works for me
Cut to many minutes later, ringing ears, lots of mess and a sore back.... The metal is cut, ready for de-burring. That however will need to wait for another day, as now it's time for BBQ food and maybe a drop or two of wobbly legs juice 
As with any Mule based job there's always some sort of sacrifice of blood required. This time the grinder decided it would do the business  Oh well, the dirt and metal particles will help it heal

So all that's left now is bolting it to the bumper, mounting and attaching it to the underside of the car. Oh, the speed flaps need marking out and bending too. The main thing is my brain gets to take a break from calculating and pondering 
Toodle pip. Hope you're all making the most of this rare blessing from the skies
We last this story with me having taken delivery of a massive parcel and wondering what the hell I'd got myself into

2mm thick, which in theory means less flexing when the car's moving.

Thankfully the packaging was thin fibre board, which actually turned out to be a blessing, as it was the same size as the sheet and could be used to make the template

Time to draw the outline and a rough guide

So this is the basic outline, although it was set to be heavily refined

First cut of the template

Cut to a few hours later, lots of tweaking and refining

Which was enough for the day.
Woke up this morning to see the great supplier of vitamin D in the sky

Measurements checked, double checked and triple checked, it was time to put the first holes in

I wanted to reduce the flared edges by 25mm, so marked up a 25mm reduction on the board.

All holes done it's time for a test fit


Deja vu

Well would you look at that


I'm planning on using the stock undertray plastics to hold the inner edge

The NS piece wasn't so hot and had a split along the edge which needs to take the load.

Onto the main event I guess

One of the observations made during the test fit was that the extra material I'd left for the speed flaps was too much in reality.

Everything in the right place I thought it easier to drill a couple of the holes needed out in advance, so the two pieces could be held together, making the marking out easier and more accurate

Marked up and ready for cutting.

Cut to many minutes later, ringing ears, lots of mess and a sore back.

As with any Mule based job there's always some sort of sacrifice of blood required.

So all that's left now is bolting it to the bumper, mounting and attaching it to the underside of the car.
Toodle pip.
-
Magic Beans
- Posts: 4789
- Joined: Thu Nov 24, 2011 1:01 pm
Re: The journey of one man and his Mule(s)
Oh, I also now have a template which should work for Border bumpers made by the same manufacturer. So if anyone needs one..
Re: The journey of one man and his Mule(s)
And to think, earlier today I was please with myself for being able to fit an alternator belt without destroying the car
Fantastic work, looking forward to the finshed article
Fantastic work, looking forward to the finshed article
2001 BMW M5 (Bahnstormer) | 2004 RX8 231 (the Racecat) | 2001 Volvo V70 (Swedish eBay barge)
Previous:
1989 MR2 Mk1b T-bar| 1988 MR2 SC Super Edition
Previous:
1989 MR2 Mk1b T-bar
Re: The journey of one man and his Mule(s)
Nice work does it need any holes for the air coming out the rad to exit or does it not go that far back 
My TRD WIDEBODY build thread http://www.imoc.co.uk/forums/viewtopic.php?t=164957
Re: The journey of one man and his Mule(s)
Good work Phil!
I wouldn't mind something similar for my Bomex bumper, however I've done ok so far with original trays tie wrapped/bolted to the bumper.
I wouldn't mind something similar for my Bomex bumper, however I've done ok so far with original trays tie wrapped/bolted to the bumper.
-
Magic Beans
- Posts: 4789
- Joined: Thu Nov 24, 2011 1:01 pm
Re: The journey of one man and his Mule(s)
ashley wrote:Good effort Phil
How rigid is the 2mm ali sheet?
I'd say it's about spot on, as it's pretty rigid but not so much as you can't manipulate it into the arc needed.
It's too much for the arch liners though, but they don't need to be so rigid I guess.
-
Magic Beans
- Posts: 4789
- Joined: Thu Nov 24, 2011 1:01 pm
Re: The journey of one man and his Mule(s)
matt-mr2 wrote:Nice work
It doesn't go back that far, there's a good amount of room for the air to flow out the rad(s) and under the car.
-
Magic Beans
- Posts: 4789
- Joined: Thu Nov 24, 2011 1:01 pm
Re: The journey of one man and his Mule(s)
synXero wrote:It will be interesting to see how this affects things.
Me too.
-
Magic Beans
- Posts: 4789
- Joined: Thu Nov 24, 2011 1:01 pm
Re: The journey of one man and his Mule(s)
RedMR² wrote:Good work Phil!
I wouldn't mind something similar for my Bomex bumper, however I've done ok so far with original trays tie wrapped/bolted to the bumper.
Could be something you
Re: The journey of one man and his Mule(s)
Magic Beans wrote:RedMR² wrote:Good work Phil!
I wouldn't mind something similar for my Bomex bumper, however I've done ok so far with original trays tie wrapped/bolted to the bumper.
Could be something you
I'll keep it in mind mate, as it would be a lot better than the standard 2 part 20 year old undertrays.
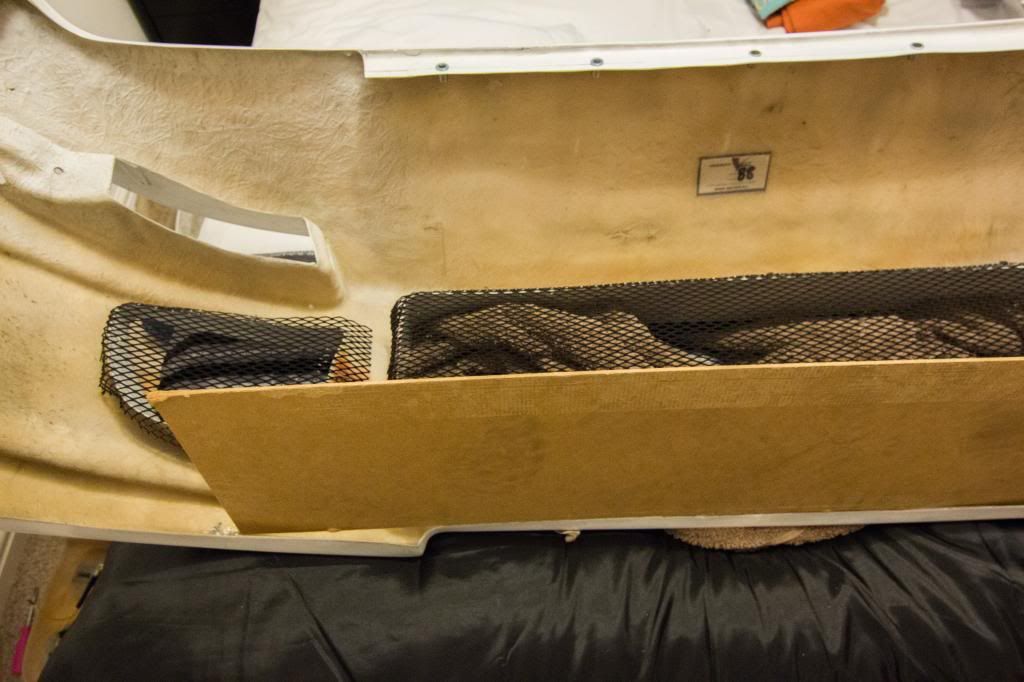
Pete's done something similar for Kong if memory serves.
-
Magic Beans
- Posts: 4789
- Joined: Thu Nov 24, 2011 1:01 pm
Re: The journey of one man and his Mule(s)
He has indeed. In fact I've looked at that one photo in his profile more than a few times, trying to figure out it's secrets
Re: The journey of one man and his Mule(s)
nice job
remeber if blood isnt spilt working on an MR2 the job hasnt been done correctly
remeber if blood isnt spilt working on an MR2 the job hasnt been done correctly