| Guide To Replacing T-Bar Seals |
Description A step-by-step photo guide on replacing leaking and worn roof seals
Author Olly P
Date Sun Mar 28, 2010 12:49 am
Type Picture How-To
Category MR2 Mk2 Articles
Views 18734
|
Guide To Replacing T-Bar Seals
A step-by-step photo guide on replacing leaking and worn roof seals |
 |
Today I began the process of replacing my 18 year old and leaking t-bar seals. Seeing as this seems to be a much desired option for many t-bar owners, and seeing as I had my camera to-hand, I thought I'd make a step-by-step guide.
If anyone has any tips or hints they feel would be useful, again just add them below.
___________________________________________________________
Firstly, replacement t-bar seals can be purchased from a Toyota parts dealer in Dallas, USA. You need all four parts listed below. The 'weatherstrips' are the seals that attach to the car around the window and t-bar glass. The 'glass t-bar panel seals' go on the actual t-bar panel itself. Search by part number:
63627-17022 (Weatherstrip for T-Bar) Drivers Side
63628-17022 (Weatherstrip for T-Bar) Passenger Side
62381-17051 (Glass t-bar panel seal) Drivers Side
62382-17051 (Glass t-bar panel seal) Passenger Side
...via this link:
http://www.toyotapartsales.com/partlocator/index.cfm'siteid=214074
All in, mine came to about '230, plus another '17 import duty upon arrival in the UK about a fortnight later. Their prices seem to change often but it's still cheaper than Toyota here in the UK!
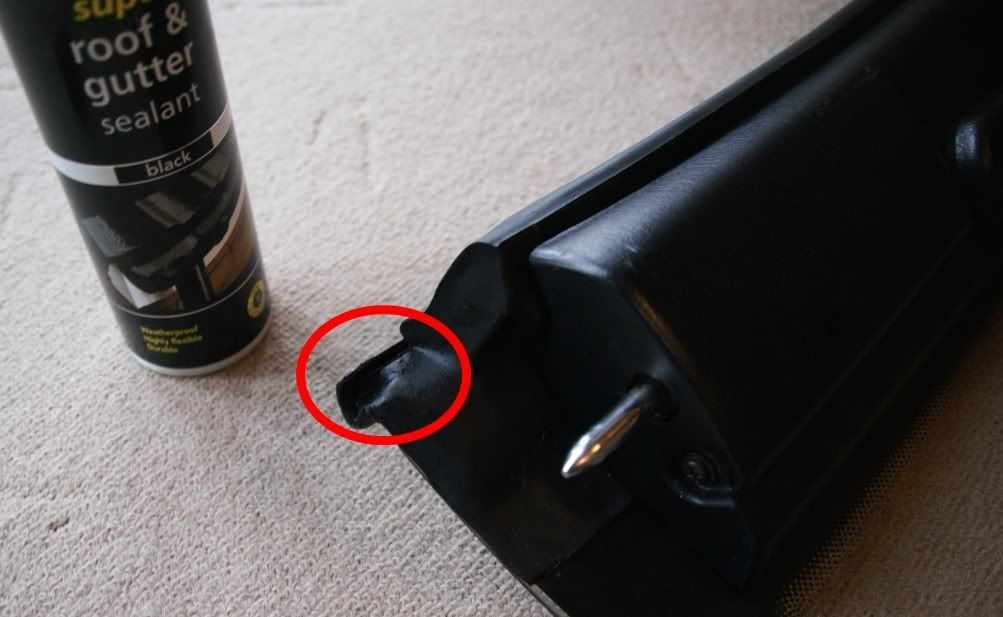
When the seals arrived, I hung them up in the shower and sprayed half a can of Halfords silicone sealant over them and left them to dry for two days. This ensures they're water tight and replenished after sitting in storage for a while.
Ok, here's what I did.
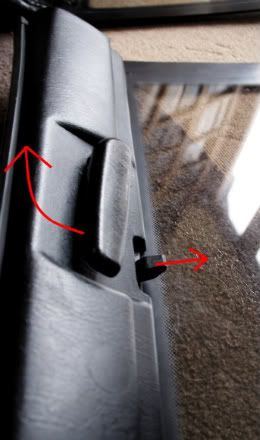
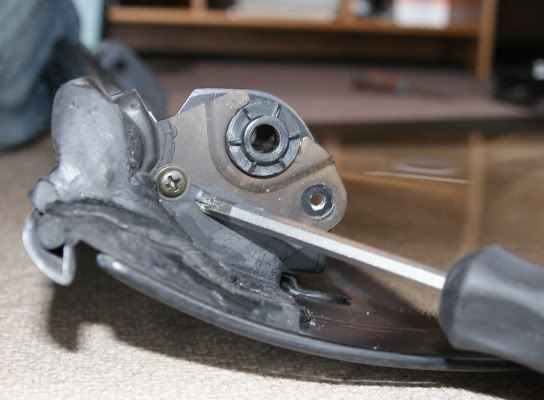
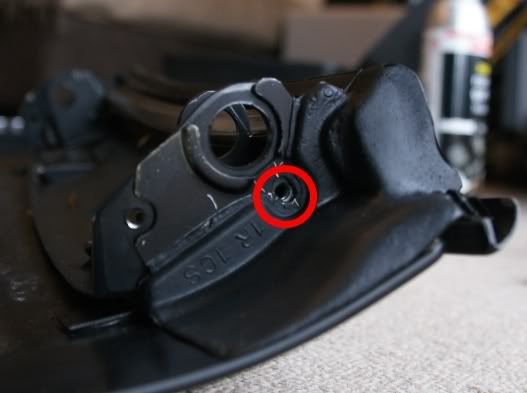
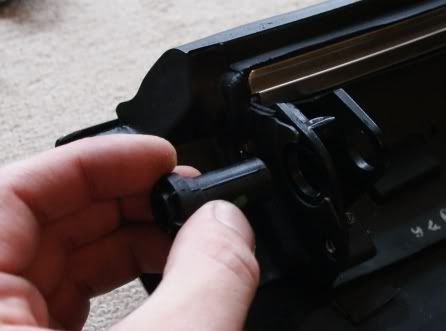
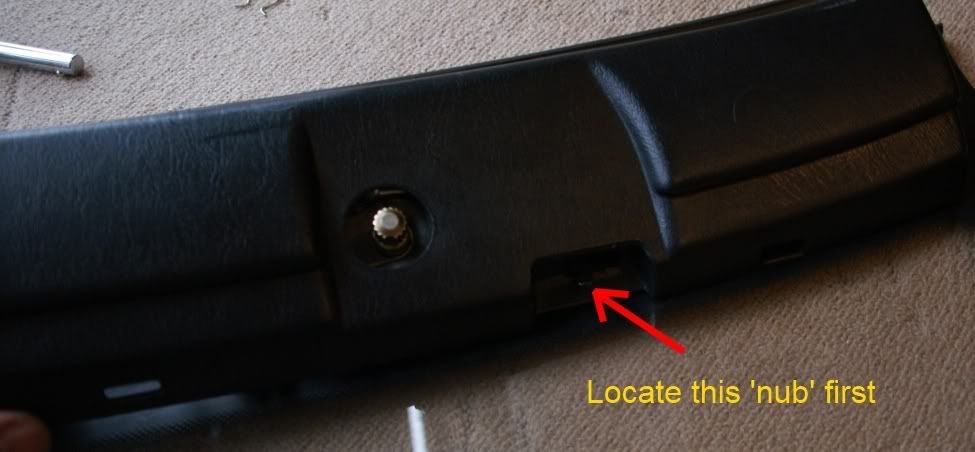
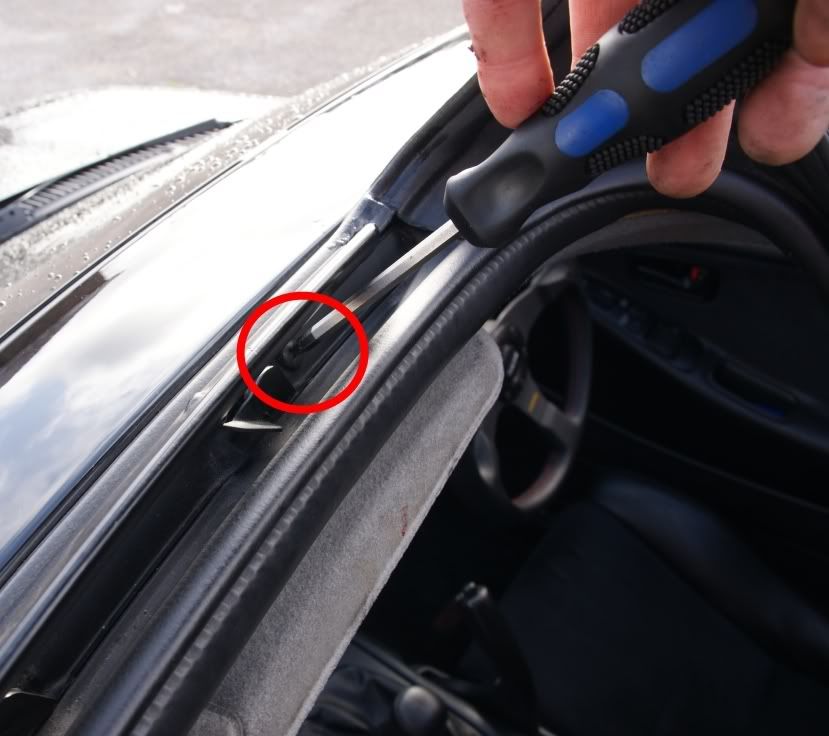
Firstly, pull the handle down and remove the little 'nub' (indicated) by giving it a firm pull.
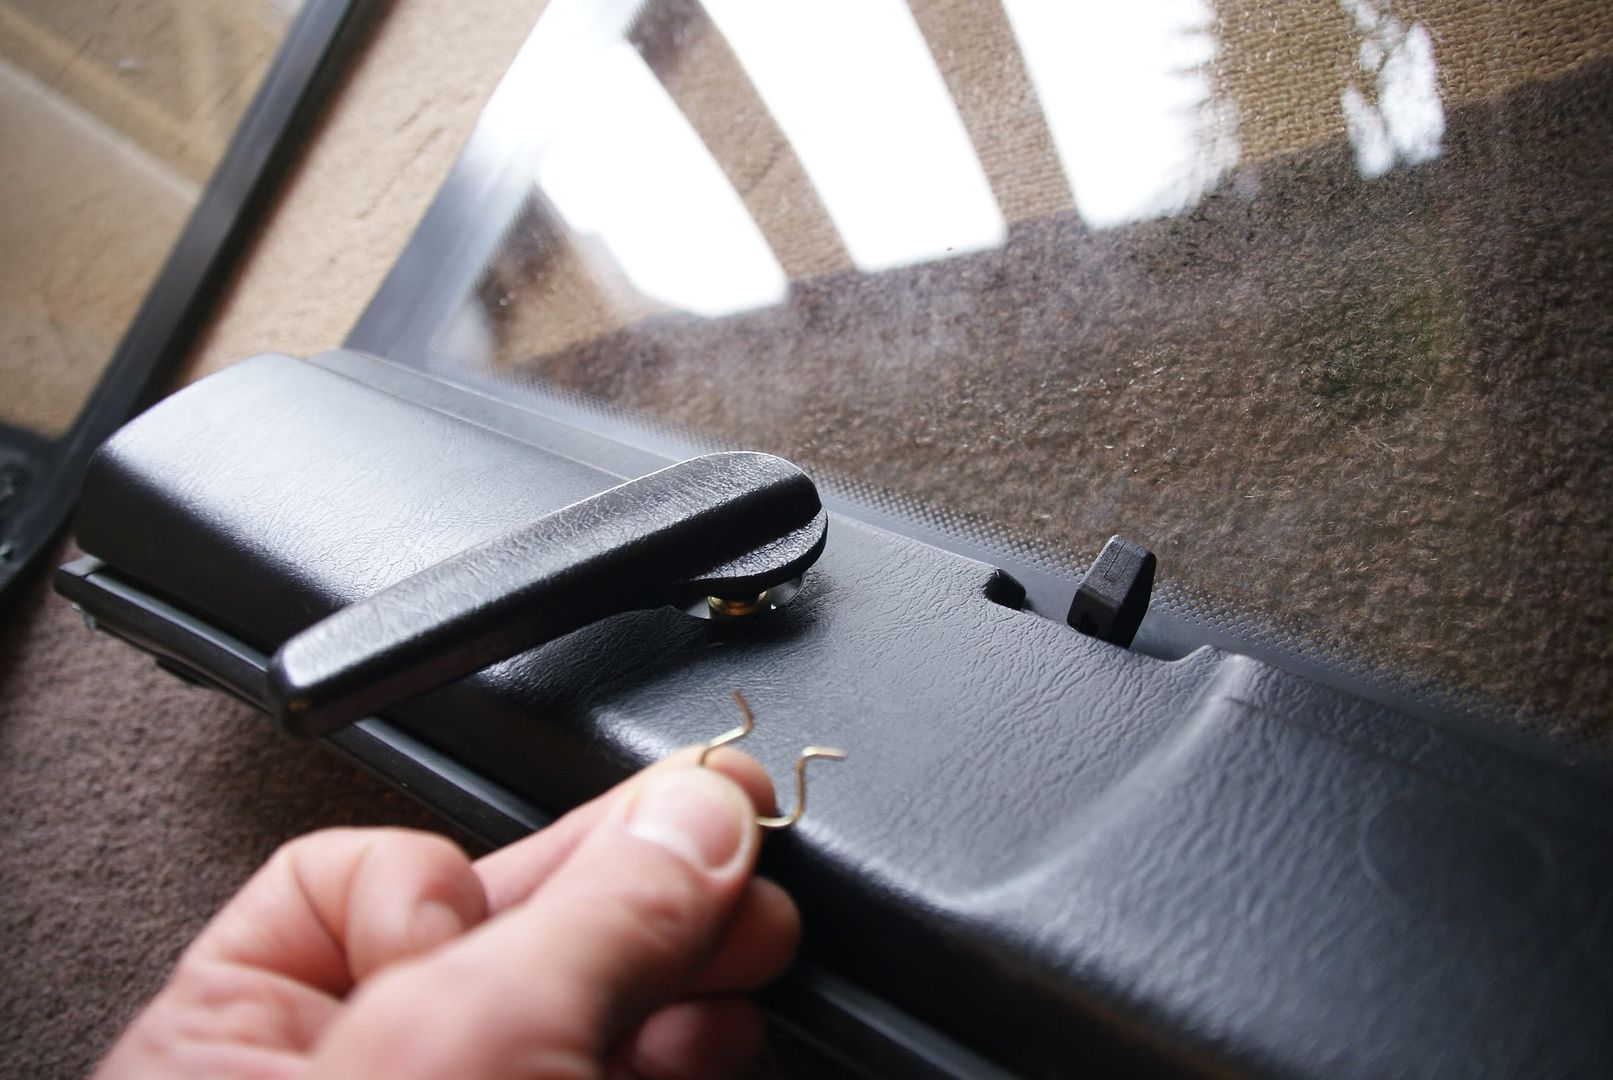
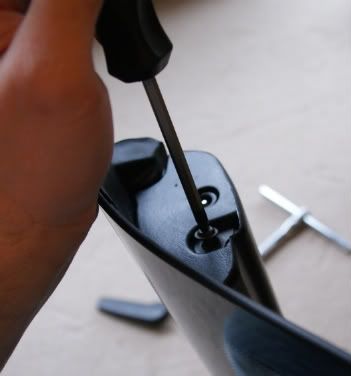
The next fit is a bit fiddly. You need to remove the golden cir-clip from the hinge of the handle. I did this with a flat-head screw driver and a bit of patience. Once removed, pull the handle outwards and it should just slide off.
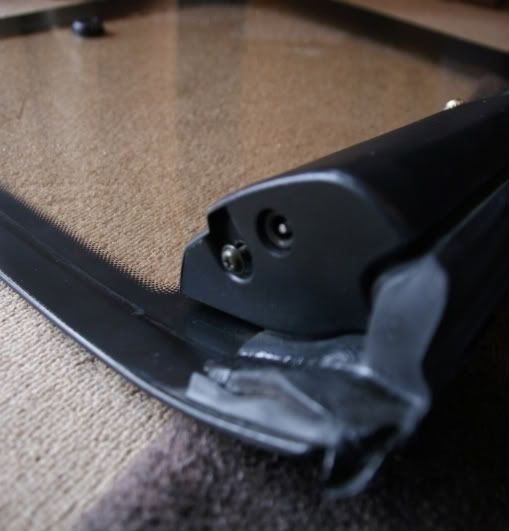
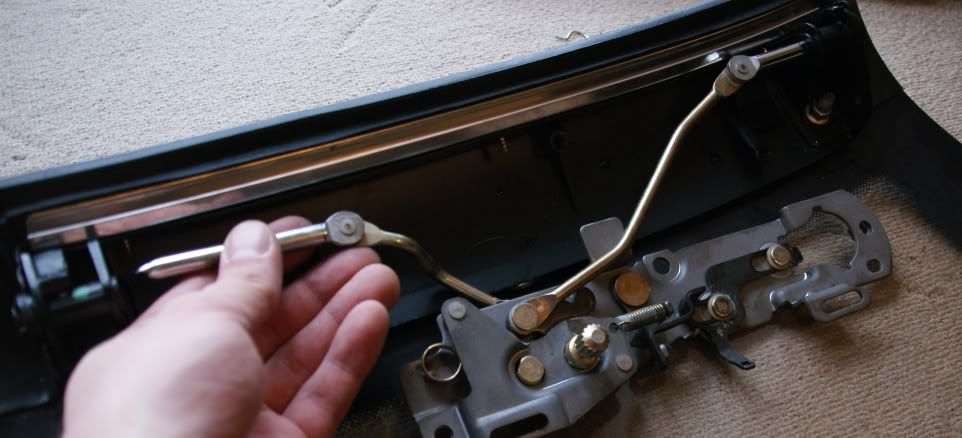
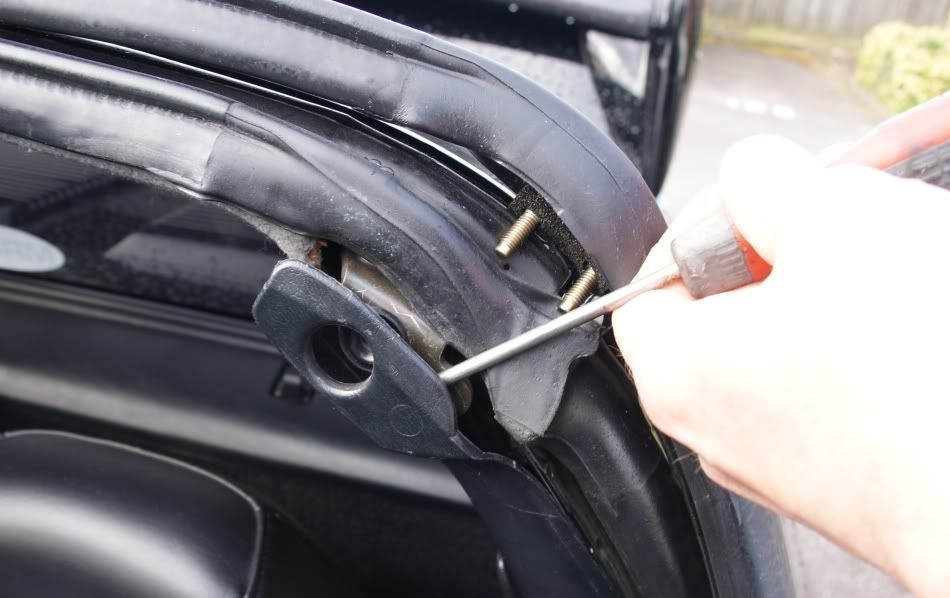
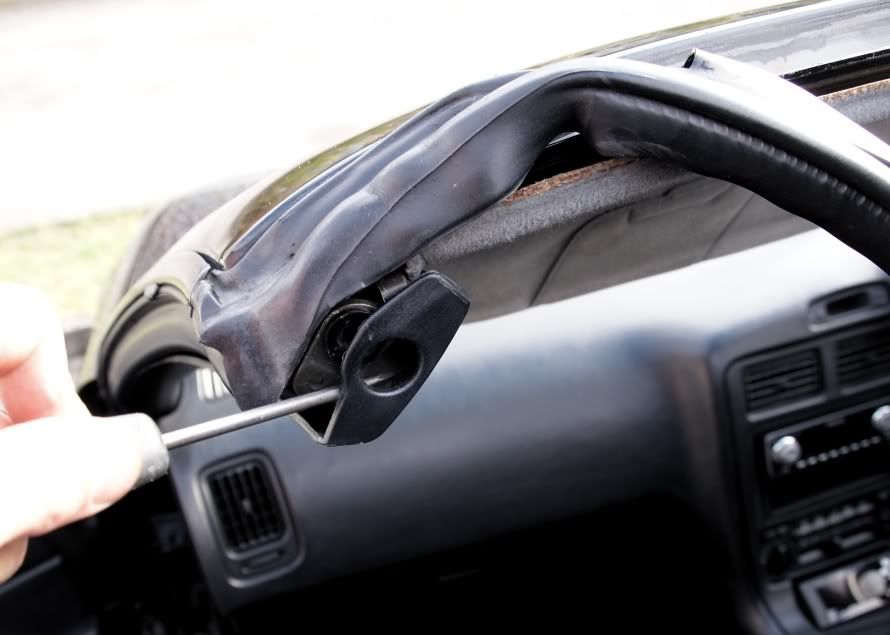
Remove the screw from both ends of the panel.
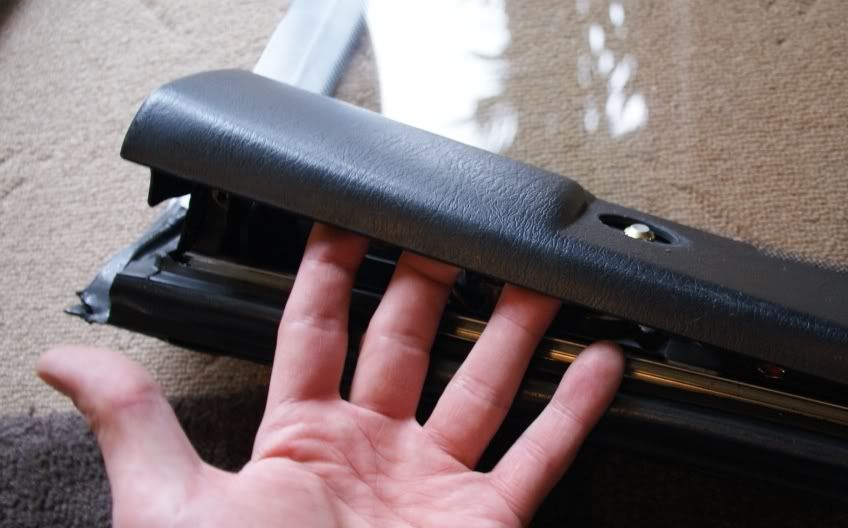
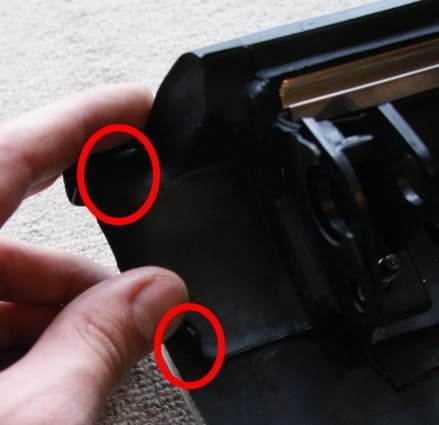
' and gently remove the plastic cover. This is attached via two concealed clips which just pop out. A bit of force is needed. But be careful, it only plastic after all.
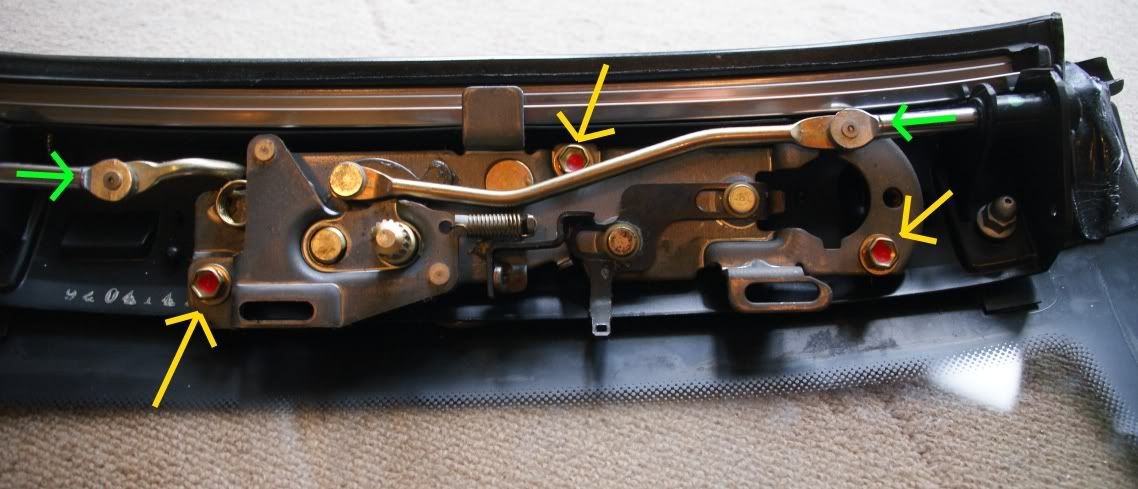
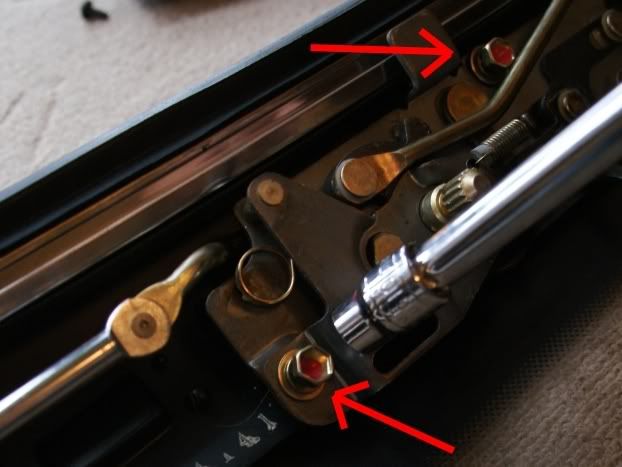
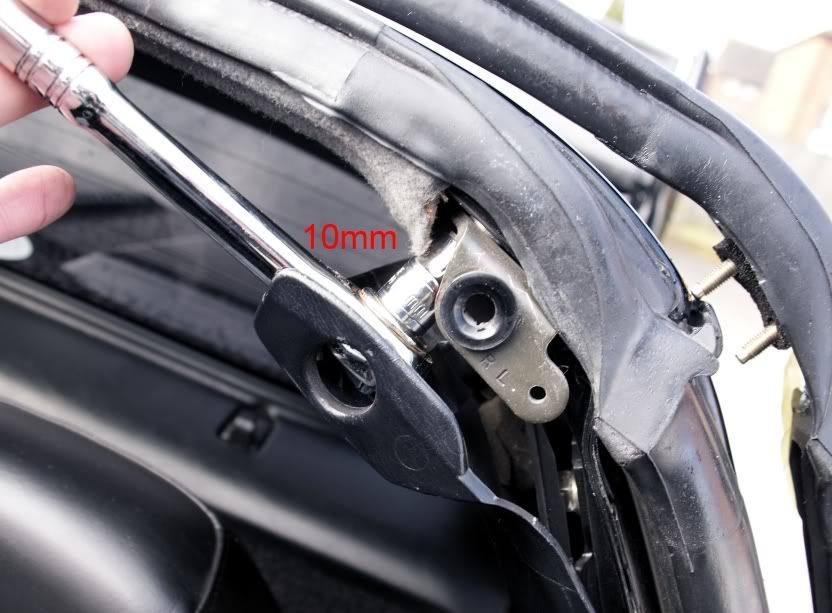
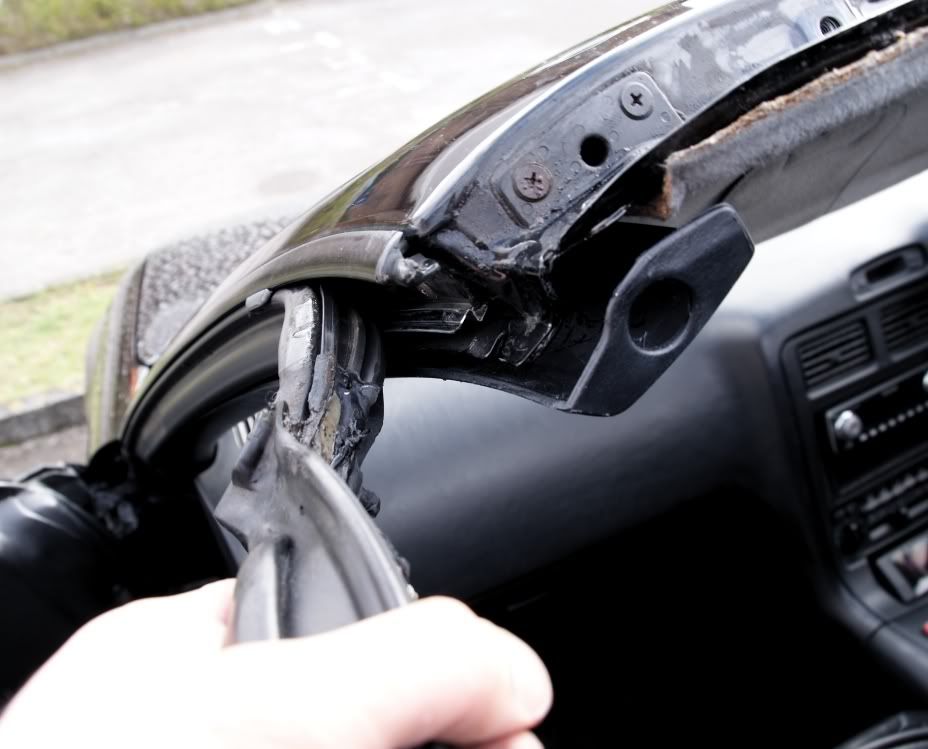
Next, remove the three red bolts using a 10mm socket. To gain access to the top one, you may need to bring the bars inwards (as shown in green). Once removed, bring those 'green' bars inwards so that you can remove the mechanism completely.

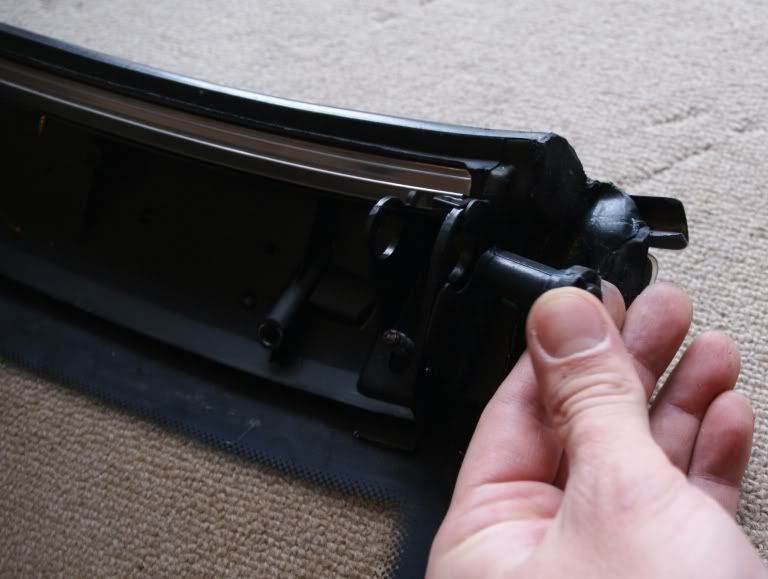
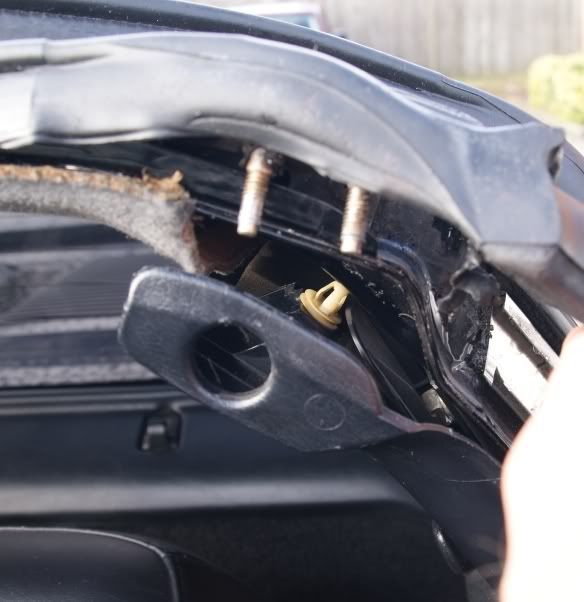
Remove this screw from both ends of the t-bar panel.
' and remove the rod guiders from both ends also.
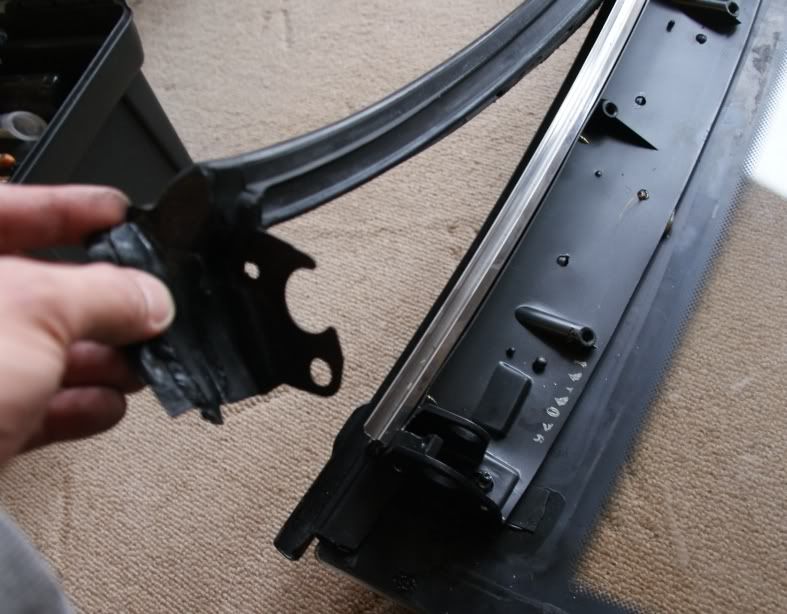
Next is the removal of the old t-bar rubber. This is attached with bonding sealant and requires a bit of force to remove.
Then with an abrasive cloth or similar, clean up the surface.
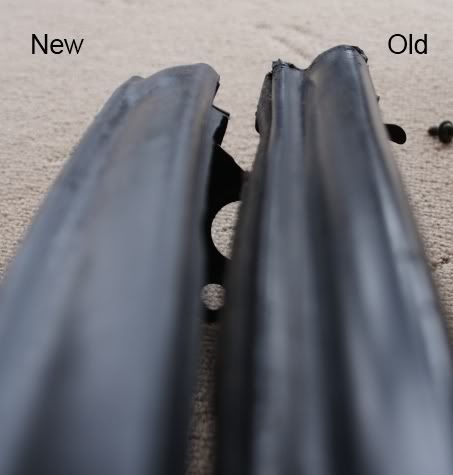
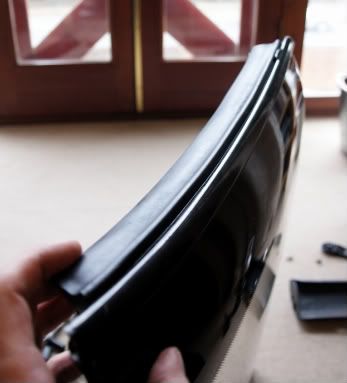
Here's a comparison between the old, worn rubber and the plump new one.
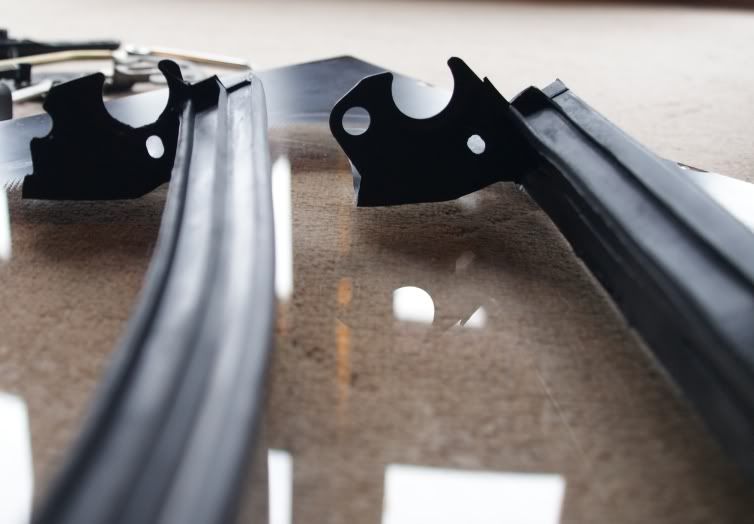
Next, take your new t-bar rubber. Make sure it is for the same side of the car as they are not interchangeable. As shown below, these are not for the same side! So be careful.
The new rubber will have paper protecting the pre-applied adhesive.
At this point, with the paper still attached, I laid the rubber in situ so that I could see how it fitted to the panel itself.
Once I was happy with how it fitted together, I grabbed myself a can of silicone-based adhesive:

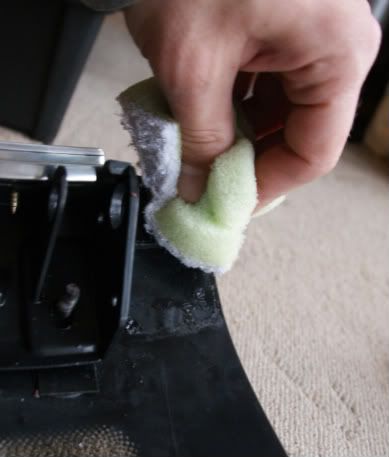
' and applied a small amount as shown:
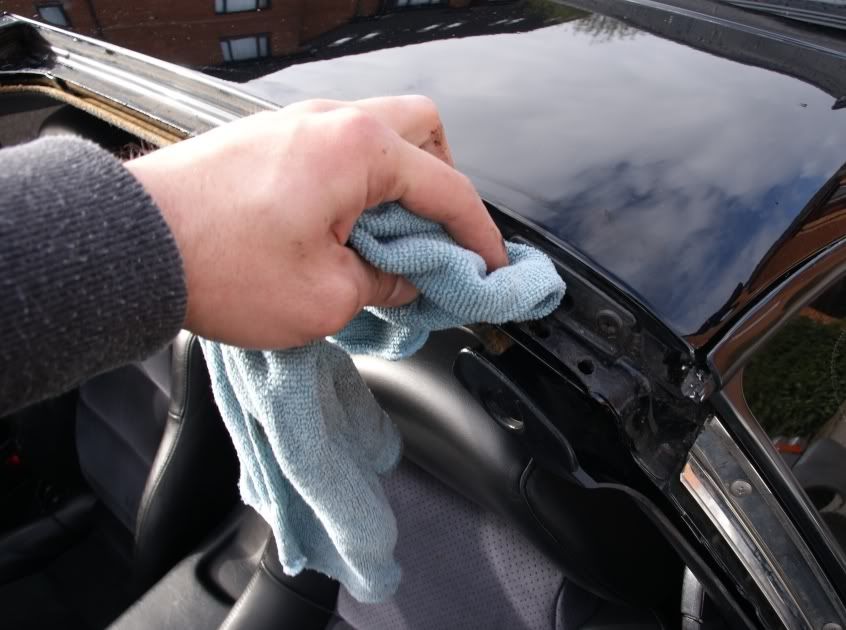
Now it's time to fix the new rubber to the panel. Remove the paper covering the pre-applied adhesive, and lay the rubber on to the panel like you did in the 'practice run'. Press down in all areas where adhesive is located.
Ensure the screw holes at both ends line up. If not, gently manoeuvre the rubber until it does. The adhesive does not dry for many hours so you have time to adjust things.
I noticed the following parts of rubber were not very well secured to the glass panel, so added a small amount of adhesive underneath:
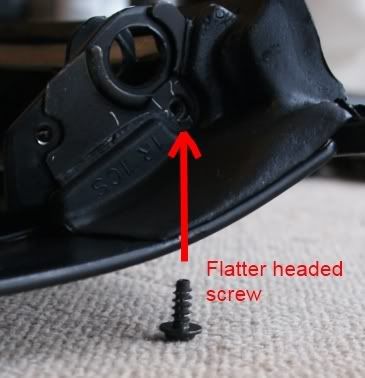
Once you're happy with the fit, re-fit the rod guides followed by the flatter-headed of the screws:
Reattach the mechanism and fasten the red bolts. Be careful not to over-tighten these bolts as they strip easily (as I found out).
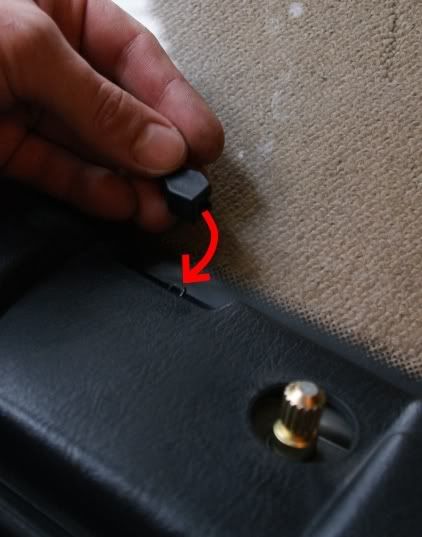
Attach the plastic covering. This is done by ensuring the 'nub' is located first (shown below).
Fasten the remaining two screws, one at either end:
Attach the nub:
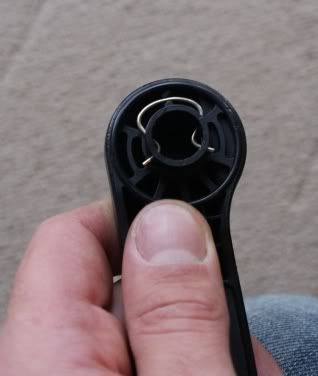
With the cir-clip in situ, attach the handle as shown. Note that the protruding rods/prongs at either end of the panel must, at this point, be retracted.

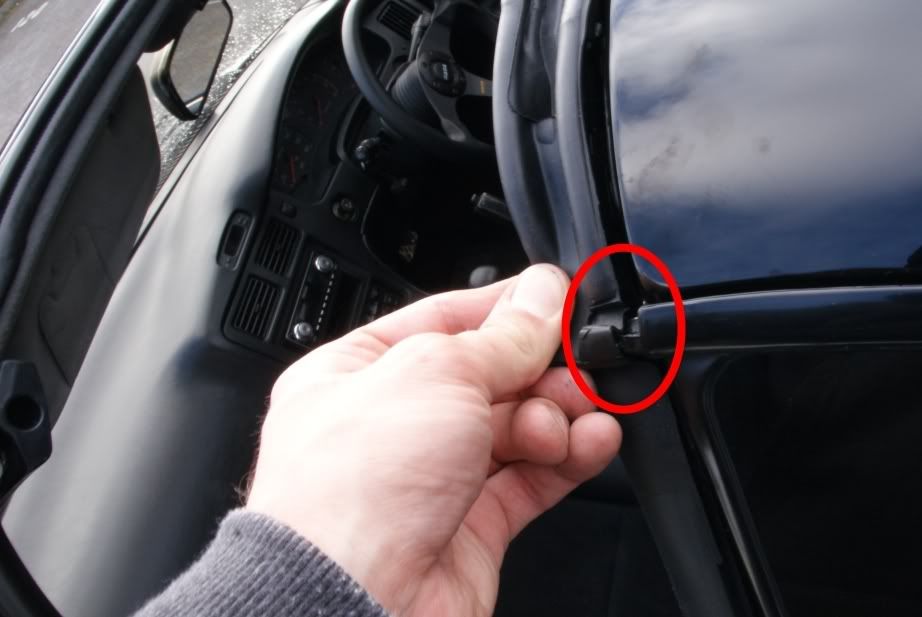
The finishing touch for me was applying an additional small dab of adhesive to the indicated area to ensure a secure fit and finish.
Now do the same on the other panel.
___________________________________________________________
***********************************************************
Ok, now for replacing the rubber t-bar seals that fix to the car itself.
The following is for the passenger side.
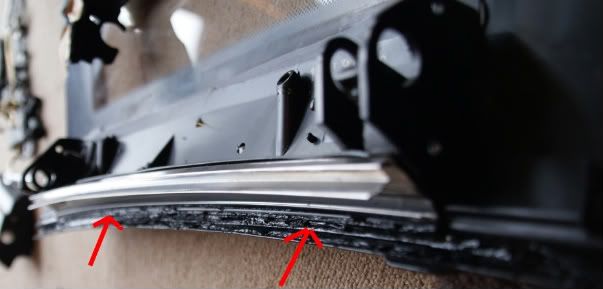
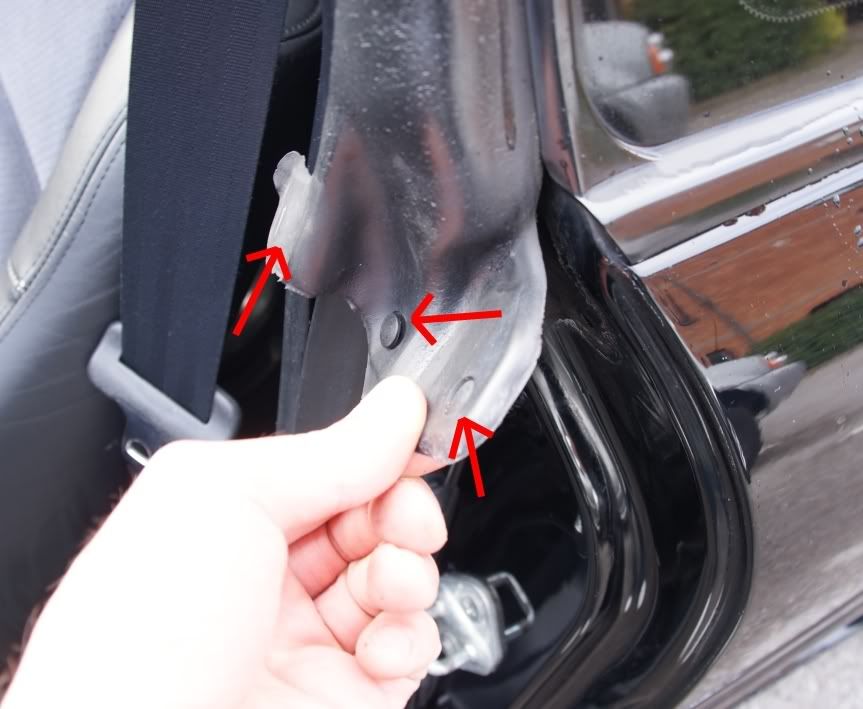
Firstly, starting at the back section of the seal, using a flat-head screwdriver, pop out the two studs/poppers, and free the small metal 'L' shaped clip (hidden behind where the far left arrow is pointing).
You should then be able to pull the seal away from the body. Some areas are attached with adhesive, but should detach quite easily.
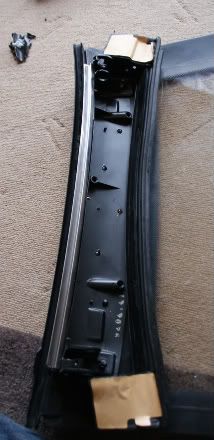
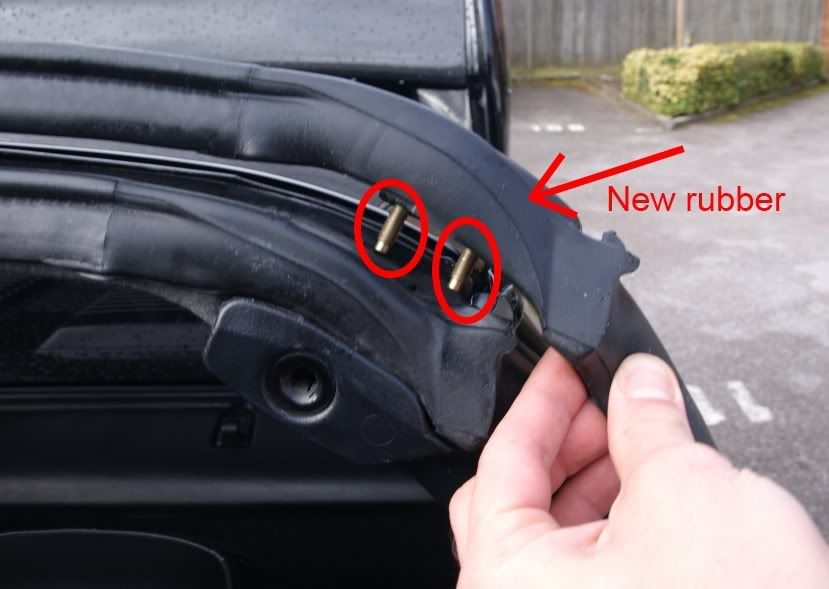
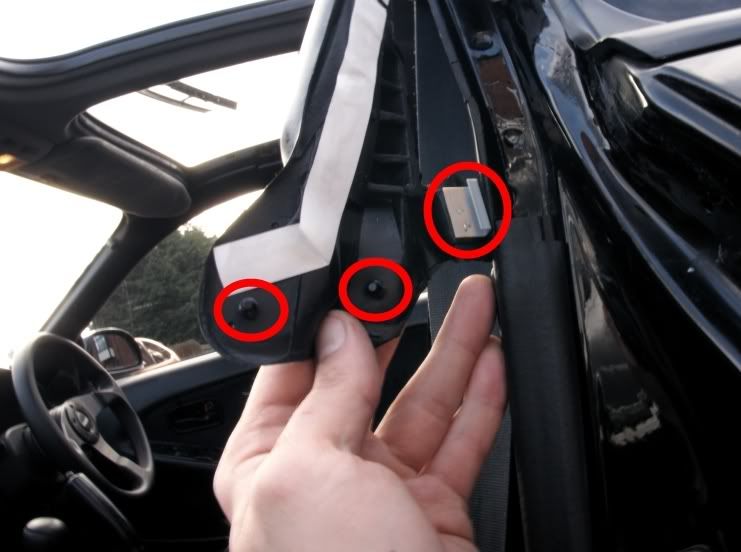
The next section of the seal is bolted to the body of the car. This image shows the new t-bar seal to indicate where the bolts are located:
With a flat-head screwdriver, bring the plastic moulding forwards so that it passed over and in front of the bracket.
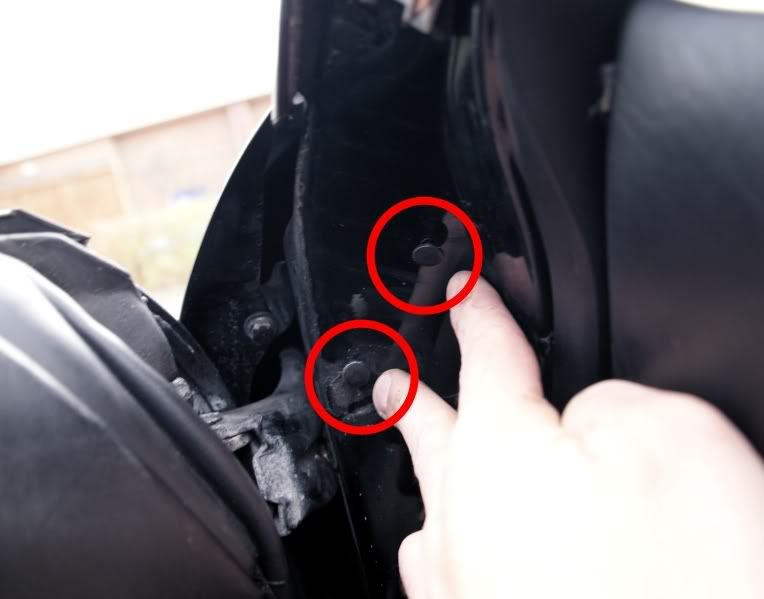
You need to remove the bracket by unscrewing two bolts using a 10mm socket. Be very careful not to drop the bolts as they will disappear behind the speakers and you may never see them again!
With the bolts removed, a bit of force will free the seal.
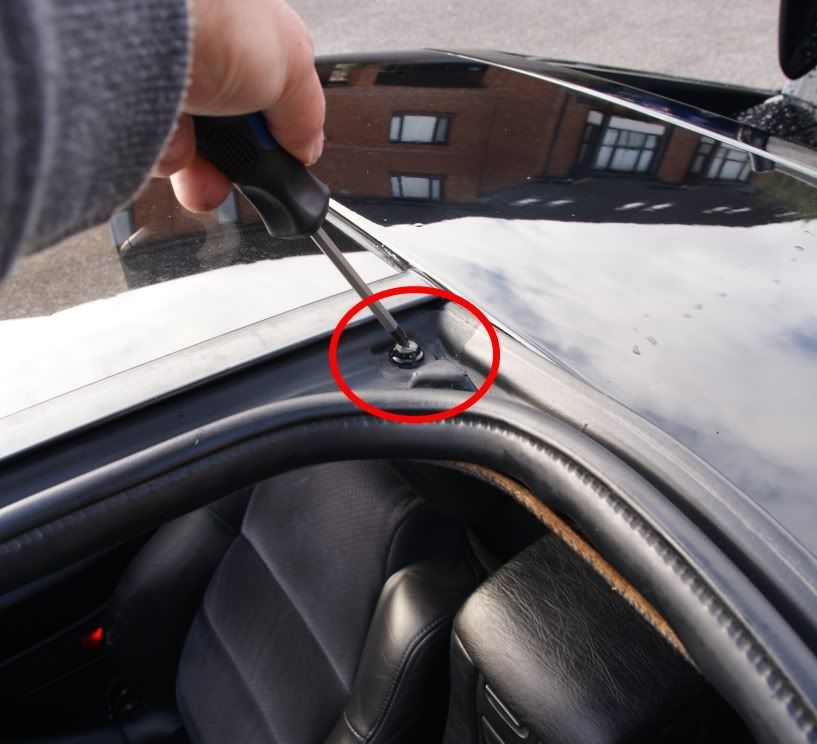
Working your way towards the centre of the roof, remove the two screws.
'and remove the wind deflector, held on by two screws.
You now need to remove the front bracket in the same way you removed the rear one.
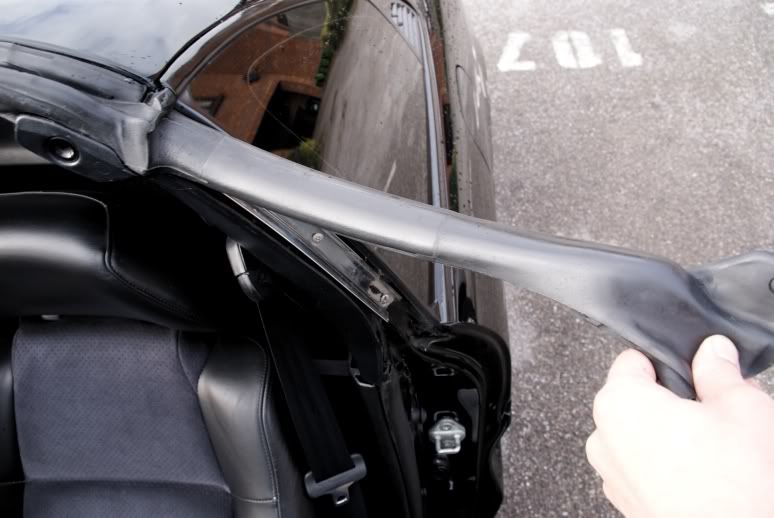
Pull the seal away from its location until you reach the door hinge section.
Here, you need to remove the two studs/poppers like you did at the rear.
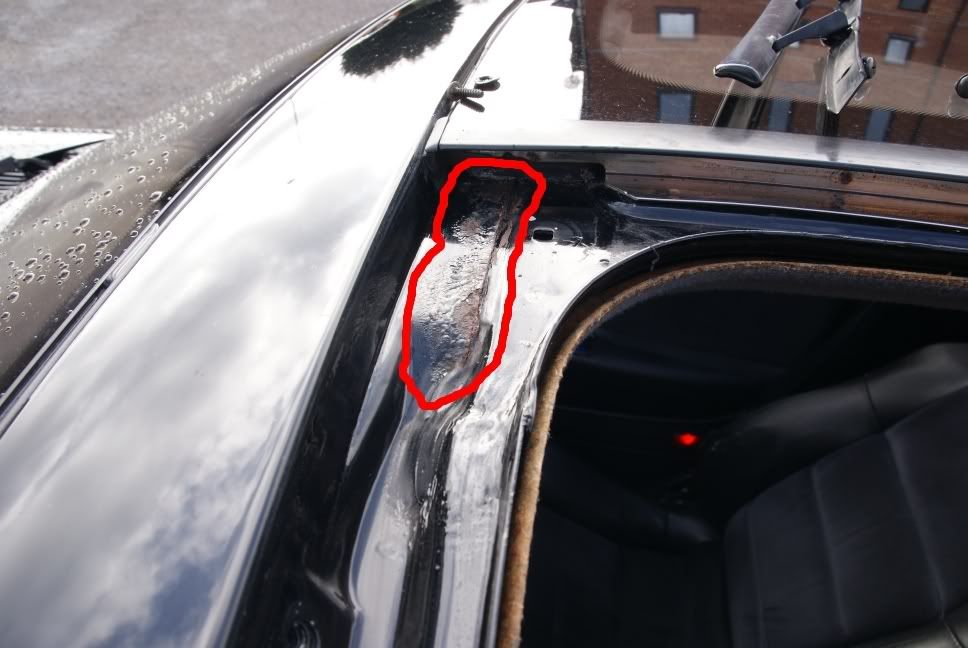
With the old t-bar seal fully removed, go around with a damp cloth and thoroughly clean all the newly exposed paintwork of moss, grime and general crud.
As is commonly the case, removing the 15-20 year old seals is likely to reveal some rust spots. Here, I cleaned up the rust by removing as much of it as I could before surrounding the area with silicone adhesive. This ensures that when the new seals are in place, no water can return to the affected area. I applied the adhesive where shown in red:
Attach the new seal starting at the centre of the roof.
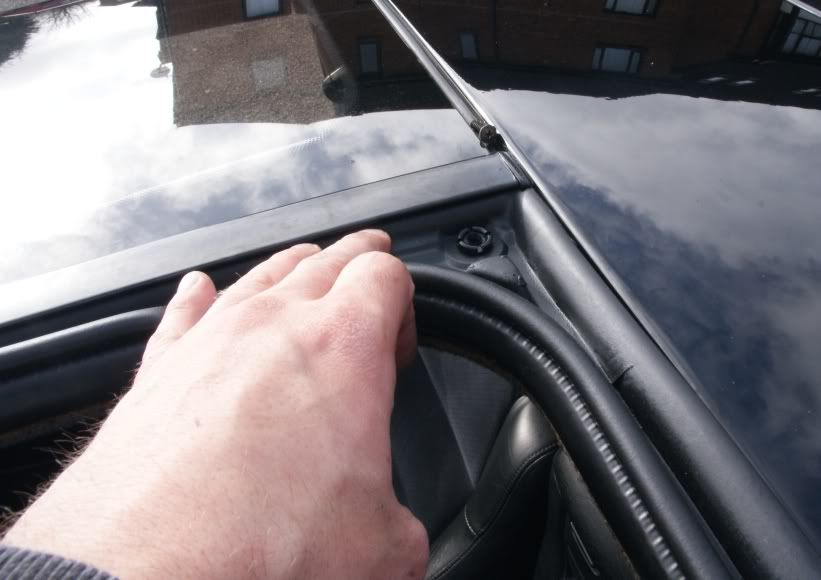
With a flat-head screwdriver, go along and ensure the seal overlaps the roof lining as shown:
Now, ensure the corner lines up with the body work as shown. Do the same for the front corner also.
I added some additional sealant under the rubber as shown in red to ensure a better seal.
Remove the tape covering the adhesive on the new seal, relocate the metal 'L' bracket and pop the two studs in to place. Push down where the adhesive is to ensure a tight seal.
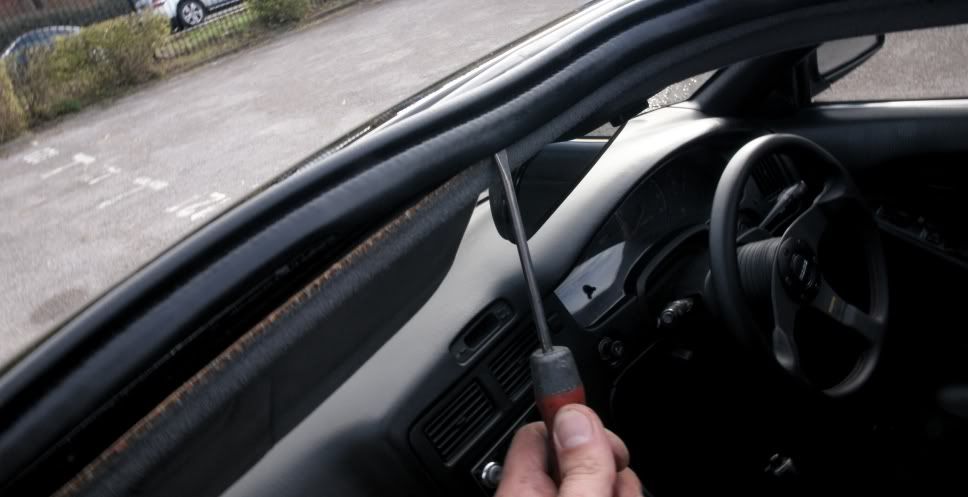
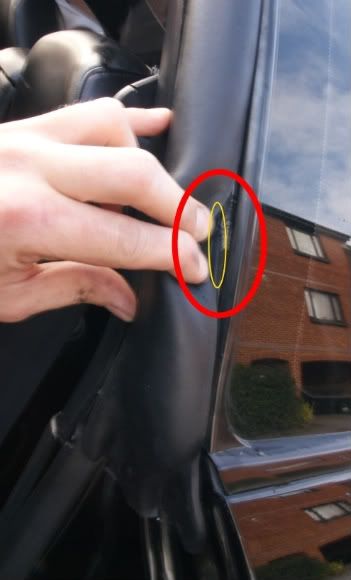
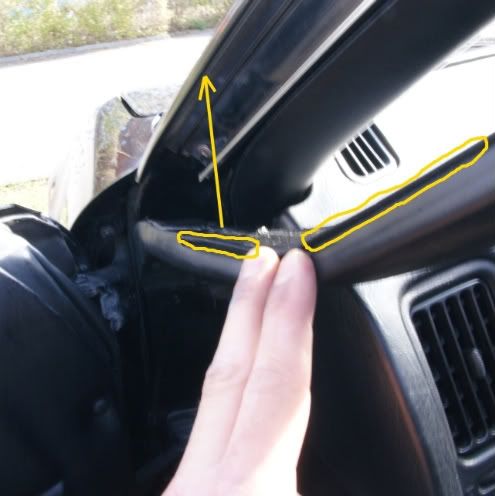
Again, armed with your flat-head screwdriver, run along the edge of the seal (highlighted in yellow) and ensure the 'flap' slots in behind the ledge.
Do the same with the front section also.
Your passenger side t-bar seal is now fitted. Just need to do the other side!
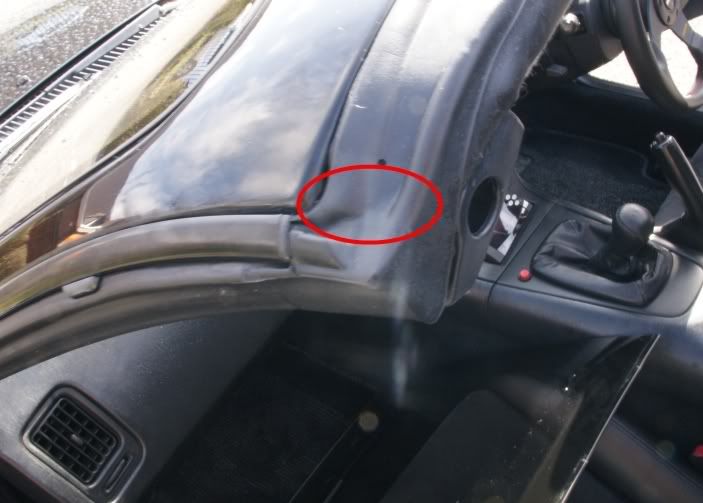
I did notice that the roof panel sits a bit higher than it did previously. This is obviously due to the plumpness of the new rubbers. As a result, the top of the window doesn't create a tight seal against the rubber of the roof panel. So the next stage for me is to adjust my window so that it sits flush against the new rubber.
![[thumleft]](images/smiles/icon_thumleft.gif "thumleft") |
| |
| User comments |
| dantical: Wed Mar 09, 2011 9:55 pm |
|
| thats a great how to !!!!! |
|
|
| F9_adm: Tue Jan 21, 2014 7:15 pm |
|
Hi great how to however........ I tried this today and for love nor money can I get the corner but at the back where the t bar seal would meet the t bar glass seal and on the inside there's a great tapping hole but there's no move movement or adjustment in the seal, what on earth have I done wrong ![[Brick wall]](images/smiles/eusa_wall.gif "Brick wall") |
|
|
| slipping clutch: Sun Feb 16, 2014 2:59 pm |
|
| F9_adm wrote: | | Hi great how to however........ I tried this today and for love nor money can I get the corner but at the back where the t bar seal would meet the t bar glass seal and on the inside there's a great tapping hole but there's no move movement or adjustment in the seal, what on earth have I done wrong |
Contact Peter Gidden at sbits on Monday - I know he has just done two sets of t bar seals so it will be fresh in his memory. |
|
|
| Scott Barton: Tue Apr 29, 2014 11:43 am |
|
| Just followed this how-to, and what a great article it is! Made light work of changing the seals. Top job. |
|
|
| Galviniser: Sat Jan 31, 2015 7:56 pm |
|
Just ordered a set, came to �329.00. Expensive I know, took me a while to click pay. The delivery is the stinger at $125.00.
Sick of having a wet seat, and I now have mould growing on the seats and on the centre consul. |
|
|
| Page 1 of 0 |
All times are GMT
Goto page |
Powered by Knowledge Base, wGEric © 2002 PHPBB.com MOD
This script (Knowledge Base - MX Addon v. 1.03e) is modified by Haplo
|