| Replace a popup headlight motor |
Description Step-by-step guide to remove and replace a popup headlight motor on a mkII
Author shinny
Date Tue Jun 10, 2008 1:02 am
Type Picture How-To
Category Electrical
Views 6599
|
Replace a popup headlight motor
Step-by-step guide to remove and replace a popup headlight motor on a mkII |
 |
This howto will walk you through replacing a popup headlight motor. (It may also be handy for anyone wanting to get to the standard rev5 alarm siren under the passenger side popup). When I thought I had a lazy passenger side motor, I couldn't find any information on how to do this; so once I'd figured it out I thought I'd write a howto while I changed the other one.
The pictures show the removal of the driver's side light - the passenger side is simply a mirror image of this (and is slightly easier IMHO). This may look long, but it actually isn't a very tricky job - it probably took me just under an hour from start to finish, including taking the photos and bickering with my housemates :rofl:
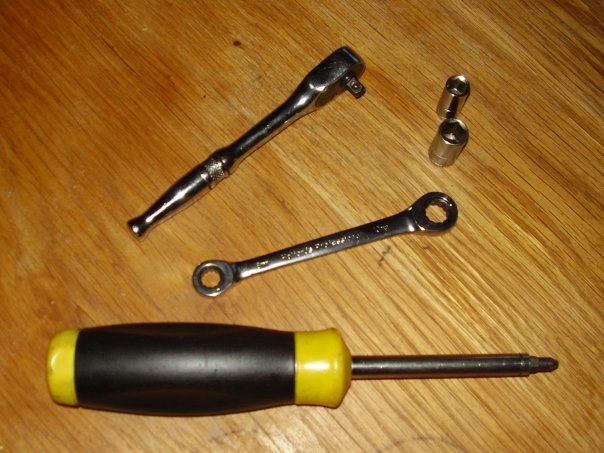
Tools
You will need:
A Socket Wrench
10mm socket
Crosshead screwdriver
Recommended:
8mm Socket
10mm Ratchet Spanner (driver's side only)
GT45 / Penetrating Fluid (to help shift rusted up bolts)
Grease
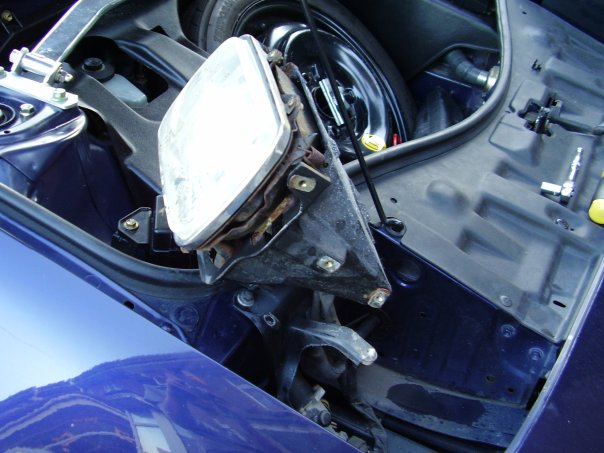
1. Remove headlight covers
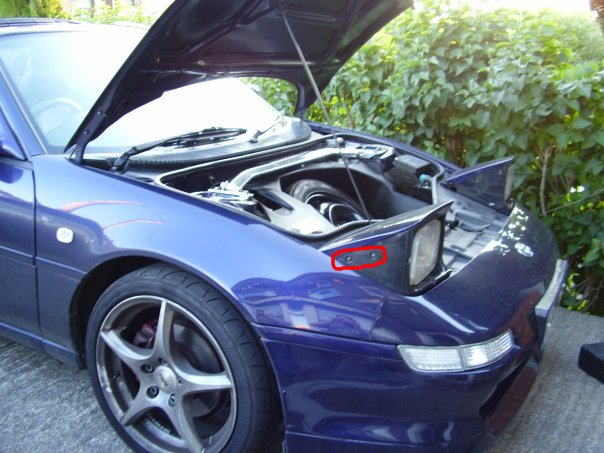
Open the frunk and pop-up the lights. To keep the lights up without the headlights or sidelights lit up, rotate the light switch to dipped beam and then back to the dot setting. (If you've done the mod to let the headlight retract after flashing while running on sidelights, don't forget to flick the switch you installed so the lights stay up. You did put a switch in for this, didn't you' ![[Wink]](images/smiles/icon_wink.gif "Wink") ) )
If your motor doesn't work at all, you can manually raise it using a knob inside the frunk, just behind the light itself. (Regardless of whether your motor works, we'll be using this later, so remember where I said it was ![[tongue]](images/smiles/jef_icon_tongue.gif "tongue") ) )
If you're a cautious type of person, you can remove the fuse for the motors (marked RTR in the front fuse box)
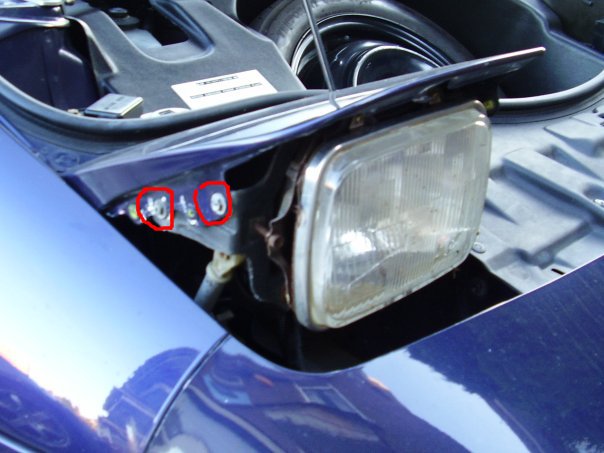
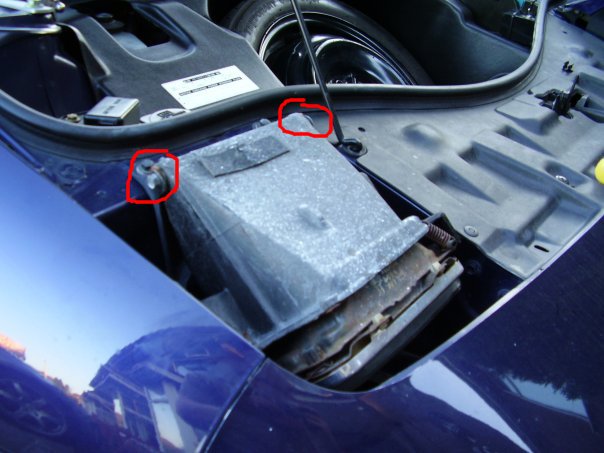
Now, remove the headlight cowl. Using the crosshead screwdriver, remove the circled screws (2 each side). These should be connected to the cowl using rubber grommet type things, but they've often perished so be prepared to catch!
Using the 8mm socket (or crosshead if you must), remove the four bolts holding on the headlight cover itself.
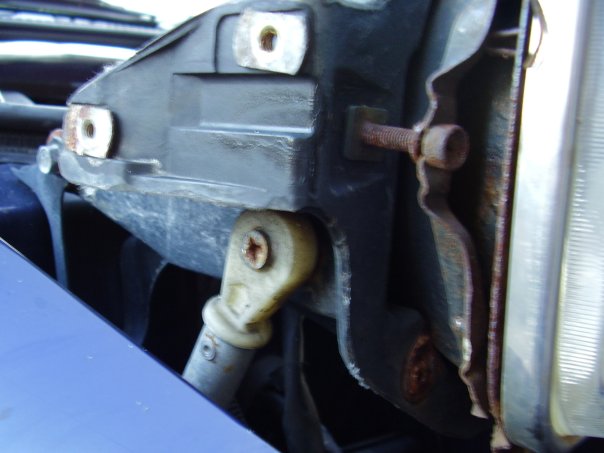
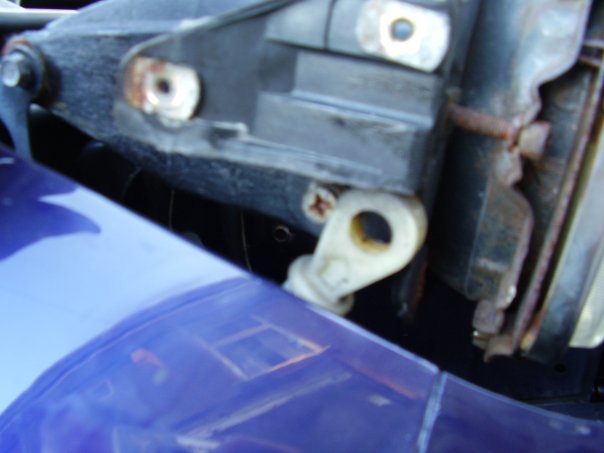
2. Disconnect the raising arm
Despite appearances, the headlight unit is supported on a ball joint - don't try to unscrew the crosshead screw that appears to be holding the arm in place, as you'll get absolutely nowhere! Instead, simply pull the raising arm firmly away from the ball joint and it will pop off.
You can let the headlight unit back down for a couple of minutes.
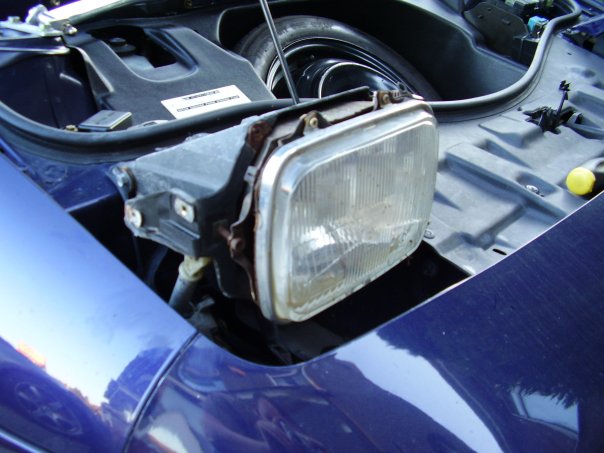
3. Remove the headlight unit
Using the 10mm socket, remove the two bolts around which the headlight pivots. On the driver's side unit, one of these bolts is unhelpfully close to the bonnet prop, so this is where you'll want that 10mm ratchet spanner I warned you about.
Now remove the light unit itself. There is a bump-stop within the wedge of the light's housing, so to clear that you need to rotate the housing inwards (anti-clockwise for the driver's side, clockwise for the passenger side) and lift the unit over the stop.
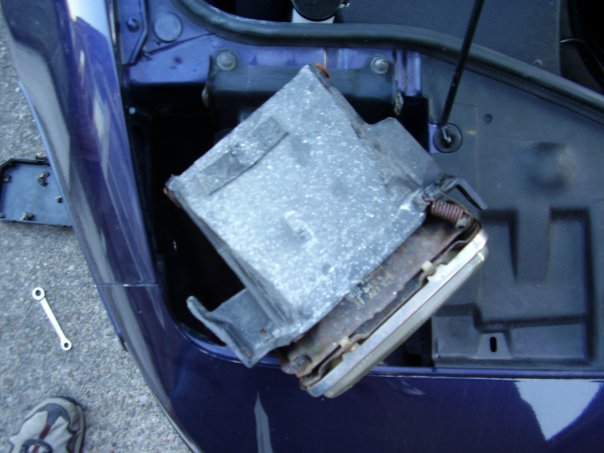
Now I'm far too lazy to remove the light completely, so I rotate the unit 180 degrees in the other direction, and rest it just inside the frunk.
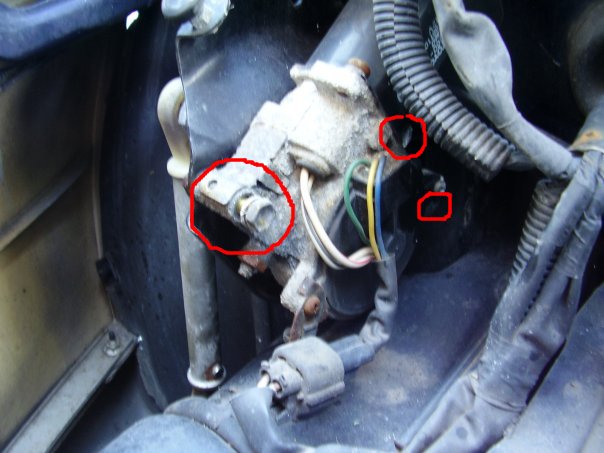
4. Remove the motor
Now we can access the motor itself. :th:
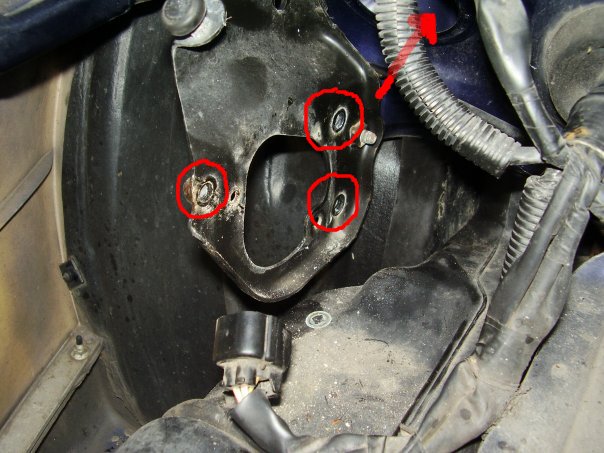
Using the 10mm socket, remove the three bolts holding the motor in place. One is obvious, the other two are hidden behind the barrel of the motor.
Also, don't forget to disconnect the electrical plug on the motor
Using the manual adjustment knob just inside the frunk, rotate the motor so the riser arm attached directly to the motor is pointing along the length of the unit (ie, back towards the adjustment knob).
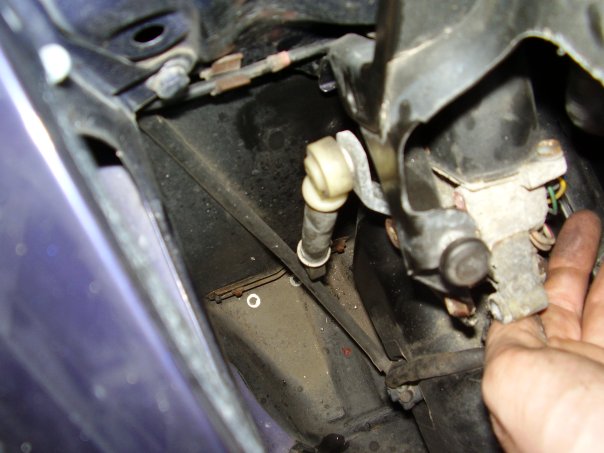
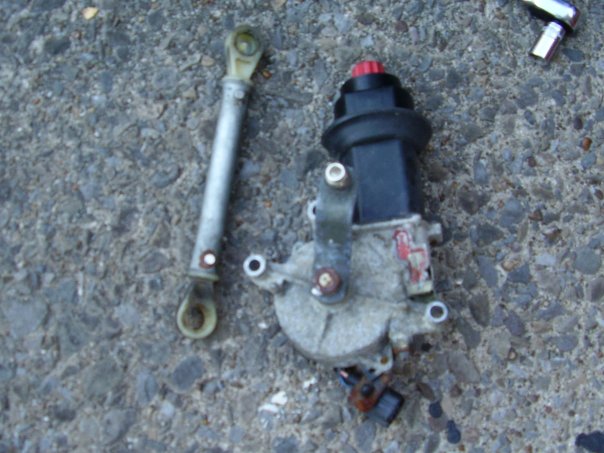
You might as well pop the main rising arm off the motor to make removing it easier. Then just ease it forwards and out of the hole, leaving you with this. (The arrow is pointing to where the adjustment knob was)
Victory! :yh:
5. Replacing the new motor
This is roughly the reverse process of what I've just described. I tend to spray any bolts being replaced with GT45, and grease the pivot and ball joints as I reassemble it all.
Once you've bolted the motor back into it's housing, you'll want to manually crank the motor so the riser arm is pointing forwards and roughly 45 degrees up. This will help when you come to reconnect the ball joint with the main light unit.
Finally, aligning the headlight cover itself is slightly fiddly. You want to do this before refitting the cowl, as the cowl blocks access to the cover's bolts. I've done this a few times, but only just figured out a neat shortcut - place the cover on the unit and tighten the bolts so they're gently holding the cover higher than required. (Replace the RTR fuse if you removed it). Shut the frunk and turn the ligthts all the way off so they retract. They you can gently push down on the cover so it aligns perfectly with the bonnet, wing and bumper, before popping the lights back up again and securing it. It will probable take more than one go before you get it lined up adequately.
Finally, replace the cowl, go inside and have a well earned cup of tea! :th:
I've yet to find any need to realign my headlights after doing this, although your milage may vary.
Mark Shinn |
| |
| Page 1 of 0 |
All times are GMT
Goto page |
Powered by Knowledge Base, wGEric © 2002 PHPBB.com MOD
This script (Knowledge Base - MX Addon v. 1.03e) is modified by Haplo
|